
Testing surface resistance meters requires careful attention to setup and procedure. You'll need a grounded conductive mat and proper electrode placement – two 5-pound electrodes positioned 10 inches apart for RTT tests, or one electrode with ground connection for RTG tests. Always clean surfaces thoroughly and maintain stable environmental conditions (75°F ±3°F, humidity ±10%). Use test voltages of 10V for conductive materials and 100V for dissipative ones, allowing a 15-second electrification period per ANSI/ESD S4.1 standards. Regular calibration and maintenance guarantee accurate measurements within the typical range of 10³ to 10¹² ohms. Understanding these fundamentals sets the foundation for mastering advanced testing techniques.
Basic Components and Specifications

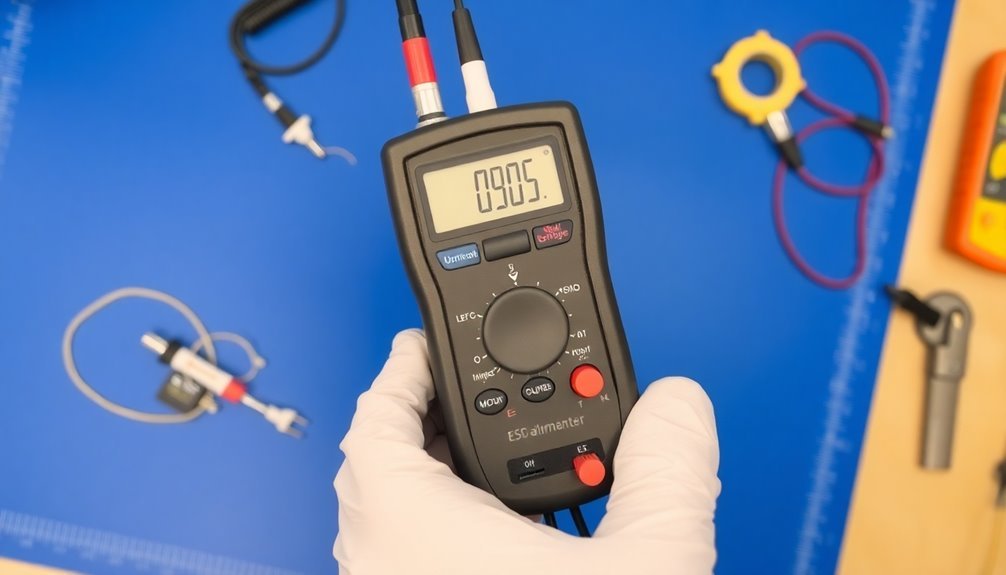
Surface resistance meters encompass several core specifications that define their measurement capabilities. You'll find these devices can measure resistance ranges from 1 x 10^3 to 1 x 10^12 ohms, operating at test voltages of 10 and 100 volts with a ±5% tolerance.
The measurement process typically involves a 15-second electrification period, and you can expect accuracy within ±10% for most readings, though this extends to ±20% for resistance values of 1 x 10^11 and higher. The device features a 1-second response time for quick resistance measurements.
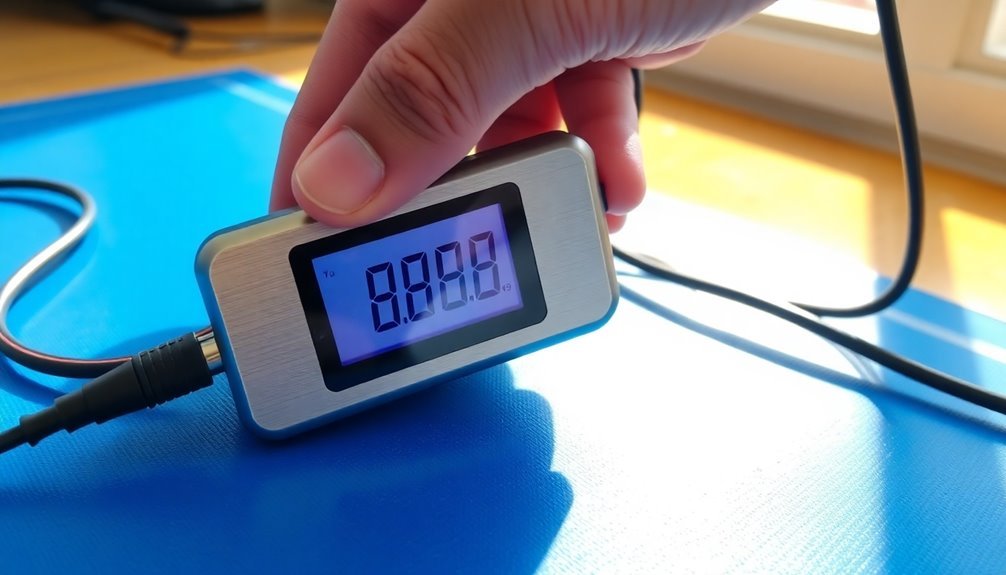
The basic components include an LCD display that shows temperature, humidity, and resistance values. You'll notice exponent LEDs that use color coding to indicate surface resistance values, while function LEDs help you identify the measurement type and test voltage in use.
When you're operating the meter, you can choose between AUTO and 10V HOLD test modes, and there's a Quick Check function that gives you immediate resistance readings.
For power, you'll typically work with a 9V battery system. The device comes with essential accessories like test leads, electrodes, and a carrying case.
You can trust these meters' reliability as they comply with ANSI/ESD S4.1 and other relevant industrial standards.
Proper Testing Equipment Setup
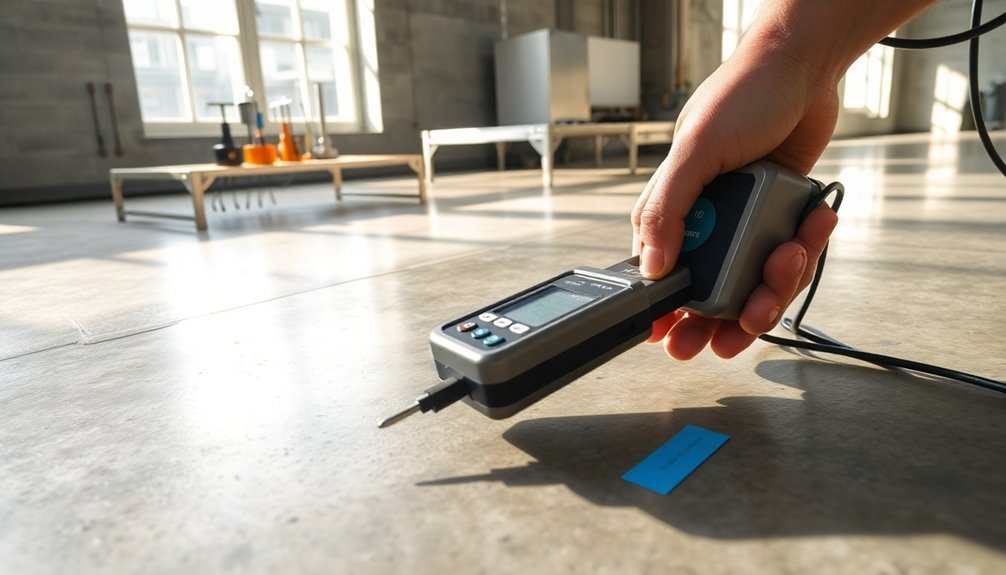
For accurate resistance measurements, you'll need to set up your testing environment with careful attention to external influences. Choose a test area away from high voltage transformers, power supplies, and fluorescent or high-power lighting that could interfere with readings.
Your worksurface must have a grounded conductive mat with 1.0 x 10³ ohms or less. You'll need to connect yourself to equipment ground using a ground cord with a 0 ohm resistor, and guarantee your decade box is also connected to equipment ground.
Keep your test leads uncrossed and separated to prevent interference.
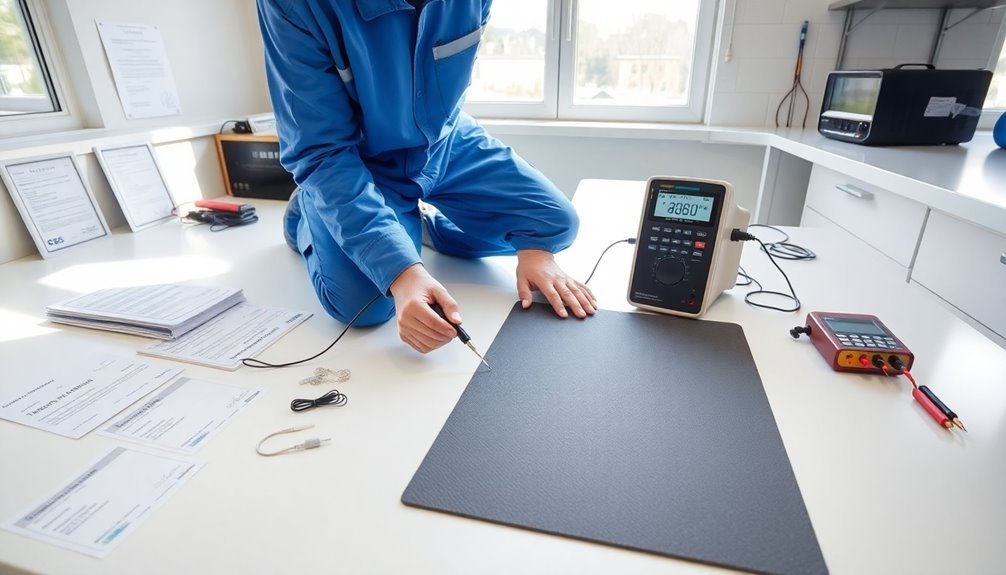
When performing measurements, use both 5-pound electrodes for Resistance Point-to-Point (RTT) tests, placing them 10 inches apart and at least 2 inches from the surface edge. For Resistance-to-Ground (RTG) measurements, use one 5-pound electrode and connect a lead to the groundable point. The item you're testing must be electrically isolated.
For resistivity measurements, you'll need a concentric ring probe. The meter will provide constant voltage and measure current flow between electrodes. Your surface resistivity calculations will depend on the electrode geometry coefficient, which is determined by the electrode's design.
Surface Preparation Guidelines
Before conducting any resistance measurements, proper surface preparation is essential to guarantee accurate and reliable results. You'll need to carefully assess the surface condition, remove any contaminants, and confirm that environmental conditions meet testing specifications.
A systematic approach to surface preparation will help you avoid measurement errors and achieve consistent results. The concrete substrate should have a minimum pull-off strength of 218 psi.
- Begin with a thorough pre-test surface assessment to evaluate cleanliness, identify damage, and verify substrate integrity. Check that ambient temperature and humidity fall within acceptable ranges.
- Remove all surface contaminants using appropriate cleaning methods. This includes eliminating oil, grease, dust, and any existing coatings that could interfere with resistance readings.
- Apply specific preparation techniques like blasting, abrasion, or chemical treatments if required to achieve the desired surface profile. Confirm you're following relevant standards and guidelines.
- Verify your preparation work through post-preparation checks. This includes visual inspection, surface profile measurement, and moisture testing. Document all preparation steps and results for quality assurance.
Remember to maintain consistent surface conditions throughout your testing process, as variations can substantially impact resistance measurements.
Measurement Techniques and Protocols
Accuracy in resistance measurement demands strict adherence to established protocols and techniques. You'll need to follow ANSI/ESD S4.1 standards, particularly sections 6.4 and 8.0, while ensuring your meter maintains ±10% accuracy across most measurement ranges.
For resistance top-to-top (RTT) measurements, place two 5# electrodes exactly 10 inches apart on your test surface. Keep them at least 2 inches from edges and 3 inches from any grounded points. Static dissipative materials must show resistance readings between 1 x 10^6 and 1 x 10^9 ohms.
When measuring resistance to groundable point (RTG), use one 5# electrode and connect your lead to the ground point, positioning the electrode at the furthest point from ground.
Your electrodes must weigh 5 pounds (±2 oz) and include conductive pads with a durometer of 50-70. Keep test leads separated to prevent measuring a lower resistance path.
When testing, press the button and wait for the reading – though you can use quick test mode to bypass the 15-second electrification period. If readings fall outside acceptable limits, clean the surface and retest to identify the failure's cause.
Remember to take additional measurements on frequently used or worn areas for thorough testing.
Understanding Resistance Readings
Understanding resistance readings starts with mastering the fundamental relationship between voltage and current, where resistance equals voltage divided by current (R = V/I).
When you're testing surface resistance meters, you'll need to take into account multiple factors that influence your readings, including material composition, temperature, and environmental conditions. Resistance in most materials like copper and aluminum follows a predictable pattern based on their inherent resistivity.
- Your meter's electrodes must be properly configured and maintained, as their placement and condition directly affect measurement accuracy.
- You'll notice resistance values change with temperature fluctuations in ohmic conductors.
- Your readings can be impacted by dirt and moisture, which often create insulative layers.
- You'll need to account for material shape and size, as cross-sectional area and length influence resistance values.
To interpret your readings effectively, you'll need to compare them against specified tolerance ranges for your components. High resistance readings might indicate damaged conductors, while unexpectedly low values could suggest compromised insulators due to moisture or overheating.
When you're taking measurements, make sure your meter's battery is properly maintained and follow specific measurement procedures, avoiding surface cleaning that could affect results.
Watch for changes in circuit resistance, as they often signal issues like loose connections or deteriorating components.
Calibration Requirements and Methods
Proper calibration of surface resistance meters stands at the heart of reliable ESD testing. You'll need to verify your meter maintains NIST traceable standards, which serve as the foundation for accurate measurements.
Using 1% resistors for each meter range, you can perform in-house calibration, though some adjustments may require specialized equipment like fixed decade boxes. Professional quality verification often utilizes p-type doped wafers as reference standards.
To calibrate your meter, you'll need to follow a systematic approach. Place your meter on an insulative surface, attach the test leads to appropriate 1% resistors, and verify the leads remain uncrossed and separated. You should record the display readings and make necessary adjustments according to manufacturer specifications.
For critical ESD applications, you'll want to maintain annual calibration schedules. Consider your specific risk factors and the sensitivity of items you're handling when determining calibration frequency. Don't forget to control environmental conditions during calibration, as temperature and humidity can affect readings.
Keep detailed calibration records and verify your meter's performance regularly. Check battery levels and verify proper contact during measurements. If you're handling particularly sensitive components, you might need to increase your calibration frequency beyond the standard annual recommendation.
Common Testing Errors
When performing surface resistance measurements, you'll encounter several common errors that can substantially impact your results. Understanding these pitfalls will help you maintain accuracy and reliability in your testing procedures.
- Lead resistance and placement errors can markedly skew your measurements, especially when using the two-wire method for low-resistance testing. Always use proper probe placement and consider switching to four-wire measurements for enhanced accuracy. Using a fast response voltmeter can help minimize the impact of thermal fluctuations during testing.
- Environmental factors like temperature changes and humidity levels directly affect your results through thermal drift and surface conductivity variations. You'll need to maintain consistent testing conditions.
- Device heating and thermoelectric EMFs can introduce unwanted voltage offsets and resistance changes. Don't rush your measurements, and allow sufficient time for thermal stabilization.
- Ground loops and magnetic field interference can corrupt your data. You'll want to properly isolate your testing setup and shield against external noise sources.
For ESD materials specifically, you must follow proper testing standards and use specialized equipment designed for area-to-area measurements.
Always clean surfaces thoroughly before testing, verify correct electrode placement, and maintain electrical isolation of the test surface from surrounding conductors.
Maintenance and Care
You'll need to clean your surface resistance meter's electrodes and cable jacks daily using a 70% isopropanol solution to maintain accurate readings.
Store your meter in a dry place and make certain the conductive pads remain moisture-free between uses to prevent degradation.
Regular calibration to NIST traceable standards, performed annually, will keep your meter operating within specified tolerances and maintain testing reliability.
Following proper user training procedures is essential for preventing equipment damage and ensuring consistent measurement accuracy.
Daily Cleaning Procedures
Regular maintenance of Surface Resistance Meters starts with systematic cleaning procedures. You'll need to focus on both the meter itself and its electrodes to guarantee accurate measurements.
Clean the area around the test jacks monthly using an isopropanol-alcohol moistened cloth, and don't forget to clean the cable jackets as well. This removes skin oils that can interfere with high-resistance readings.
For electrode maintenance, use a minimum 70% isopropanol-water solution with a low-linting cloth. The conductive pads on 5-pound electrodes must be completely dry before you begin testing.
When cleaning test lab specimens, you'll need to clean the electrodes twice.
- Clean meter test jacks and surrounding areas monthly
- Use isopropanol-alcohol solution for both meter and cable cleaning
- Clean electrodes with 70% isopropanol-water solution
- Guarantee all components are completely dry before testing
Storage Best Practices
Beyond proper cleaning procedures, appropriate storage conditions play a major role in maintaining your Surface Resistance Meter's accuracy and longevity. You'll need to store your meter in a dry, cool environment away from direct sunlight and magnetic fields. Using the original packaging or a protective case will help prevent physical damage and shield the device from dust and contaminants.
| Storage Factor | Best Practice |
|---|---|
| Environment | Keep in cool, dry area with silica gel packets |
| Protection | Use original case or protective cover |
| Battery Care | Remove batteries during extended storage |
When preparing your meter for storage, you'll want to remove the batteries if you're not planning to use it for an extended period. Store these batteries separately in a cool, dry place, and always follow the manufacturer's guidelines for replacement and disposal. Don't forget to inspect your meter regularly for signs of damage or battery leakage, especially during long-term storage periods. If you're storing multiple meters, avoid stacking them to prevent pressure damage. It's also helpful to maintain a log of storage dates and conditions for quality control purposes.
Regular Calibration Steps
At the heart of maintaining your Surface Resistance Meter's accuracy lies a systematic calibration process. You'll need to perform calibrations annually or more frequently if you're handling critical ESD-sensitive items.
The process requires specific equipment, including a digital multimeter, resistance decade box, thermometer, and relative humidity meter.
To guarantee accurate calibration results, you'll need to:
- Set up a controlled testing environment away from high voltage transformers and fluorescent lighting, using a grounded conductive mat.
- Clean the electrodes with 70% isopropanol solution and guarantee they're completely dry.
- Use ±1% tolerance resistors for each decade range of your meter.
- Record measurements with separated test leads to avoid interference.
Before starting calibration, verify that your test area maintains proper temperature and humidity levels. If you need to make adjustments, it's best to contact the manufacturer, as these require specialized equipment.
Don't forget to verify calibration after battery replacement, and remember to clean the meter and electrodes monthly. If measurements fall outside acceptable limits, clean the surface with an ESD cleaner and perform the test again.
Safety Measures During Testing
When conducting tests, you must avoid touching the electrodes, as your body's resistance can affect the readings. Always place your test surface on an insulative material to achieve proper isolation, particularly when testing ESD garments that require separation between sides. Regular wrist strap compliance testing should be performed to ensure proper grounding during measurements.
| Safety Measure | Key Action |
|---|---|
| Temperature Control | Test at ambient conditions |
| Equipment Contact | Stay 2" from edges, 3" from ground points |
| Material Handling | Remove all conductive items from area |
| Test Environment | Control humidity levels |
| Physical Setup | Don't cross test leads |
Remember to inspect your equipment regularly for signs of wear or damage before starting any measurements. You'll want to maintain controlled environmental conditions throughout testing, as temperature and humidity fluctuations can impact your results. Keep your work area clear of any materials that could interfere with measurements, and guarantee your test surface remains flat and undamaged during the entire process.
Frequently Asked Questions
Can Surface Resistance Meters Be Used on Vertical Surfaces?
You can use surface resistance meters on vertical surfaces, but you'll need special adaptations for accurate measurements. Be aware that electrode placement and gravity may affect readings compared to horizontal surfaces.
How Do Extreme Temperatures Affect Surface Resistance Measurements?
You'll find that extreme temperatures substantially alter your measurements. High temps decrease material resistivity, while cold temps increase it. Even a 1°C change can cause up to 3% variation in your results.
What Causes Sudden Spikes in Resistance Readings During Continuous Testing?
You'll notice sudden spikes in resistance readings due to stray currents, electromagnetic interference, poor electrode contact, or static charges. Environmental changes and probe contamination can also cause unexpected jumps in your measurements.
Does Paint Thickness Impact the Accuracy of Surface Resistance Measurements?
Yes, your paint's thickness directly affects surface resistance measurements. You'll find thicker coatings can alter readings by affecting moisture penetration and creating barriers that impact the meter's ability to measure accurately.
Can Multiple Meters Be Used Simultaneously on the Same Surface?
You can use multiple meters simultaneously on the same surface, but you'll need to keep them at least 2" apart and guarantee their test leads don't cross to prevent interference and maintain measurement accuracy.
In Summary
You'll find that mastering surface resistance meter testing requires attention to detail and consistent practice. By following proper setup procedures, maintaining your equipment, and adhering to safety protocols, you can achieve reliable results every time. Remember to calibrate regularly, prepare surfaces correctly, and document your readings. With these skills, you're well-equipped to conduct accurate surface resistance measurements in any setting.


Leave a Reply