Static-safe zone floor markers use standardized colors and patterns to identify areas requiring electrostatic discharge (ESD) protection in workplaces. You'll typically see green markings for static control areas, while yellow indicates caution zones, and red signals fire hazards or emergency controls. These markers help you identify where you need to follow specific ESD protocols, like wearing proper footwear or using grounding equipment. Blue markers point out machinery locations and specific material handling areas, while striped patterns warn of hazardous zones. Understanding these color codes is just the first step in maintaining a thorough ESD protection system.
Understanding Static Control Floor Requirements
When selecting your flooring, you must evaluate it against industry standards ANSI/ESD STM7.1 and STM97.2.
You'll also need to assess the type of footwear used in your facility and specific environmental factors like humidity levels and traffic patterns.
For instance, in environments where people wear regular footwear, static-dissipative carpet tile and ESD rubber are the best ESD flooring choices. However, if the floor is not low charge generating, the use of ESD footwear may be mandated. Maintaining relative humidity levels between 35% and 60% is crucial for minimizing static buildup in these environments.
It's critical to determine the type of footwear people will use in the space and test for both electrical resistance (STM7.1) and charge generation (STM97.2). A floor can be conductive and still generate enough static to damage electronics.
When choosing an ESD floor, you should also evaluate:
- The relevant electrical code
- Industry standards for electrical resistance and charge generation (body voltage)
- Independent test results: resistance (STM7.1); charge generation (STM97.2)
- Footwear used in the space: ESD-protective footwear or regular street shoes
- Any specific requirements for the application
- The demands and constraints of the environment
- Buyer goals and objectives.
Additionally, ensure the floor meets industry standards for static-control flooring, such as ANSI/ESD S20.20 and IEC 61340-5-1 for electronics manufacturing, and other standards relevant to your specific environment.
Footwear affects the performance of static-control floors, so it is recommended to obtain a report from an independent ESD-flooring laboratory, showing performance results tested with different types of footwear.
EPA Zone Safety Standards
You'll need to verify your static-safe zone's resistance testing requirements to guarantee proper grounding and personnel safety across all EPA zones.
Your floor marking system must meet specific ground bonding specifications that align with both hot and warm zone safety protocols. Bold and vibrant markers are essential for maintaining clear visibility of EPA boundaries.
These tests should include surface-to-ground resistance measurements and bonding verification between conductive floor elements in accordance with EPA safety standards.
Resistance Testing Requirements
Before installing static-safe zone floor markers, you'll need to understand the critical resistance testing requirements that guarantee EPA zone safety compliance.
All flooring materials must undergo three essential measurements: surface resistivity, point-to-point resistance, and resistance-to-ground testing. You'll need to confirm these measurements fall within the industry-standard range of 1.0 x 10^5 to 1.0 x 10^8 ohms.
You must follow ANSI/ESD S20.20 and IEC 61340-4-5 guidelines when conducting your tests. Remember that FAA and telecom standards require a minimum resistance of 1.0 x 10^6 ohms for safety purposes.
Don't forget to account for environmental factors like humidity and surface contamination, as they can substantially affect your readings. Regular floor maintenance and cleaning are essential to maintain consistent electrical performance over time.
When testing, you'll need to perform multiple measurements to identify any potential low-resistance paths to ground. Pay close attention to the adhesives you're using during installation, as they can impact resistance readings.
Always maintain clear, metric-based specifications throughout your testing process to avoid confusion and confirm consistent ESD protection across your facility.
Ground Bonding Specifications
Proper ground bonding specifications form the backbone of any effective EPA zone safety system. You'll need to establish a Common Ground Point, typically using an Earth Bonding Point (EBP) Plug or Bracket, to guarantee all conductive components maintain the same electrical potential. This central grounding point must connect to your equipment ground (the green third wire) to complete the circuit properly. The goal is to achieve equipotential balance between all EPA elements to prevent damaging discharges.
When you're setting up your EPA zone, you'll need to guarantee that all surfaces, products, and personnel are bonded to this common ground point.
Your static field levels shouldn't exceed 100 volts within the protected area. If you're using a flooring/footwear system for personnel grounding, your ESD flooring must have a resistance of less than 1 x 10^9 ohms to comply with S20.20 standards. This system works in conjunction with ESD footwear, which must maintain a resistance to ground of less than 1 x 10^8 ohms.
Remember that you'll need to verify these specifications regularly through resistance testing and ESD audits to maintain compliance with IEC-61340-1-5 standards. All conductive elements in your EPA must connect to the central grounding point to guarantee consistent static protection.
Identifying Static Safe Areas
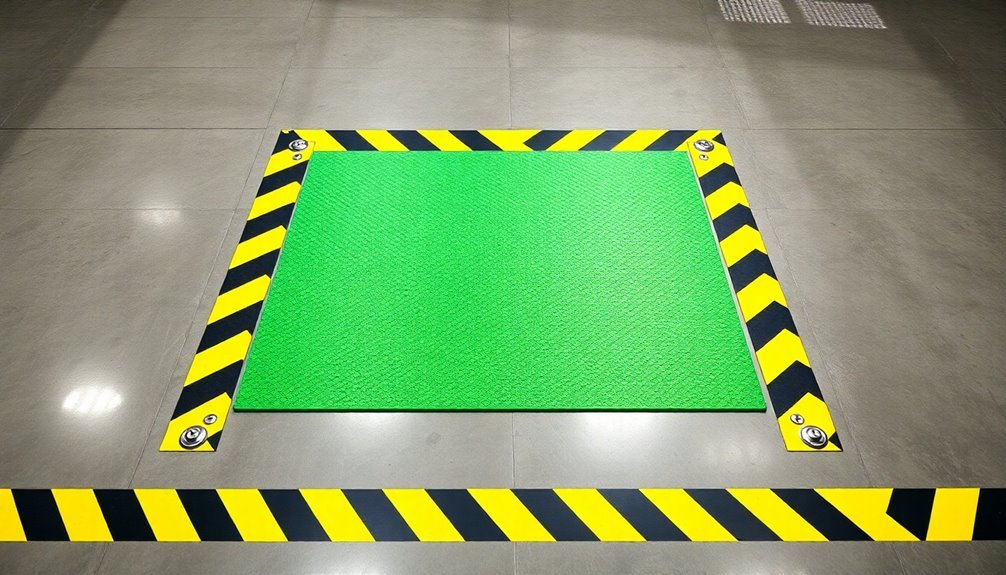
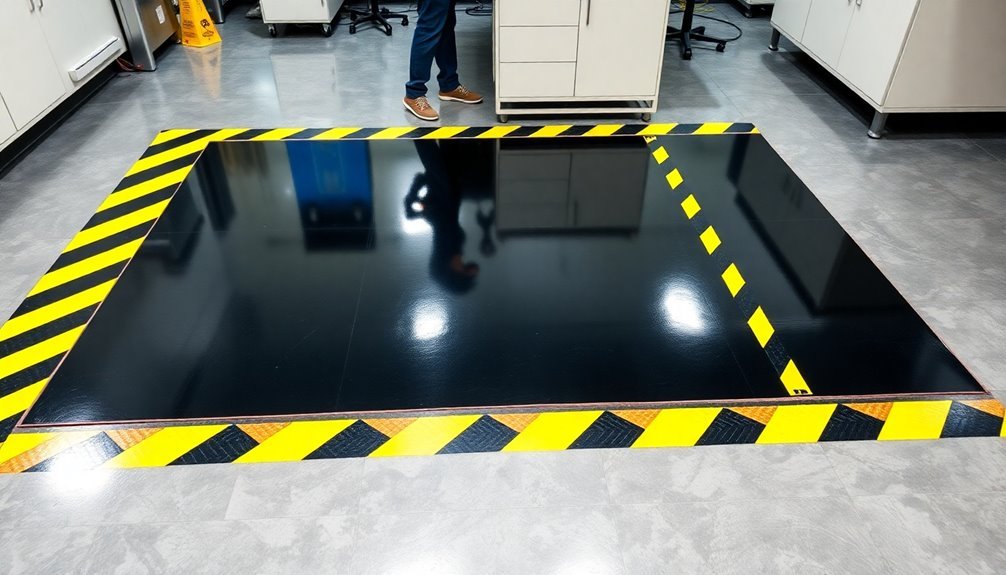
You'll find that static-safe areas aren't marked with traditional yellow and black stripes, but rather rely on specific EPA signage and controlled entry points to clearly define their boundaries.
When entering these zones, you must look for prominent ESD Protected Area signs that indicate where static-control protocols begin and standard workplace practices end. For maximum clarity and compliance, color-coded floor markings should align with standardized ANSI guidelines for industrial facilities.
These designated areas feature specialized static-dissipative flooring and require proper ESD protection equipment like wrist straps and appropriate footwear before you can access them.
Color-Coded Safety Boundaries
Safety managers rely on color-coded floor markings to clearly identify static-safe zones and maintain workplace safety standards. You'll notice specific colors serve distinct purposes in these areas, helping you navigate the workspace safely and efficiently.
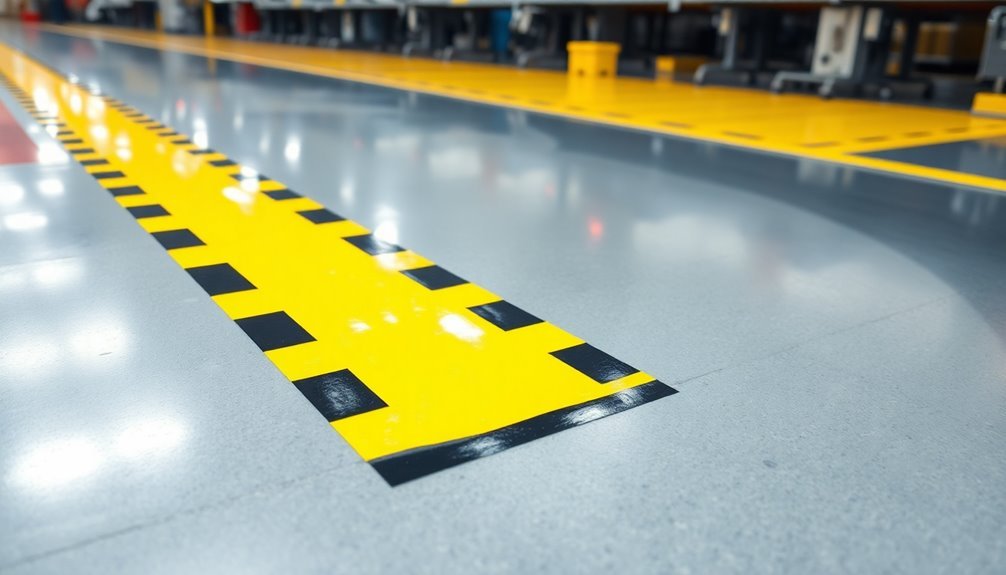
Yellow markings indicate physical hazards and define traffic lanes, ensuring you stay within designated paths while moving through the facility.
Red markings are essential for identifying fire protection equipment and emergency controls, making them easily visible during urgent situations.
When you see blue, green, or black markings, they're showing you where to find specific materials, components, and machinery. This consistent color standardization helps reduce the time employees spend searching for needed items.
Striped patterns on the floor warn you about hazardous areas around dangerous equipment, while white markings designate general equipment and fixtures that don't require specific color coding.
These color standards comply with OSHA regulation 29 CFR 1910.144, which specifically mandates red for fire protection and yellow for physical hazards.
In static-safe zones, these color codes work alongside static control measures like grounding accessories and specialized flooring. Together, they create an extensive safety system that protects both you and sensitive electronic components from potentially damaging static discharge.
EPA Zone Entry Points
While color-coded floor markings provide general safety guidance, EPA (Electrostatic Protected Area) entry points require specific identification methods to protect sensitive electronic components.
You'll find ESD awareness signs prominently displayed at these entry points, complying with 61340-5-1 guidelines to guarantee visibility for all personnel entering and exiting the area.
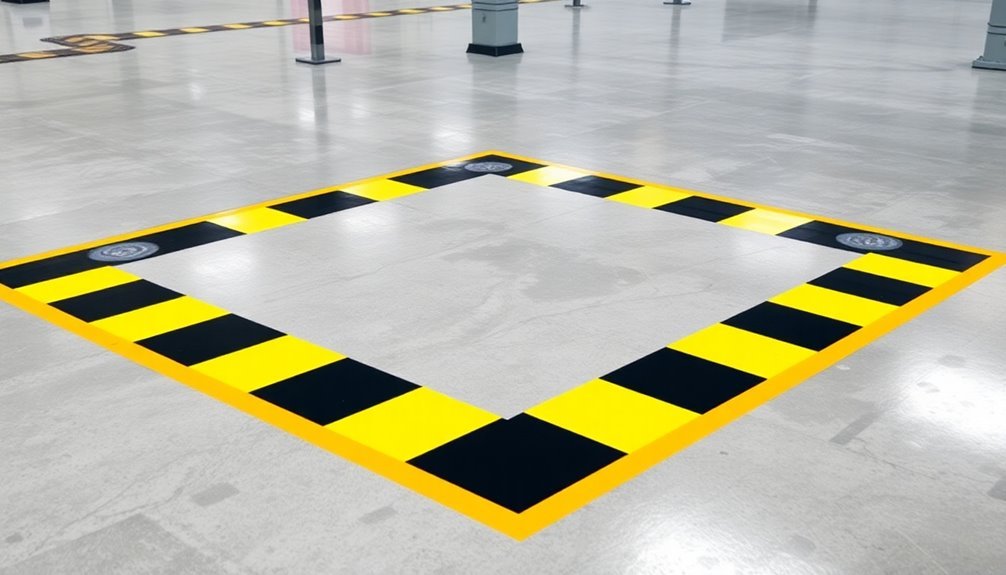
At entry points, you'll notice floor marking tape that clearly defines the shift between regular and static-safe zones. This tape serves a dual purpose: it withstands heavy foot traffic while maintaining clear boundary visibility.
You can identify proper entry points through various indicators, including specialized floor tiles or carpet sections that distinguish EPA boundaries from regular flooring. Employee safety measures are enforced through regular testing of wrist straps and grounding equipment at entry points.
When you're setting up EPA entry points, remember that they're vital changeover zones where you'll need to implement proper grounding procedures. You'll need to guarantee all surfaces and equipment at these points are connected to a common ground, preventing static buildup.
Keep in mind that whether you're managing a single workstation or an entire factory floor, entry points must consistently display clear signage and markings to maintain ESD awareness and safety protocols.
Static Control Signage Types
Throughout static-sensitive facilities, proper signage plays a critical role in identifying and maintaining static-safe zones.
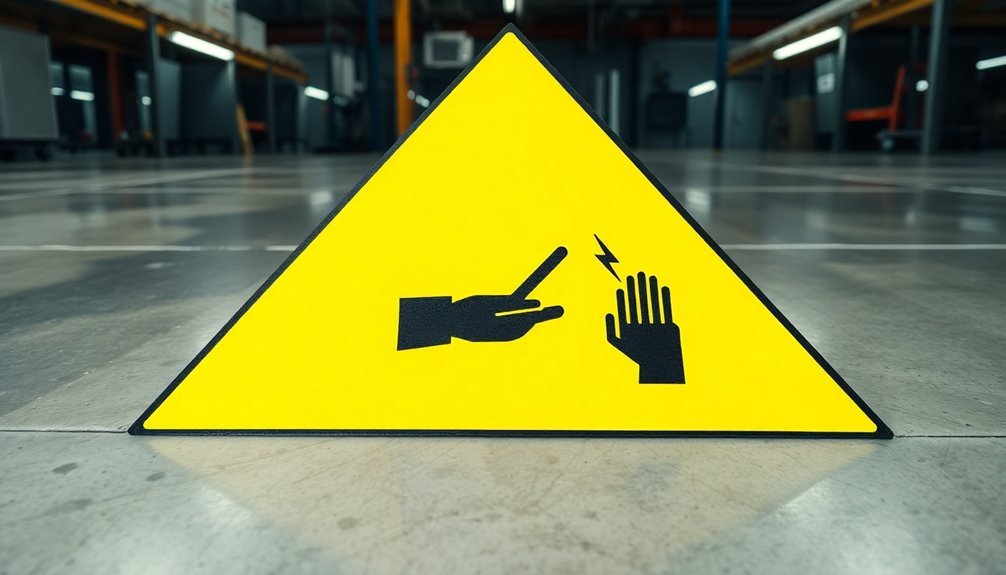
You'll encounter various types of static control signs designed to protect sensitive equipment and guarantee safety protocols are followed. These signs use bright colors, clear language, and internationally recognized symbols to communicate essential information about static-safe areas.
When you're working in or visiting these facilities, you'll need to understand three primary types of static control signage:
- Static-Free Area Markings – These use yellow or bright colors to clearly indicate zones where static control is vital, often incorporating OSHA-compliant headers and visual elements to guide your behavior.
- ESD Warning Signs – Located near entry points, these signs alert you to potential electrostatic discharge risks and typically display the ESD symbol or grounding requirements you must follow.
- Static-Safe Handling Area Indicators – These signs provide specific instructions for maintaining proper grounding and handling procedures, guaranteeing all surfaces and personnel maintain electrical potential below 100v.
All static control signage must comply with OSHA and ANSI regulations, undergo regular audits, and remain clearly visible to effectively communicate safety protocols in your work environment.
Floor Marking Color Guidelines
The proper use of floor marking colors plays a vital role in maintaining workplace safety and organization. While OSHA doesn't strictly enforce most color standards, you'll need to follow specific guidelines for red and yellow markings in your facility.
Red markings indicate fire-related hazards and equipment, including emergency switches and buttons on hazardous machines, while yellow designates physical hazards like tripping, falling, or striking risks.
You're free to choose other colors for your facility's needs, but you must maintain consistency throughout your workplace. When implementing your floor marking system, guarantee all lines are at least 2 inches wide, and keep aisles at least 4 feet wide or 3 feet wider than your largest equipment.
For areas where you can't use tape or paint, consider using flags or traffic cones.
To maximize effectiveness, keep your color-coding system simple and easy to understand. Post color guides throughout your facility to help employees and visitors quickly identify what each marking means. Remember, while you have flexibility in choosing colors beyond red and yellow, clear communication and consistency are essential for maintaining a safe work environment.
Static Control Implementation Methods
Four essential methods form the foundation of static control implementation in protected workspaces: charge reduction, grounding, neutralization, and material selection. You'll need to implement these methods systematically to create an effective static-safe environment within your marked zones.
To reduce static charges, you can employ anti-static bars, ionizing equipment, and specialized treatments.
Proper grounding requires connecting all equipment and personnel to a common ground point, typically through wrist straps and dissipative worksurfaces with resistance between 10^6 and 10^9 ohms.
- Use anti-static guns and ionizing bars to actively neutralize charges in the air and on surfaces
- Apply liquid antistatic agents to non-conductive materials that can't be replaced
- Control environmental factors by adding inert gases and maintaining proper humidity levels
For effective implementation, you'll want to guarantee all your workstation equipment connects to the same electrical ground. Don't forget to bond auxiliary grounds to the main equipment ground.
When handling sensitive components, always use static-dissipative materials and ESD-protective packaging to maintain the integrity of your static control system.
Protective Measures For ESD Zones
While protecting sensitive electronics in ESD zones requires multiple safeguards, you'll need to implement several key protective measures to create an effective static-safe environment.
Start by installing proper grounding systems that connect all surfaces and equipment to the same electrical potential. You'll want to equip your workstations with ESD-protective floors, grounded tables, and floor mats.
Ensure you're using appropriate personal protection equipment, including wrist grounding straps and ESD-protective clothing made with conductive yarn fibers.
You must maintain relative humidity levels between 20% and 80% non-condensing to reduce static buildup. Store and transport sensitive components in antistatic containers or static shielding bags.
Remove all unnecessary insulators from your workspace, including common items like coffee cups and adhesive tapes. You'll need to use ionizers to neutralize static charges in the air and keep static-accumulating materials away from unshielded PCBs.
Mark your ESD zones clearly using standard-compliant symbols, including the ESD common ground point symbol and susceptibility warnings. Remember to follow ANSI/ESD S8.1 and S20.20 standards for all your ESD markings and protective measures.
Employee Training For ESD Safety
Because protecting sensitive electronics requires a well-trained workforce, implementing a thorough ESD training program must be your top priority. You'll need to guarantee all personnel receive extensive initial training before handling ESD-sensitive items, followed by regular refresher courses to maintain awareness and competency.
Your training program should focus on these essential components:
- Basic ESD concepts and risk awareness, helping employees understand how static discharge occurs and its potential impact on electronic components
- Proper use of protective equipment, including wrist straps, anti-static mats, and specialized packaging materials
- Specific procedures for handling sensitive items and maintaining ESD-protected zones
You'll want to maintain detailed training records and verify that employees fully comprehend the material through testing or practical demonstrations.
Make sure your program covers both theoretical knowledge and hands-on practice with ESD-safe equipment.
Remember to emphasize the importance of continuous learning and proper behavior in ESD-protected areas. By fostering a culture of ESD awareness, you'll help guarantee that all personnel understand their role in maintaining a static-safe environment and can recognize potential threats before they cause damage.
Frequently Asked Questions
How Often Should Static-Safe Floor Markers Be Replaced or Inspected?
You'll need to inspect your static-safe floor markers based on foot traffic, typically weekly in high-use areas. Replace them when resistance tests fail, signs fade, or wear becomes visible during regular surface testing.
Can Regular Cleaning Products Be Used on Static-Safe Floor Marking Areas?
No, you shouldn't use regular cleaning products on static-safe floor markings. They'll compromise the floor's electrical integrity and ESD protection. Instead, use specialized conductive cleaning products designed for ESD surfaces to maintain proper functionality.
Do Temperature and Humidity Affect the Performance of Static-Safe Floor Markers?
Yes, your static-safe floor markers' performance is substantially affected by both temperature and humidity. You'll notice reduced effectiveness in dry conditions, while temperature changes can impact the dispersion of conductive materials in ESD coatings.
What Happens if Static-Safe Floor Markers Get Scratched or Partially Damaged?
If your floor markers get scratched or damaged, you'll face reduced visibility, potential safety risks, and confusion about EPA boundaries. You should replace them immediately to maintain clear communication and proper ESD safety protocols.
Are Static-Safe Floor Markers Effective Through Carpet or Raised Floor Tiles?
You'll find static-safe markers aren't effective through carpet due to its insulating properties. However, they work well on raised floor tiles when properly applied, maintaining their visibility and static-dissipative functions with regular maintenance.
In Summary
Static-safe zone floor markers are essential tools you'll need to protect sensitive equipment and maintain workplace safety. You can easily identify these areas through standardized colors and symbols that indicate ESD-protected zones. Remember to follow your facility's specific guidelines, wear proper ESD gear, and stay within marked boundaries. By understanding these markers, you're helping prevent costly damage and maintaining vital safety standards.


Leave a Reply