When working with static-sensitive equipment, you'll need to understand key ESD warning symbols and signs to prevent damage. The main ESD Susceptibility Symbol shows a yellow hand in a black triangle with a slash, indicating "don't touch," while the ESD Protective Symbol features a reaching hand with an arc to identify protected areas. You'll need to place these signs 3-5 feet from hazards, using durable materials like vinyl or aluminum that meet OSHA and ANSI standards. Proper signage placement and understanding symbol meanings forms just the foundation of thorough static control safety protocols.
Understanding ESD Warning Symbols
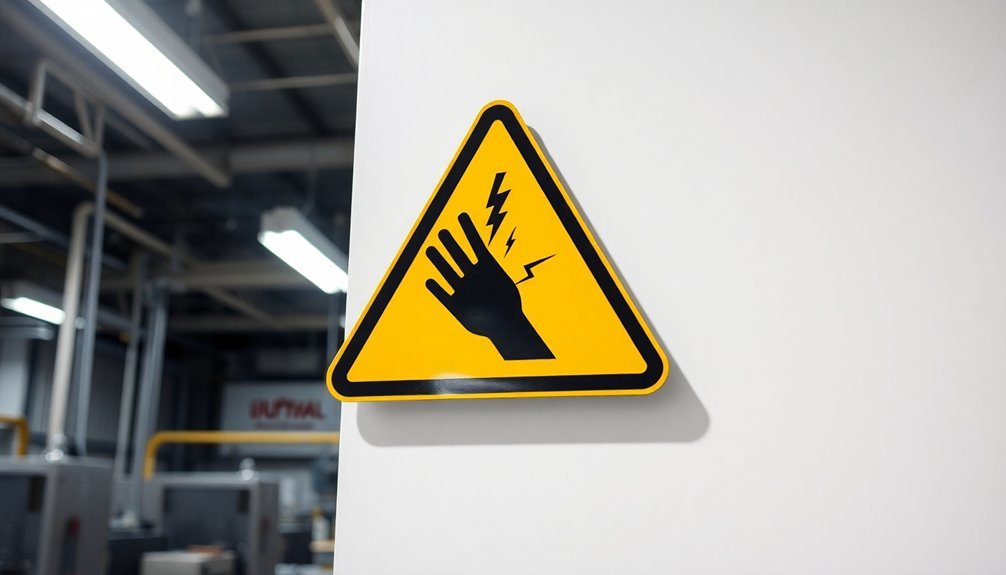
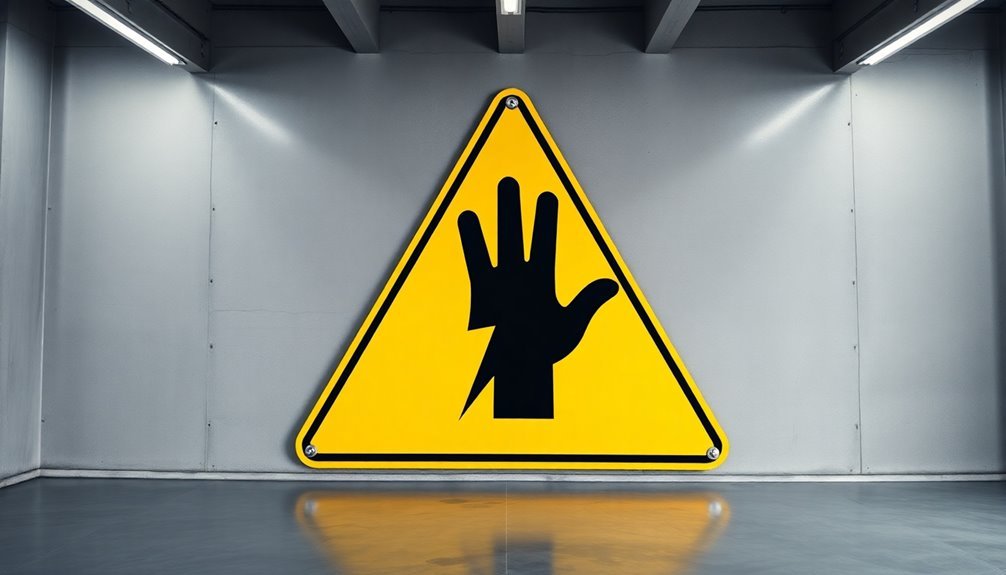
ESD warning symbols play a vital role in protecting sensitive electronic components from static electricity damage. You'll commonly encounter the ESD susceptibility symbol, which features a yellow hand in a black triangle with a slash through it. This symbol alerts you to devices and assemblies that require careful handling to prevent static damage. These signs must be readable from three feet to ensure clear visibility in workspace environments.
When you're working with ESD-sensitive components, you'll notice these symbols appear on both individual parts and their related documentation.
The symbols typically use a black-on-yellow color scheme, deliberately avoiding red to prevent confusion with personal safety hazards. You'll find various label types available, including small attention labels, MIL 129 labels, and labels with space for additional information.
Understanding these symbols is essential for proper handling of sensitive electronics. They're standardized according to ANSI/ESD S8.1 and IEC 61340-5-1 guidelines, guaranteeing consistent interpretation across different manufacturers and facilities.
While compliance with these standards isn't mandatory in the U.S., you'll benefit from following them as they promote clear communication and help prevent costly damage to sensitive components. The standardization also guarantees compatibility with international requirements, making these symbols universally recognizable in the electronics industry.
Proper Sign Placement Guidelines
A well-positioned warning sign can mean the difference between preventing static damage and costly equipment failure. When placing static control safety signs, you'll need to position them as close to potential hazards as safely possible while ensuring they're clearly visible without creating distractions.
You should mount signs permanently on stable surfaces, avoiding movable objects like doors or windows. The signs must be readable from five feet for proper hazard communication. Place them at ESD protected area boundaries and workstations, making sure they're readable from a safe distance.
Follow OSHA standard 1910.145 and ANSI Z535 guidelines for proper placement and design.
Your signs should feature yellow backgrounds with black text for maximum visibility. Use clear, concise language and incorporate relevant safety symbols to effectively convey the message. Left-align the text and use sentence-style capitalization with sans-serif fonts for better readability.
Don't forget to maintain your signage regularly. You'll need to inspect signs for wear and damage, replacing them when necessary. Keep signs securely fastened and remove any that are no longer relevant. Update your signage whenever hazard conditions change to maintain an effective static control safety program.
Common Static Control Labels
When you're implementing static control measures, you'll need to understand the three key label components: placement guidelines, warning types, and appropriate materials.
Your facility must display standardized ESD warning labels, including the yellow hand-in-triangle symbol for susceptible items and the protective symbol for ESD control products, in clearly visible locations. These labels help ensure equipment is handled in protected areas to prevent electrostatic discharge damage.
Proper label materials are essential for durability and effectiveness, so you'll want to select materials that can withstand your specific environment while maintaining clear visibility and adhesion.
Essential Label Placement Tips
Proper placement of static control labels guarantees both compliance and effective hazard communication in ESD-sensitive environments. You'll need to follow specific size requirements: use 2×2-inch labels for intermediate containers and 4×4-inch labels for exterior containers, with two labels required on the latter.
When handling ESD-sensitive materials, you must place labels on protective bags or cartons. Make sure you're using appropriate ESD caution labels on all ESD protective packages. Per the ANSI Z535 standard, safety signs must be inspected regularly to maintain their effectiveness and legibility.
Position your labels so they're readable from a distance of three feet to facilitate quick identification of hazards.
You'll want to follow key design elements in your label placement strategy. Use the EIA-471 symbol on a yellow background with black symbols for maximum contrast. Include essential text such as "ATTENTION STATIC SENSITIVE DEVICES" and "HANDLE ONLY AT STATIC SAFE WORK STATIONS." Don't forget to indicate that packages should only be opened in ESD protected areas.
Monitor your label production process by using electrostatic fieldmeters to measure electric fields (keeping them below ±5.0 kV/in) and employ static dissipators to prevent label jams and static cling issues.
Standardized Warning Label Types
Throughout the electronics industry, two primary ESD warning labels serve as critical identifiers for static-sensitive components and protective materials.
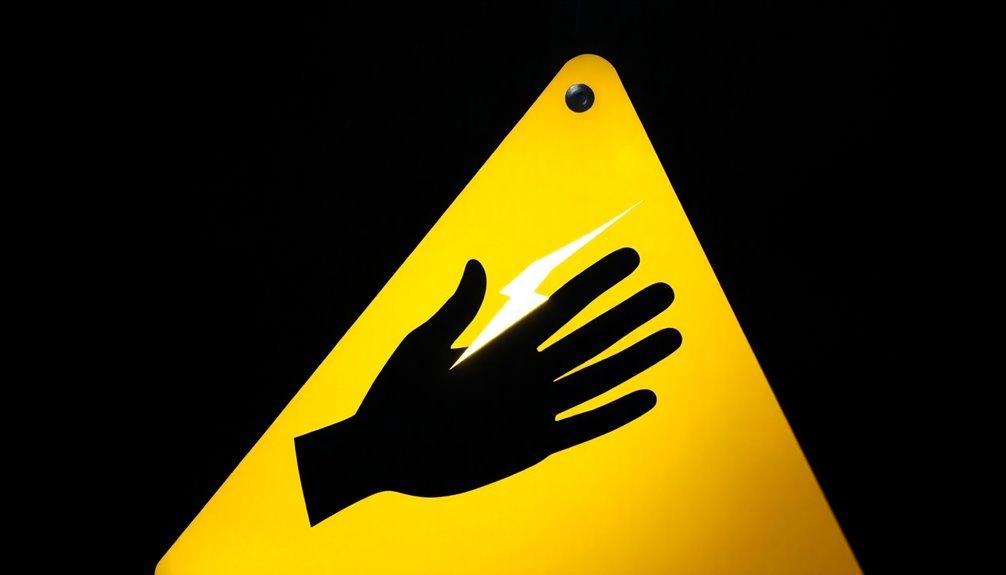
The ESD Susceptibility Symbol features a triangle with a slashed reaching hand, warning you about static-sensitive devices or assemblies. You'll typically find this symbol on individual components, assemblies, and related documents, usually displayed as a black triangle on a yellow or orange background. The standard prohibits using red coloring for ESD symbols as this suggests personnel hazards rather than ESD sensitivity.
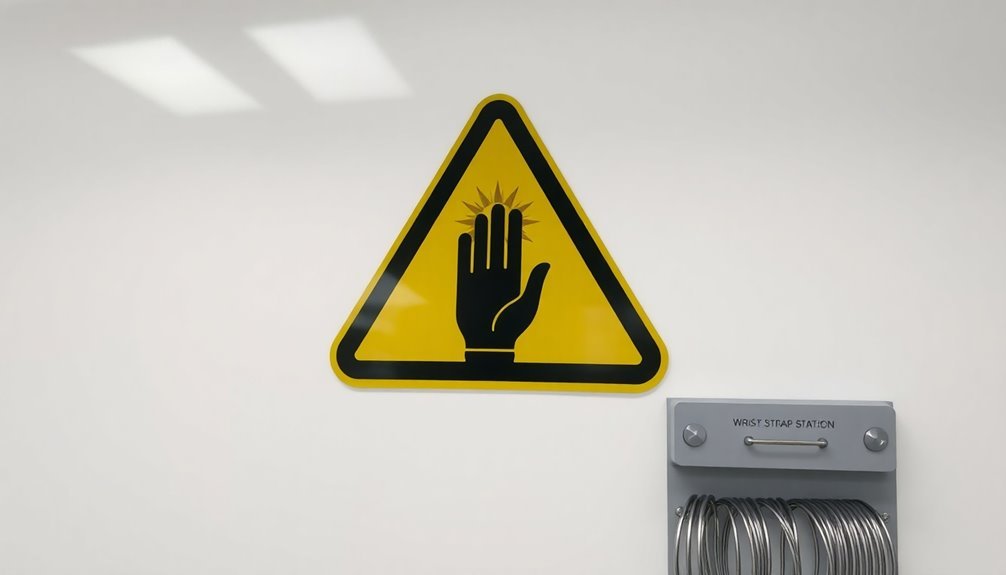
The ESD Protective Symbol, on the other hand, includes a triangle with a reaching hand and an arc, indicating materials with ESD control properties. You'll notice additional letters on these labels – 'L' for low charging, 'D' for static dissipative, or 'C' for conductive EPA. This symbol appears on protective equipment like chairs, mats, and wrist straps.
Both symbols must comply with industry standards like ANSI/ESD S20.20 and MIL-STD-129N.
You'll find these labels in various sizes and styles, featuring permanent or reusable adhesive backing. They're designed to withstand moisture, grease, and chemicals, ensuring long-lasting visibility in manufacturing facilities, laboratories, and cleanrooms.
Static Control Label Materials
Two primary types of static control label materials dominate the electronics manufacturing industry: ESD Polyester and ESD Polyimide.
ESD Polyester labels, made from 2 mil white semi-gloss material, offering temperature tolerance up to 400°F, making them ideal for PCB labeling on the board's cool side. They generate less than 100 volts when peeled from their liner. They're cost-effective and won't smear when removed from reflow or wave solder environments.
For more demanding applications, you'll want to evaluate ESD Polyimide labels. These 2 mil labels can withstand temperatures from 550°F to 617°F and offer superior resistance to harsh chemicals, solders, fluxes, and cleaners. You can rely on them for both lead-free and standard electronics manufacturing processes.
When you're selecting static control labels, you'll benefit from their ability to eliminate electrostatic discharge, which protects sensitive components during application. They'll help preserve vital serial and product information while improving production yields.
If you're in the medical device or pharmaceutical industries, you'll particularly appreciate their particle-free properties. To guarantee effectiveness, make sure your labels comply with standards like MIL-STD-3010C for static control performance.
Regulatory Standards For Warning Signs
When you're implementing static control warning signs, you'll need to meet OSHA regulation 1910.303 for electrical equipment markings and follow ANSI guidelines for standardized safety symbols.
You must maintain proper documentation showing compliance with these standards, including records of sign placement, design specifications, and regular inspections. Strategic placement areas should include entry points and locations near static-sensitive equipment.
The documentation should include verification that your warning signs feature the required black legend and border on yellow background, along with proof that they're appropriately sized and positioned for maximum visibility.
Key Standards Required
Regulatory standards for static control warning signs follow strict guidelines established by multiple governing bodies, including OSHA, ANSI, and international organizations.
When implementing warning signs, you must follow ANSI Z535's four major categories: hazard alerting, mandatory action, prohibition, and informational signs. OSHA's safety sign classifications require specific color-coding, with each category demanding distinct design elements. You'll find that danger signs, caution notices, and safety instruction markers each have their own color requirements and formatting rules.
For proper grounding and bonding measures, you'll need to comply with NFPA 77, while IEC 60079 addresses static control in hazardous environments.
For international compliance, you'll need to take into account ATEX Directive 2014/34/EU if you're operating in Europe, while Canadian facilities must follow Section 10.12 of their Occupational Safety regulations. IEC 61340-5-1 is vital if you're protecting electronic devices.
Remember that your signs must incorporate appropriate symbols, pictograms, or text based on the specific hazard type. Regular testing and verification guarantee your warning signs maintain compliance with these standards.
Compliance Documentation Process
Beyond implementing proper safety signs, maintaining thorough compliance documentation forms the backbone of an effective static control safety program. You'll need to establish and maintain detailed verification plans that align with ANSI/ESD S20.20 standards while confirming all technical requirements, measurement limits, and verification frequencies are clearly identified.
Your compliance documentation must include thorough test methods for process monitoring and specific procedures for conducting both internal and external audits. When documenting safety sign compliance, you're required to verify that all signage meets OSHA and ANSI regulations for design, content, and placement.
- Create a structured verification plan that outlines routine checks based on control item usage and potential failure risks.
- Document all test equipment specifications used for measuring technical requirements.
- Maintain detailed records of verification results, audit findings, and any corrective actions taken.
Remember to regularly review and update your compliance documentation to confirm it remains current and effective. Your records should provide a clear audit trail that demonstrates ongoing conformity with regulatory standards. When non-compliance issues arise, you'll need to document the implementation of corrective measures according to your established procedures.
Essential Safety Symbol Components
When working with ElectroStatic Discharge (ESD) sensitive devices, it is crucial to understand and use the correct ESD symbols to ensure proper handling and protection. Here are the main symbols and their meanings:
ESD Susceptibility Symbol
- This symbol features a yellow hand in the act of reaching, with a bar (slash) through it, all within a black triangle. It is used to identify devices and assemblies that are susceptible to ESD damage.
- It is placed on individual components, assemblies, and related documents to warn that the device is static sensitive and should not be touched without appropriate precautions.
- The color is typically yellow or orange on a black background, and red is avoided as it suggests a hazard to personnel.
ESD Protective Symbol
- This symbol is similar to the ESD Susceptibility Symbol but lacks the slash through the hand and triangle. Instead, it features an arc around the triangle.
- It indicates that the product has at least one ESD control property, such as Low Charging, Static Dissipative, or Conductive properties.
- Specific letters may be included under the triangle to indicate the type of protection: 'L' for Low Charging, 'D' for Static Dissipative, or 'C' for Conductive EPA (Electrostatic Protected Area).
ESD Common Ground Point and Earth Bonding Point Symbols
- These symbols are used to identify the location where all ESD elements at an ESD workstation should be connected to a common electrical ground.
- The older Earth Bonding Point Symbol features the earth ground symbol with concentric circles around the ground snap, plug, or jack.
- The newer ESD Common Ground Point Symbol features concentric circles with a thick circle around the ground snap, plug, or jack.
- Both symbols should include text identification and are typically black and yellow, avoiding the use of red.
Using these symbols correctly, as outlined in standards such as ANSI/ESD S8.1 and IEC 61340-5-3, helps maintain clarity and ensures the proper handling of ESD-sensitive items across various facilities and international operations.
ESD Protected Area Signage
ESD Protected Area signage must follow strict visual requirements to maintain safety standards in your facility.
You'll need to place clearly visible ESD caution signs at all protected area boundaries and workstations, using the standardized black and yellow ESD Susceptibility Symbol along with appropriate text like "ESD HANDLING IS REQUIRED."
All signs should be easily readable from three feet away and consistently used throughout your facility to guarantee immediate recognition and compliance with ANSI/ESD standards.
The signs should use the approved symbol, such as the one recommended by the ESD Association, and ensure a clear contrast between the lettering/symbol and the background, typically a black symbol on a yellow background.
The words and the symbol should clearly identify that ESDS devices are inside the package, and that it is NOT TO BE OPENED, or to be opened at an ESD protected area or workstation.
Sign Requirements and Placement
Clear signage serves as the foundation for maintaining safety and compliance in ESD Protected Areas (EPAs). You'll need to guarantee that your signs include the ESD symbol and/or the phrase "ESD HANDLING IS REQUIRED" to clearly identify protected zones.
For maximum effectiveness, use "NOTICE" instead of "DANGER" or "WARNING" on your ESD labels, following the ANSI Z535.4 standard.
When placing your signs, position them at EPA boundaries and workstations where they're visible from at least three feet away. You can also use floor tape, different colored tiles, or carpet to mark EPA boundaries effectively. Remember that your symbols and text should maintain high contrast against their backgrounds for easy readability.
- Place signs at entry points to alert both operators and visitors when they're entering or leaving an EPA.
- Guarantee consistency in signage throughout your workplace to prevent confusion.
- Avoid using red coloring in ESD symbols, as it incorrectly suggests personnel hazards.
Your ESD protected area can range from a single workstation to an entire factory floor, but regardless of size, all personnel and conductive items within must be electrically bonded and grounded.
Maintain consistent signage to promote quick understanding and compliance with safety protocols.
Visual Safety Standards
Today's sophisticated electronics manufacturing environments require standardized visual safety protocols to protect sensitive components. You'll need to follow specific visual guidelines when setting up ESD Protected Area signage to maintain clear communication and safety compliance.
| Symbol Type | Visual Elements | Purpose |
|---|---|---|
| ESD Susceptibility | Hand in triangle with bar | Warns of static-sensitive devices |
| ESD Protected Area | Boundary markers | Identifies controlled static zones |
| ESD Packaging | Hand in triangle with arc | Indicates protective materials |
The primary ESD symbol must be black on a yellow background, though you can use other contrasting colors except red. Your warning signs should be visible from three feet away and include clear text like "ESD Handling Required" or "Static Sensitive Devices Inside." When marking ESD Protected Areas, you'll need to clearly identify boundaries where personnel enter and exit these controlled zones.
For protective packaging and materials, you'll see additional letter designations: "L" for Low Charging, "D" for Static Dissipative, and "C" for Conductive. Your signs should be durable enough for long-term use in production environments and must comply with ANSI/ESD S20.20 standards.
Static-Sensitive Equipment Warning Signs
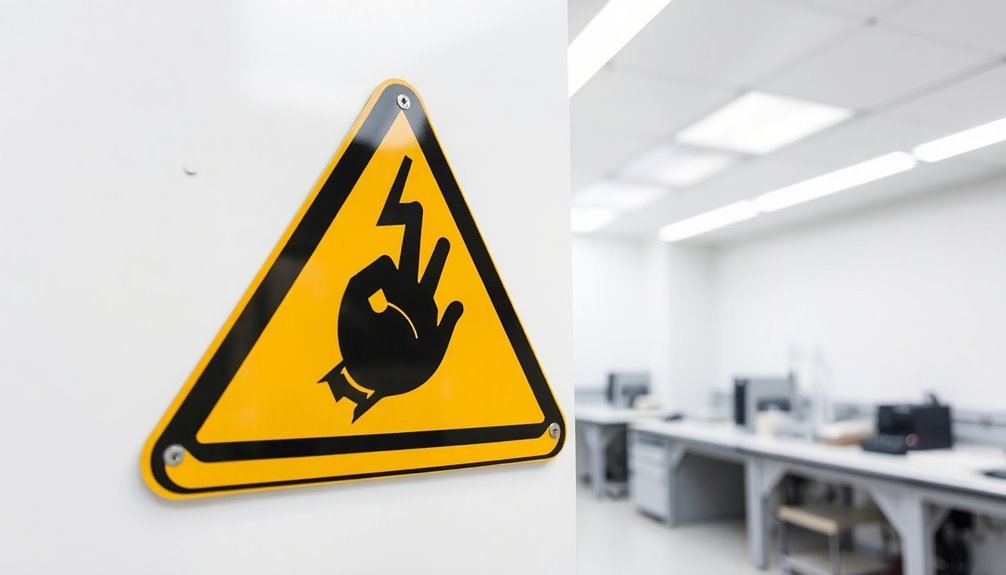
Warning signs for static-sensitive equipment play a crucial role in protecting delicate electronic components from electrostatic discharge damage. You'll commonly encounter the ESD Susceptibility Symbol, which features a yellow hand on a black triangle with a bar through it. This standardized symbol warns you that special handling precautions are necessary to prevent damage to sensitive devices.
When you're working with ESD-sensitive items, you'll notice different types of warning signs and symbols throughout the facility. These include the ESD Protective Symbol for items like chairs and wrist straps, and the ESD Common Ground Point symbols that show you where to connect grounding equipment.
- The ESD Susceptibility Symbol appears on components, assemblies, and packaging to indicate static sensitivity
- Floor signs mark entry points where you must wear proper ESD protection
- Warning labels on bags, boxes, and totes help you identify ESD-sensitive contents
You'll find these signs made from various materials, including aluminum, plastic, and vinyl, all complying with ANSI/ESD standards.
Remember that red isn't used in ESD symbols to avoid confusion with personnel hazards, as these signs focus on protecting equipment rather than people.
Workplace Static Control Markers
Effective workplace static control markers provide essential visual guidance throughout facilities where electrostatic discharge poses a risk. You'll find these markers available in various materials, from durable vinyl to industrial-grade aluminum, each designed to withstand specific environmental conditions.
| Feature | Benefit |
|---|---|
| Easy Installation | Peel-and-stick application saves time and resources |
| Multiple Materials | Choose from vinyl, aluminum, or plastic for your needs |
| Customization Options | Tailor markers to match facility requirements |
| Compliance Ready | Meets OSHA and ANSI standards for safety |
When selecting static control markers, you'll want to think about both indoor and outdoor applications. The markers' UV-resistant properties and chemical-resistant coatings guarantee longevity in challenging environments. You can easily remove them without leaving residue, making them ideal for temporary or permanent installations.
For areas with sensitive equipment, these markers serve as constant reminders of proper static control protocols. They're particularly effective when placed near workstations, entrances to static-sensitive areas, and equipment storage locations. By incorporating clear symbols and consistent designs, you'll create a safer workplace while maintaining compliance with industry standards.
High-Risk Zone Warning Requirements
Building on proper marker placement, high-risk zone warnings demand specific requirements to protect personnel and equipment in areas with elevated static discharge dangers.
You'll need to carefully consider zone classifications, with Zone 0 representing continuous explosion risks, Zone 1 indicating likely hazards during normal operation, and Zone 2 covering areas with brief, occasional risks.
When implementing warning signs in these zones, you must guarantee they're visible whenever the hazard exists and position them as close as possible to the danger source. Your signs should follow ANSI Z535.2-2007 standards and incorporate clear safety symbols with black images on white backgrounds.
- Place hazard signs with standardized legends exactly as shown in the USACE Sign Standards Manual, using proper surround shapes to highlight dangerous conditions.
- Implement consistent safety symbols that are readable from a safe distance and effectively communicate both the hazard type and required actions.
- Guarantee your signage complies with OSHA regulations, ANSI specifications, and HSE guidance for hazardous area classification.
Remember to document all considerations for flammable materials, physical properties, potential release sources, and ventilation when classifying zones and determining appropriate warning requirements.
Emergency Response Signage Features
Modern emergency response signage must incorporate dynamic features that adapt to evolving situations while maintaining fail-safe functionality. This is crucial because these systems integrate seamlessly with building management and emergency protocols, offering real-time updates and multi-language support to guarantee thorough communication during critical situations.
When you're implementing emergency response signage, you'll need to take into account several technical requirements. Your system should include reliable backup power sources and redundant network connections to maintain continuous operation.
Don't forget that regular maintenance and software updates are essential to keep the system running effectively.
You can maximize evacuation efficiency through dynamic displays that show current routes and step-by-step instructions. These signs will help you manage crowds by displaying estimated wait times at exits and directing people to less congested areas.
They'll remain operational even if some components fail, thanks to their fail-safe design.
You'll benefit from cost-effective adaptability as these systems eliminate the need for physical signage updates. The integration with fire alarms and security cameras guarantees you're providing the most up-to-date safety information while complying with relevant safety standards and regulations.
Frequently Asked Questions
How Often Should Static Control Warning Signs Be Inspected and Replaced?
You should inspect your static control warning signs daily for damage and weekly for secure mounting. Replace them immediately if they're damaged or illegible to maintain safety standards and prevent electrostatic discharge incidents.
Can Static Warning Signs Fade or Deteriorate Under UV Light Exposure?
Yes, your warning signs can deteriorate and fade when exposed to UV light. You'll notice reduced visibility and clarity over time if they're not made with UV-resistant materials or properly protected.
What Temperature Ranges Can Static Control Warning Signs Withstand?
You'll find most static control warning signs can withstand temperatures between -4°F to +176°F (-20°C to +80°C). This range applies to plastic, vinyl, and paper signs, though indoor use is recommended for vinyl types.
Are Multilingual Static Warning Signs Required in International Manufacturing Facilities?
You'll need multilingual warning signs in international facilities where workers speak different languages. While not always legally required, they're strongly recommended for safety compliance and effective hazard communication across language barriers.
How Do Color-Blind Workers Interpret Static Control Warning Symbols Effectively?
You'll rely on high contrast designs, patterns, and clear labeling instead of just colors. Look for symbols using shapes, size differences, and brightness variations to interpret static control warnings effectively in your workplace.
In Summary
You've now gained essential knowledge about ESD warning symbols and static control safety signage. Make sure you're following proper placement guidelines and regulatory standards when implementing these visual alerts. Remember, clear warning signs aren't just about compliance – they're critical for protecting sensitive equipment and personnel. Keep your workplace safe by maintaining up-to-date signage and ensuring everyone understands these important safety markers.


Leave a Reply