
To properly set up cleanroom ionizers, you'll need to follow specific installation steps for each type. Mount overhead Guardian CR2000 units with 18" clearance and verify power compatibility. Position benchtop ionizers with 5" rear clearance and proper target aim. Configure handheld neutralizers within 1 meter of work surfaces, guaranteeing correct ion balance. Install pulsed DC bars with secured power connections and compressed air supply. Place CoreStat blowers 4 inches from target areas with unobstructed airflow. Each system requires regular maintenance and performance monitoring to maintain ISO standards – exploring detailed setup procedures will guarantee ideal static elimination in your cleanroom environment.
Overhead Guardian CR2000 Installation Process

Four key steps confirm proper installation of the Overhead Guardian CR2000 ionizer in your cleanroom environment.
First, select your mounting option – either a fixed mount or portable stand setup. If you're using the CCS Stand, you'll need to adjust its width to accommodate your specific model's dimensions (31.75" for 2-fan or 42.75" for 3-fan units).
Second, verify your power source matches the unit's requirements. You'll need either 120 VAC or 230 VAC with 50/60 Hz frequency. The unit draws a maximum of 0.2A at 120VAC through its IEC 320 standard inlet.
Third, position the ionizer to achieve ideal coverage – a 2' x 3' area for 2-fan models or 2' x 4' for 3-fan models. Mount it so you'll maintain an 18" distance from the blower face to your work surface for the specified 3.0-second discharge time. The unit features unique ion shields that minimize parasitic ion loss during operation.
Finally, check the unit meets your cleanroom's standards. The CR2000's silicone-free surfaces and ion shields comply with ISO 14644-1 Class 4 and Fed Std. 209E Class 10 requirements.
You'll achieve balanced ion delivery within ±5V, thanks to the unit's patented circuitry.
Benchtop Ionizer Quick Setup Guide
Setting up your benchtop ionizer starts with proper placement in and around your workspace. You'll need to maintain at least 5 inches of clearance on the rear and sides to guarantee proper airflow. Position the unit so it directly faces your target area for ideal neutralization performance.
| Setup Phase | What to Do | Key Considerations |
|---|---|---|
| Pre-Install | Check clearance & position | 5" space needed, aim at target |
| Power Up | Connect power & set speed | Unit OFF during connection |
| Operation | Turn ON & verify function | Watch for self-test indicators |
Before powering up, make sure the unit's OFF switch is engaged. Connect the power cord to the unit first, then to your AC outlet. You'll find the fan speed switch on the rear – set it to LOW, MED, or HIGH depending on your needs. Higher speeds will give you faster discharge times, but consider your workspace requirements.
To maintain peak performance, you'll need to clean the emitter points regularly. Always turn off and unplug the unit before maintenance. Use either specialized Emitter Point Cleaners or an isopropyl alcohol-dampened swab. Don't forget to secure the rear screen after cleaning and test the unit's performance before resuming operation.
Handheld Static Neutralizer Configuration
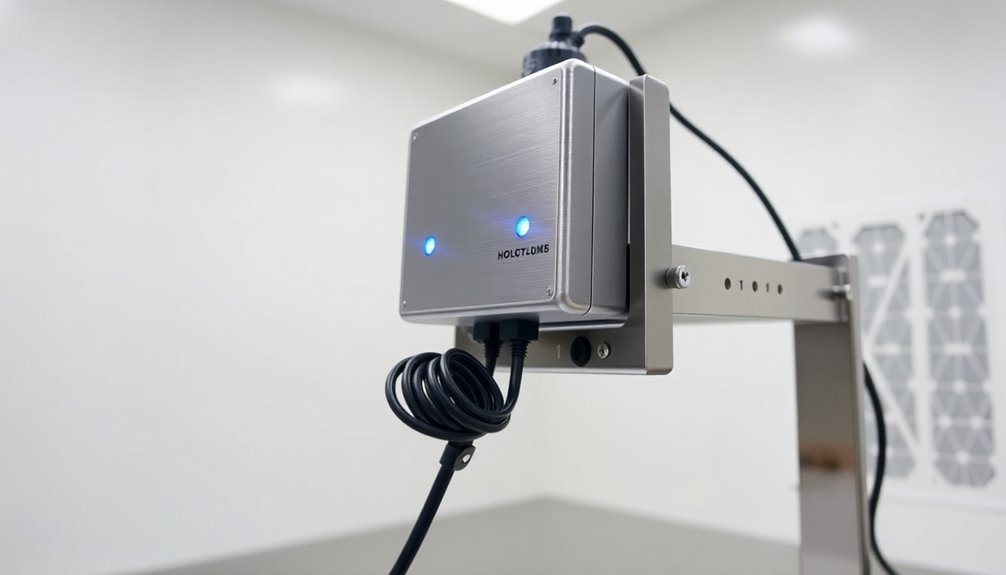
Proper configuration of handheld static neutralizers involves three essential considerations: ion generation method, performance requirements, and installation setup.
You'll need to select between corona discharge types for standard applications or high-speed neutralization models for rapid response times. The ion balance control, which ranges from ±10 V to ±15 V, guarantees precise static elimination across your target surfaces. The De Laval nozzles enhance static elimination efficiency while using minimal compressed air.
For peak performance in your cleanroom, follow these configuration steps:
- Position the neutralizer within the recommended distance range (up to 1 meter) from target surfaces, guaranteeing you've got sufficient coverage for your static elimination needs.
- Connect the power supply and verify that you don't need compressed air for your specific model, as many newer units operate independently.
- Test the ion balance using the feedback sensors, and adjust settings if your model includes auto-balance capabilities for maintaining peak performance.
- Install any protective rubber components and verify the self-diagnosis functions are active to monitor maintenance needs.
You'll want to guarantee easy access to the emitter cartridges for future replacements.
Remember to leverage the unit's compact design for tight spaces while maintaining proper positioning for effective static neutralization.
Pulsed DC Bar Mounting Steps
Successful installation of pulsed DC ionizing bars begins with strategic placement of both the controller console and ion bar components.
You'll need to position the controller near your target area and mount the ion bar where it can effectively direct ionized air toward your workspace. For best results, consider overhead mounting to guarantee consistent air flow distribution. The high-voltage emitter pins generate ions through corona ionization to neutralize static charges effectively.
Next, you'll make the necessary connections. Connect the ion bar to your controller console's back panel, and attach clean, dry compressed air using a 1/4" flexible plastic tube.
Make sure you've secured the power cord properly to protect operators when you plug the controller into an appropriate outlet.
You'll need to fine-tune the system for your specific application. Adjust the pulsed DC settings and verify the calibration using a Charged Plate Monitor to test discharge times.
Always check that the ion bar remains properly aligned with your target area after making adjustments.
To maintain peak performance, establish a regular maintenance schedule. Keep emitter points clean, confirm fan intake grills remain unobstructed, and monitor the system's self-test indicators.
Regular checks of discharge times will confirm your static control remains effective.
CoreStat Blower Placement Strategy
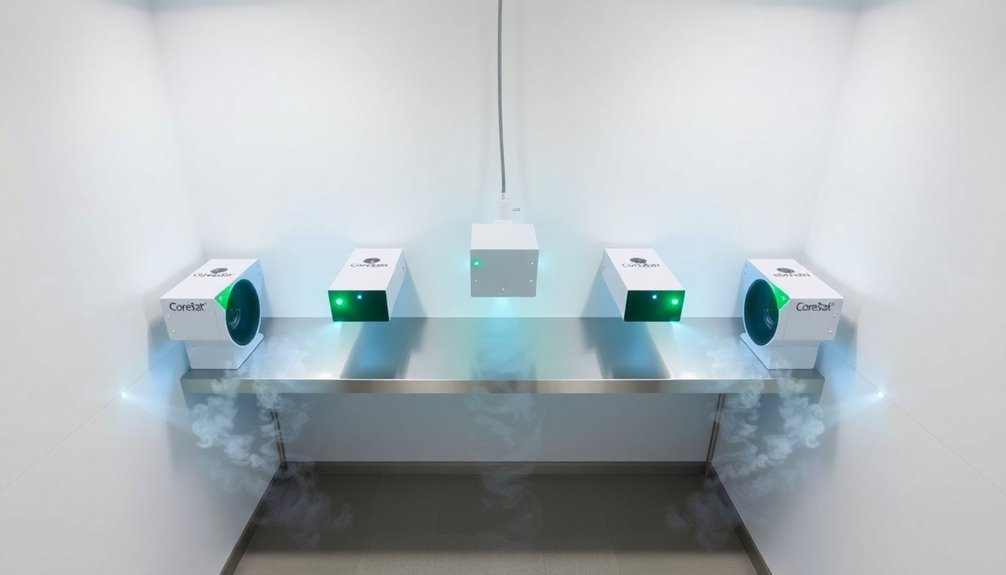
Strategic placement of CoreStat blowers determines their effectiveness in neutralizing static charges within cleanroom environments. You'll need to take into account several key factors including airflow direction, spacing requirements, and integration with your cleanroom's existing HVAC system to achieve ideal performance.
To guarantee proper installation and operation, follow these essential steps:
- Position your blower at least 4 inches away from target areas to prevent reverse charging, while maintaining a 5-inch clearance around the unit for proper airflow circulation.
- Use the tilt lock knobs to aim the airflow directly at your target area, ensuring there aren't any obstructions that could impede ion distribution.
- Adjust the fan speed settings and emitter cleaning timer based on your specific neutralization needs – remember that higher speeds result in faster discharge times.
- Integrate the blower with your cleanroom's air balancing system by taking into account room pressure patterns and existing HVAC design.
Regular audits and certifications are crucial to maintain ISO compliance and ensure optimal ionizer performance.
Monitor the blower's performance through built-in indicators and maintain regular emitter cleaning schedules.
You'll want to execute a cleaning cycle upon initial power-up and set automatic cleaning timers to guarantee consistent ionization levels.
Remember to check system alarms regularly for any performance issues that require immediate attention.
Frequently Asked Questions
How Often Should Ionizer Performance Be Tested After Initial Installation?
You'll need to test your ionizer every 6 months per EIA-625 guidelines, but if you're using it in critical cleanroom applications, you should test more frequently and adjust based on performance data.
Can Multiple Types of Ionizers Be Used Simultaneously in One Cleanroom?
Yes, you can effectively use multiple ionizer types together in your cleanroom. You'll get better contamination control by combining room system ionization with overhead ionizing blowers, each serving complementary particle removal functions.
What Is the Typical Lifespan of Emitter Points Before Replacement?
You'll typically need to replace emitter points every 12-24 months, but your specific environment impacts lifespan. In harsh conditions, you might need replacement sooner, while clean environments allow longer use.
Do Seasonal Humidity Changes Affect Ionizer Performance Settings?
Yes, you'll need to adjust your ionizer settings as seasons change. Low humidity reduces ion production, while high humidity affects particle movement. It's best to monitor and modify settings to maintain ideal performance year-round.
Are Special Power Requirements Needed for Cleanroom Ionizer Installations?
You'll need standard voltages (115V, 230V, or 277V) for your cleanroom ionizers. Make sure you've got proper wiring and consider installing backup power systems for continuous operation in critical applications.
In Summary
You've now learned the essential setup steps for the top 5 cleanroom ionizers. By following these straightforward installation guides, you'll minimize static discharge risks and maintain ideal cleanroom conditions. Whether you're working with overhead systems, benchtop units, or handheld neutralizers, proper placement and configuration are vital. Remember to test your ionizer's performance regularly and keep maintenance schedules current for consistent static control.


Leave a Reply