
To properly test your ESD workstation, you'll need to follow key steps in sequence. Start by thoroughly cleaning all surfaces with ESD-compatible detergents to guarantee accurate readings. Next, verify your measurement equipment's calibration and set up the ground reference plane. You'll then need to conduct resistance measurements between common point grounds and work surfaces, maintaining levels between 1.0 x 10^6 to 1.0 x 10^9 ohms. Don't forget to test chairs, carts, and other accessories while monitoring environmental conditions like humidity. The extensive testing process involves several additional critical procedures that guarantee complete ESD protection compliance.
Pre-Testing Surface Preparation
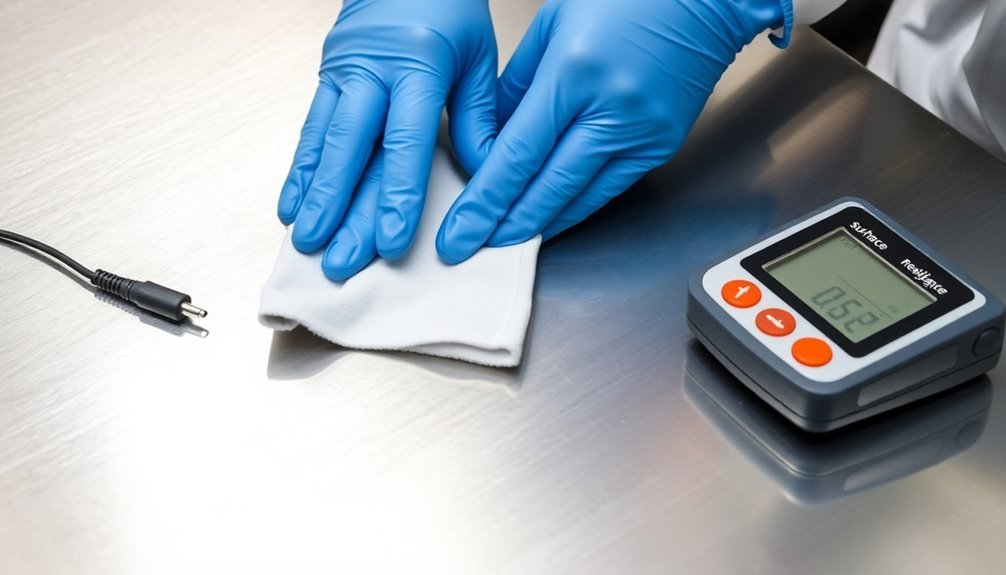
The proper preparation of ESD testing surfaces is essential for accurate measurement results. You'll need to start by cleaning all surfaces with ESD-compatible detergents, avoiding standard cleaners that contain wax, as these can create unwanted insulative layers.
Make certain you're thoroughly cleaning every component, including shelves, cart casters, and chair wheels, to maintain proper ESD resistance. You must remove all contamination between measured surfaces, as dirt and debris can greatly affect your resistance readings. Standard ESD components can be damaged by charges between 100-200 volts.
Keep your testing probes clean and make certain your environment stays free of dust buildup. Don't forget to insulate surfaces from potential contaminants to secure accurate measurements.
Environmental factors play a vital role in your testing process. You'll need to control both relative humidity and temperature, as these can impact resistance levels and ESD events. Lower humidity levels will increase the likelihood of ESD events, so you'll want to maintain stable conditions throughout your testing.
When preparing specific components, pay special attention to cart casters and chair wheels, making sure they're properly cleaned with ESD detergent.
Check that all shelves are securely grounded to the work surface and verify your common point ground connections before testing.
Equipment Calibration and Setup
Before conducting ESD testing at workstations, you'll need to verify that all measurement equipment has current calibration certificates and meets IEC standards.
Annual calibration checks from reputable calibration services are essential for maintaining accuracy and reliability of testing equipment.
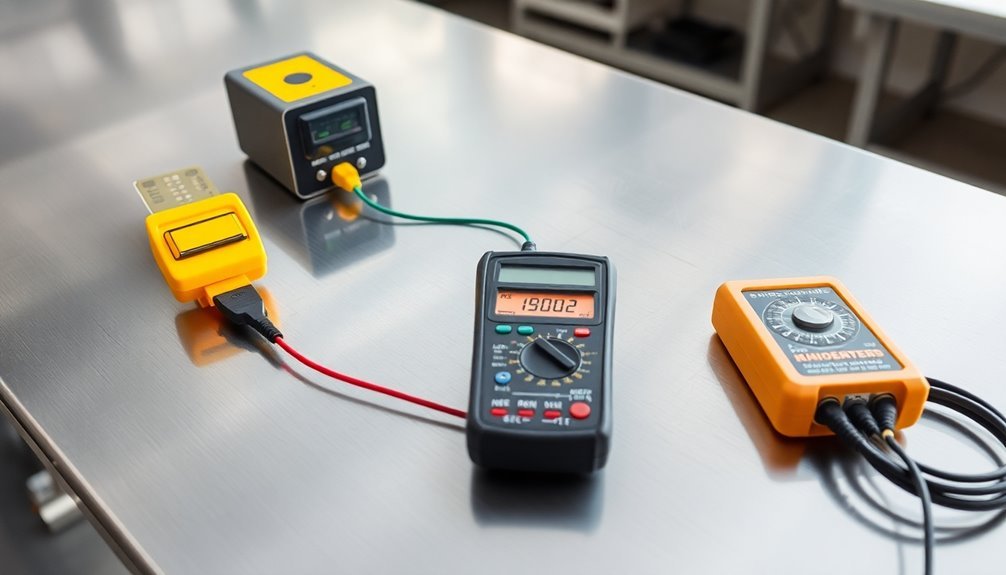
You should check your ESD generators, current probes, and field meters against standard reference instruments to guarantee accurate readings.
Position your measuring devices strategically on the workstation's horizontal coupling plane, ensuring proper contact with test points and maintaining consistent distances as specified in the testing protocol.
Calibration Standards and Tools
Proper calibration of ESD testing equipment forms the foundation of reliable workstation testing procedures.
You'll need to guarantee your testing instruments meet established standards like IEC 61000-4-2 for ESD testing and ANSI/ESD S8.1 for common point ground requirements. Your equipment must undergo annual calibration to maintain accuracy, which involves comparing readings against a standard instrument and making necessary adjustments.
When setting up your testing tools, you'll use ESD guns to simulate human body model discharges, current probes for testing ESD events, and field meters to measure electrostatic fields around insulators. The testing process should include evaluation under both contact and air discharge conditions as specified in industry standards.
You must maintain point-to-point resistance measurements below 1×10⁹ Ω for work surfaces and ESD floors. Your ESD protective surfaces should have a resistance to ground between 1.0 x 10⁶ and 1.0 x 10⁹ Ω.
Don't forget to clean all testing surfaces with ESD-compatible detergent to prevent insulative layers that could affect measurements.
You'll need to monitor relative humidity levels and guarantee surface cleanliness, as these factors can impact resistance readings.
Always obtain calibration certificates from suppliers or use reputable calibration companies to verify your equipment's accuracy.
Pre-Test Equipment Verification
Building on established calibration standards, successful ESD testing requires systematic verification of your equipment and workstation setup. You'll need to verify both your ESD workstation components and static control measures before proceeding with any testing procedures.
| Component | Verification Action |
|---|---|
| Bench Mat | Connect grounding cord and verify stud orientation |
| Wrist Strap | Test conductivity and attach to EBP bar |
| Floor Mat | Confirm proper grounding and snap connection |
| Monitoring Systems | Check continuous protection status |
Start by ensuring your bench mat lies flat with studs facing upward and properly connected to the grounding cord. You'll need to verify the Earth bonding point bar's installation and connection to a suitable earth point. Don't forget to test your ESD wrist strap's connection to both your wrist and the EBP bar. Since dry conditions increase static buildup, maintaining proper moisture levels in the workspace is essential during testing.
For static control measures, you must use workstation monitors to track continuous ESD protection and verify personal grounding through wrist strap testers. Check your ionization balance using appropriate testers and maintain proper humidity levels with indicator cards. Complete your verification by testing workstation continuity from the ground point to all surfaces using a surface resistivity meter.
Measurement Device Placement
A successful ESD testing setup requires precise placement of measurement devices and coupling planes. You'll need to position both horizontal and vertical coupling planes strategically to achieve proper ESD interaction with your equipment under test (EUT).
When setting up your testing environment, establish a ground reference plane as your foundation for accurate measurements. The contact discharge method is preferred for conducting standardized IEC 61000-4-2 testing procedures.
For tabletop measurements, maintain at least 25 cm spacing between probes and keep them 5 cm from any edges. You'll need to measure the total resistance between your tabletop and the common point ground using appropriate measuring leads.
When dealing with insulators, you must use a field meter that complies with IEC 61340-5-1 standards.
To guarantee accurate readings, you'll want to verify all measurement devices are properly calibrated before placement. Position your ESD surface resistivity meter strategically to monitor the effectiveness of your control measures.
If you're using air ionizers, place them where they'll effectively neutralize static charges in your work area. Remember to document all device positions and maintain consistent placement throughout your testing procedures to guarantee reproducible results.
Resistance Measurement Protocols
Through systematic testing procedures, resistance measurement protocols form the backbone of effective ESD workstation validation. You'll need to conduct both resistance-to-top (RTT) and resistance-to-groundable point (RTG) tests to verify your work surfaces meet the required standards.
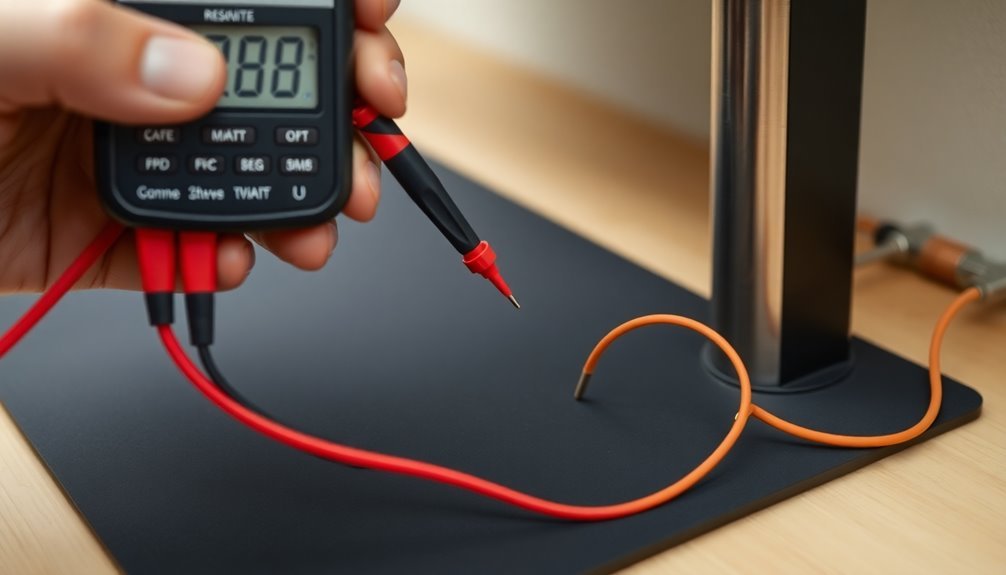
When performing these measurements, you must place your probes at least 25 centimeters apart and maintain a 5-centimeter distance from the edge of the work surface. Your point-to-point resistance measurements shouldn't exceed 1×10⁹ Ω to maintain effective static dissipation. Using ESD meter kits is essential for accurate resistance testing.
You'll want to confirm your testing environment maintains relative humidity between 30% and 70%, as this greatly impacts resistance readings. Before testing, clean your surfaces with ESD-compatible detergents to prevent the formation of insulative layers that could skew your results.
For thorough testing, you should measure the total resistance between your work surface and the common point ground. If you're working with insulators, you'll need to use a field meter following IEC 61340-5-1 guidelines.
Remember to document your readings and maintain regular testing schedules to guarantee your ESD control measures remain effective over time.
Workstation Grounding Assessment
You'll need to conduct thorough ground path resistance testing to verify all workstation components maintain proper connections to the common point ground.
Regular testing helps ensure antistatic mat effectiveness by monitoring ESD safety performance.
Testing the integrity of your common point ground guarantees all equipment shares the same electrical potential and meets ESD safety requirements.
To complete your assessment, you should measure equipment bonding to confirm that resistance values fall within the specified range of 1.0 x 10^6 to 1.0 x 10^9 ohms for all connected components.
Ground Path Resistance Testing
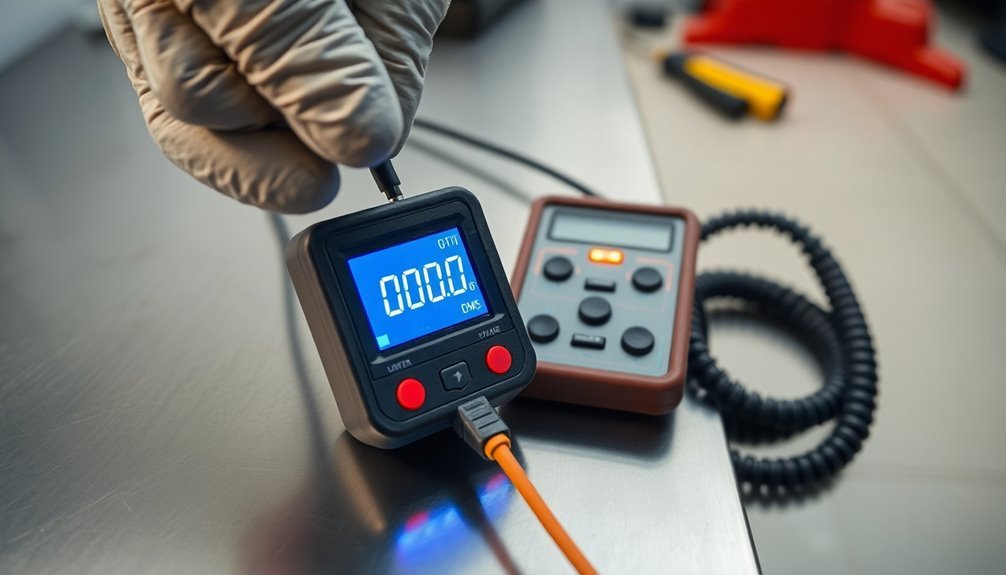
Ground path resistance testing forms the backbone of effective ESD protection at workstations. You'll need to verify all conductive and dissipative items are connected to a common point ground, maintaining resistance levels between 1.0 x 10^6 to 1.0 x 10^9 ohms for proper static dissipation.
Following ANSI/ESD S6.1 standards, you can use electrical outlets as connection points, which trace back to Earth through the building's piping system. AEMC's accredited training seminars ensure proper testing techniques for optimal grounding system performance.
To conduct accurate measurements, you'll want to use either four-terminal testers or clamp-on equipment, depending on your specific setup. The clamp-on method's particularly useful as it doesn't require disconnecting the ground system during testing. You can store and analyze your results using DataView software to maintain thorough testing records.
- Use the three-point method when you need the most detailed resistance measurements for installed grounding electrodes.
- Apply the fall-of-potential method to measure resistance at various points between your electrode and reference rods.
- Implement clamp-on testing for multi-grounded systems where disconnecting isn't practical.
Remember to regularly test your workstation's ground path resistance to maintain effective ESD protection and identify potential grounding issues before they become problems.
#
Common Point Ground Verification
Effective common point ground verification requires a systematic approach to ascertain your workstation's ESD protection system functions correctly.
You'll need to verify all components connect to the same electrical ground point and meet resistance specifications under 1 ohm.
Start by using an ohmmeter to test resistance between the common point ground and equipment grounds. Connect ground-resistance testers to measure earth resistance between the auxiliary earth ground and AC system's ground conductor.
You'll also want to employ wiring analyzers to confirm continuity meets specifications.
Install ground-integrity monitors for continuous verification of your ground path. These devices will alert you if there's an open circuit or ground-circuit degradation.
Make sure you're following ANSI/ESD S6.1 standards for proper grounding connections.
Check that all workstation components – including work surfaces, wrist straps, floor mats, and equipment frames – connect properly to your common point ground.
Don't forget to verify your ESD control items like heel grounders and grounding snaps are correctly installed.
Remember to test ground integrity regularly and maintain documentation of your verification results to ascertain ongoing ESD protection effectiveness.
Equipment Bonding Measurements
Proper equipment bonding measurements form the foundation of a reliable ESD-protected workstation. You'll need to verify that all equipment meets specific resistance requirements, including wrist straps at less than 35 million ohms and foot grounders below 1 gigohm. Use combo testers in your ESD safe work areas to confirm these measurements regularly.
When setting up your grounding connections, make certain you're using firm-fitting devices like metallic crimps and banana plugs rather than unreliable alligator clips. Connect your worksurface mat to ground using proper grounding cords or copper foil strips, and verify that your floor mats are laid flat with studs facing upward before connecting them to ground.
- Test wrist straps and foot grounders according to ANSI/ESD S20.20 standards daily before starting work.
- Measure resistance between equipment and ground points using appropriate testing equipment, making certain continuous paths to Earth.
- Document all measurements in your compliance verification plan as specified in ESD TR53, maintaining records of regular testing.
Remember that bonded equipment can't hold static charges, so proper connections are essential for both safety and protecting sensitive components.
Cart and Chair Testing

Two vital components of any ESD workstation require regular testing: carts and chairs.
For cart testing, you'll need to place one probe on the cart's shelf and another on a metal plate beneath the ESD caster. The point-to-point resistance measurement between these points should be less than 1×10⁹ Ω. You can also measure between two shelves or between a shelf and the Common Point Ground using a lead.
When testing chairs, place one probe on the seat and another on a metal plate under one of the wheels. The resistance measurement should be less than 1×10⁹ Ω, though be aware that upcoming standards will require less than 1×10¹⁰ Ω.
Both cart casters and chair wheels must be cleaned with ESD-compatible detergent before testing to guarantee accurate results.
For both items, you'll need to take into account environmental factors that can affect readings. Dirt, contaminants, and relative air humidity can influence resistance levels.
It's essential to use ESD-compatible cleaning products to prevent the formation of insulative layers on surfaces. When dealing with insulators, you must use a field meter in accordance with IEC 61340-5-1 standards.
Environmental Conditions Monitoring
Monitoring your work environment's conditions plays an essential role in achieving reliable ESD test results. You'll need to pay close attention to both temperature and relative humidity levels, as they directly affect resistance measurements and the overall effectiveness of your ESD control program.
When humidity levels fluctuate, they can greatly impact the resistance readings of your ESD surfaces and materials.
To maintain consistent and accurate test results, you should:
- Keep relative humidity between 30-70% in your testing area, using humidity control systems when necessary
- Use calibrated field meters to measure electrostatic field strength, guaranteeing it stays below 5000 V/m as per IEC 61340-5-1 standards
- Regularly verify your testing equipment's calibration under standardized environmental conditions
If you're working with insulators, you'll need to pay extra attention to electrostatic field measurements since these materials can't be grounded conventionally.
When environmental conditions aren't ideal, consider using ionizers to neutralize static charges. Remember to document all environmental conditions during testing, as they'll help validate your results and maintain compliance with ESD control standards.
## Common Point Ground Verification
A reliable common point ground system serves as the foundation for effective ESD protection in your workstation. To validate your common point ground, you'll need to follow the ANSI/ESD S6.1 standard and implement a two-step verification process.
First, connect all your workstation components to a common ground point, guaranteeing they're at the same electrical potential. Then, link this point to the equipment grounding conductor. You'll need to use a Common Point Ground Monitor, like the SCS model, to verify the resistance path's integrity from your common ground point to the electrical ground.
Watch for the LED indicators during testing – green lights confirm correct wiring and an intact ground path, while red lights and buzzer sounds indicate problems. You'll want to use specific resistors to validate the PASS and FAIL points for neutral-to-ground resistance.
Don't forget to mount your ground hub using the appropriate hardware and connect it using banana jacks.
Remember to calibrate your testing equipment annually and regularly evaluate your ESD control measures. This verification process guarantees all your workstation components and personnel maintain the same electrical potential, which is vital for protecting ESD-sensitive items.
Safety Equipment Inspection
You'll need to begin your inspection by checking all personal protection gear, including wrist straps, heel grounders, and ESD jackets for proper resistance levels and wear.
Next, verify your testing equipment's calibration status and functionality, ensuring your ground testers and resistance meters are operating within specifications.
Test your ionizers' performance by measuring their ability to neutralize static charges and checking their balance with an ionization tester.
Personal Protection Equipment Checks
Regular inspections of personal ESD protection equipment stand out among the most critical safety procedures in an EPA.
You'll need to check your ESD wristbands and foot straps daily before entering the protected area. When testing foot straps, step on the ESD test station's floor plate with one foot while lifting the other – a green light signals proper functioning, while red indicates a problem. If you encounter issues, replace your foot straps rather than switching to wristbands.
Your testing responsibilities extend beyond personal equipment. You must verify work tables, floor mats, and grounding connections monthly, while ESD monitoring instruments require annual checks.
Remember that resistance levels can fluctuate due to air humidity and surface contamination, so use ESD-compatible detergents for cleaning.
- Daily Checks:
- Personal ESD wristbands
- Foot straps
- Connection cords to workstations
- Monthly Checks:
- Work tables and surfaces
- Floor mats
- Grounding connections
- Annual Checks:
- ESD monitoring instruments
- Resistance measuring devices
- Test station calibration
Ground Testing Equipment Validation
Precision in ground testing equipment validation forms the cornerstone of ESD safety protocols. You'll need to follow specific distance and placement requirements when testing your workstation surfaces and equipment.
Place your testing probes at least 25 cm apart on tabletops, and maintain a 5 cm minimum distance from edges. You must also test between work surfaces, shelves, and ESD floors.
When measuring resistance levels, verify your point-to-point readings remain below 1×10⁹ Ω for all surfaces. Remember that both dirt accumulation and relative humidity can affect your measurements, so you'll need to clean surfaces with ESD-compatible detergent.
For cart testing, clean the casters thoroughly and measure resistance between shelves and from shelf to common point ground.
You'll need to document all your test results and maintain inspection records in your department files. Regular testing helps identify potential hazards before they become problems.
If you're working with insulators, use a field meter that complies with IEC 61340-5-1 standards. Don't forget to verify that all equipment connects properly to the common point ground, and consult EHS when you need compliance assistance.
Ionizer Performance Assessment
Performance testing protocols for ionizers require specific measurement tools and procedures to confirm proper static control. You'll need a Charged Plate Monitor (CPM) to measure both discharge time and offset voltage at predetermined locations.
Place the CPM at the center of the ionizing bar or at a documented repeatable position, with the height based on your specific application needs.
Regular performance assessments should follow industry standards like ANSI/ESD STM3.1 and SP3.3. When testing air-assist ionizing bars, verify you're using the actual airflow and pressure conditions of your application.
Don't forget to record environmental factors like temperature and humidity during testing.
- Check ionizer performance monthly alongside work tables and floor mats to maintain consistent static control.
- Document all test results, including discharge times for both polarities and offset voltage measurements.
- Verify compliance annually using appropriate tools like the Model 287B Analyzer for decay and balance tests.
Your testing frequency should align with your specific application requirements.
Maintain detailed records of test locations and results for future reference, confirming consistent measurement conditions across all compliance verification sessions.
Compliance Documentation Requirements
Documentation forms the backbone of any effective ESD control program, requiring thorough record-keeping across multiple areas.
You'll need to maintain detailed records of your ESD Control Program Plan, which must outline your EPA boundaries, training protocols, and specific procedures for managing ESD-sensitive equipment and materials.
Your Compliance Verification Plan needs to specify what you're testing, how you're testing it, and how often these tests occur.
You'll need to document all measurement limits and guarantee your test equipment can accurately perform the required measurements. It's essential that you maintain calibration records for all testing equipment according to manufacturer specifications.
As you conduct workstation testing, you must follow your documented test methods precisely and keep extensive records of all verification activities.
You'll need to establish clear audit procedures and guarantee your ESD Coordinator addresses any non-conformances discovered during inspections.
Remember to maintain detailed records of all audit findings, corrective actions, and verification results.
Your documentation should demonstrate continuous monitoring and improvement of your ESD control measures, providing evidence that you're meeting all technical requirements consistently.
Workspace Material Evaluation
After establishing proper documentation procedures, your next step involves evaluating workspace materials to confirm they meet ESD protection standards.
You'll need to conduct various tests including surface resistance, volume resistance, and static shielding measurements to assess how well materials dissipate or retain static charges.
When testing workstation components, you'll measure point-to-point resistance on work surfaces using probes placed 25 cm apart and 5 cm from edges.
Check resistance between work surfaces and shelves, as well as between surfaces and ESD floors, confirming readings remain below 1×10⁹ Ω.
Don't forget to evaluate chair ESD by measuring resistance between the seat and a metal plate under the wheel.
- Use appropriate testing equipment including workstation monitors for continuous protection, personal grounding testers for wrist straps, and field meters for insulator measurements.
- Perform compliance tests across multiple samples at different humidity levels to confirm consistent performance.
- Follow industry standards like ESD STM11.31 for static shielding and maintain detailed reports using Test Suite Manager programs for peak current and energy measurements.
ESD Control Device Testing
The testing of ESD control devices demands a systematic approach to guarantee reliable protection against electrostatic discharge.
You'll need to begin by properly setting up your test equipment and the device under test according to standards like IEC 61000-4-2. Make sure you maintain controlled temperature and humidity conditions throughout the testing process.
When executing the tests, you'll apply controlled ESD events using both contact and air discharge methods. You should test at various voltage levels, including contact discharge at 2 kV, 4 kV, 6 kV, and 8 kV, while air discharge tests can go up to 15 kV.
Monitor your device's performance during and after each ESD event. You'll need to comply with industry-specific standards that match your product type. For medical devices, follow EN 60601-1-2, and for automotive products, use ISO 10605.
It's essential to conduct testing in certified laboratories using properly calibrated equipment. After testing, evaluate your device's ESD withstand voltage and identify any vulnerabilities.
Document all results thoroughly and implement necessary design changes to improve ESD robustness. Keep detailed records for regulatory compliance and future reference.
Mitigation Measures Implementation
Properly implementing ESD mitigation measures requires a thorough approach to workstation setup and maintenance.
You'll need to guarantee your work surface is made of ESD-compatible materials like rubber, vinyl, or laminate, with a properly installed 10mm grounding snap. It's essential to connect all components, including work surfaces, personnel, and equipment, to a common point ground for effective static discharge.
When setting up your workstation, you'll need to implement several key protective measures:
- Install ESD floor mats with grounding snaps every 10 feet for mobile personnel, and guarantee all workers wear heel grounders to maintain continuous grounding while moving.
- Use wrist bands with coil cords to ground personnel directly to the workstation, providing constant protection during component handling.
- Maintain proper cleaning protocols using ESD-compatible detergents to prevent insulative layers from forming on work surfaces.
You'll need to regularly test your setup using proper probe placement techniques, measuring point-to-point resistance across surfaces.
For tabletops, place probes 25 cm apart and 5 cm from edges, guaranteeing readings remain below 1×10^9 Ω. Remember to document all testing results and maintain humidity logs for compliance purposes.
Frequently Asked Questions
How Often Should ESD Testing Equipment Itself Be Recalibrated?
You'll need to calibrate your ESD testing equipment annually to maintain accuracy. Additionally, you should get your new equipment calibrated before its first use, with suppliers typically providing initial certification upon purchase.
Can Wireless Devices Interfere With ESD Testing Measurements?
Yes, wireless devices can interfere with your ESD testing measurements through radio frequency interference (RFI). You'll need to control your test environment and consider using shielding to protect your workstation from wireless interference.
What's the Average Lifespan of an Esd-Safe Workstation Mat?
You'll typically get 6-9 months from your ESD workstation mat under normal use. However, if you're using it less frequently and maintaining it properly, it can last up to several years with proper care.
Does Lighting Type Affect ESD Test Readings?
Yes, lighting can affect your ESD test readings. While high-quality ESD lighting products maintain near-zero static charge, you'll want to use LED lighting for its efficiency and minimal impact on ESD measurements.
How Do Seasonal Changes Impact ESD Testing Schedules?
You'll notice significant variations in ESD testing during winter, when low humidity increases static buildup. You should adjust your testing schedule, maintain controlled environments, and monitor footwear conductivity to guarantee accurate results year-round.
In Summary
You'll need to regularly conduct ESD testing to maintain a safe workspace. Document all test results and verify that your workstation meets required standards. Keep monitoring resistance measurements, grounding connections, and ESD control devices. If you find any issues, implement corrective actions immediately. Remember, consistent testing and maintenance are key to preventing costly static discharge damage to sensitive components.


Leave a Reply