
You'll want to employ these 7 proven methods to test your anti-static workwear effectively. Start with surface resistivity testing using calibrated electrodes to measure current flow. Then perform point-to-point resistance measurements with an ESD meter kit. Analyze static decay time under controlled conditions, and assess triboelectric charge through material contact tests. Don't forget to verify grounding paths with a surface resistance tester, evaluate rotary static performance using standard cloths, and conduct human body voltage testing with a digital voltmeter. Understanding these testing approaches will help you guarantee your workwear meets critical safety standards.
Surface Resistivity Testing Methods

Surface resistivity testing serves as the cornerstone of anti-static workwear evaluation. To test your workwear effectively, you'll need to follow standardized procedures outlined in ASTM D-257 and IEC 62631-1, which guarantee accurate and consistent measurements.
When you're conducting the test, you'll place your workwear sample between two circular electrodes. You'll then apply a potential difference across these electrodes to measure the resulting current. Using Ohm's law and the electrode dimensions, you can calculate the surface resistivity, which should fall within the range of 1 x 10^6 to 1 x 10^12 ohms.
You'll want to pay special attention to sample preparation and electrode placement, as these factors greatly impact your results. For optimal safety compliance, garments must achieve Class A performance levels with decay times under 1.0 seconds. Make sure you're using calibrated equipment like the 6517B Electrometer for accurate measurements.
It's essential that you follow ANSI/ESD S4.1 guidelines specifically designed for ESD protection testing. Remember to apply any necessary correction factors provided by the standards.
You'll need to document your results carefully to demonstrate compliance with industry standards and guarantee your workwear meets the required antistatic properties for your specific manufacturing environment.
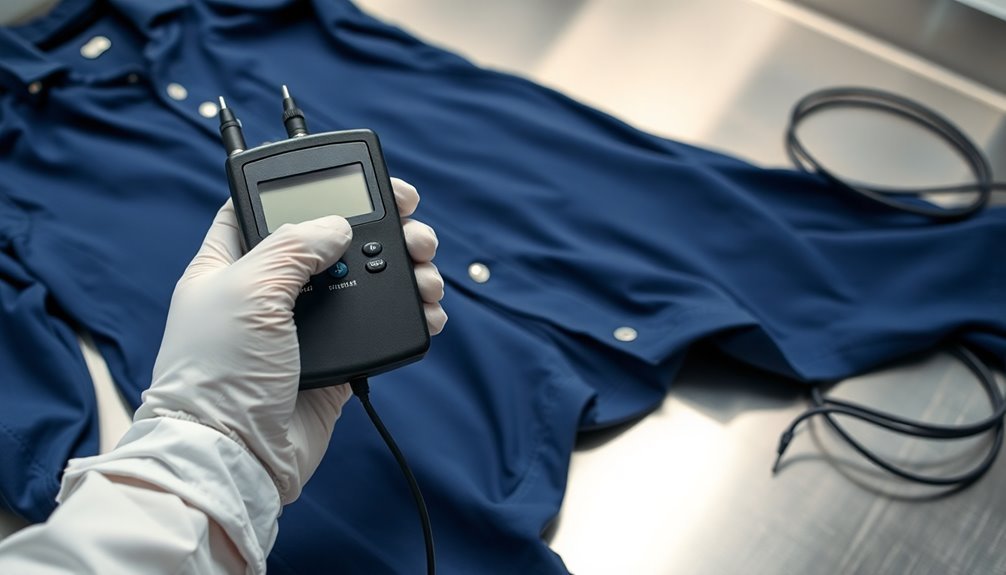
Point-to-Point Resistance Measurement
While surface resistivity offers valuable insights, point-to-point resistance testing provides a direct way to verify your anti-static workwear's protective capabilities.
You'll need an ESD meter kit and must prepare your garment by laying it flat on an insulative surface with the inside facing up. Don't forget to insert insulative sleeves to prevent fabric-to-fabric contact during testing. Black carbon threading in ESD garments helps ensure proper conductivity during measurements.
To perform the measurement, you'll position two 5-pound electrodes on different parts of the same sleeve. Start by applying 10 volts and wait 5 seconds to record the reading if it's below 1.0 x 10^6 ohms. If it's higher, switch to 100 volts and measure for at least 15 seconds. Your ESD smock should show resistance less than 1 x 10^9 ohms to pass the test.
You'll need to test multiple panels and both sleeves by moving the electrodes around. Make sure they're positioned directly above the sleeve inserts. For smaller areas, use a weighted probe setup.
Remember that ANSI/ESD S20.20 requires both initial and periodic verification of ESD control items, so you should conduct these tests according to ANSI/ESD STM2.1 standards.
Static Decay Time Analysis
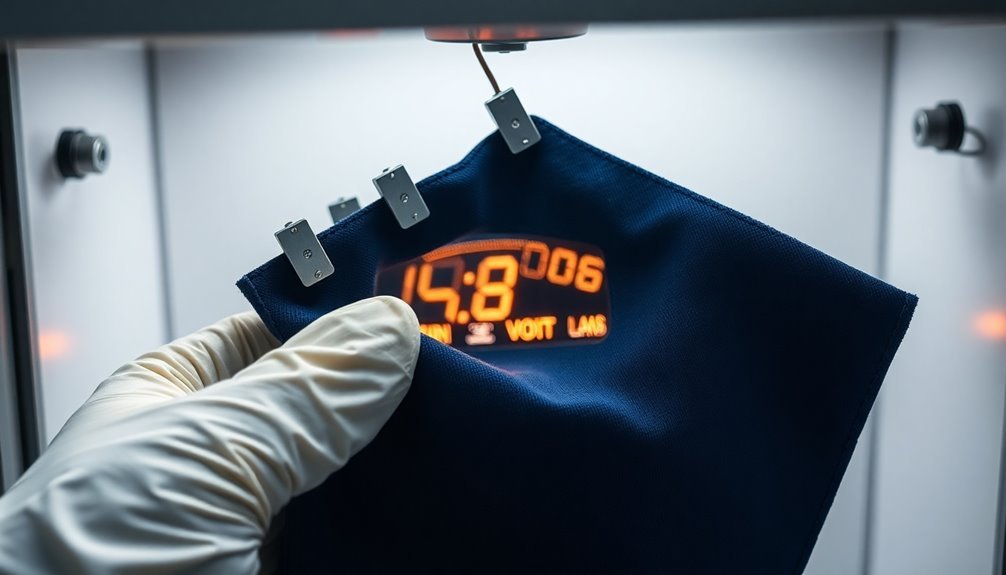
After establishing point-to-point resistance, you'll need to assess your workwear's static decay time – an essential measure of how quickly the fabric dissipates electrical charges.
You'll conduct this test using a static decay analyzer or electrostatic decay tester under controlled environmental conditions of 20±5°C and 35±5% relative humidity.
The testing process involves applying a 5000V charge to your fabric sample and measuring how long it takes for this voltage to decay to either half or one-tenth of its initial value.
You'll want to perform multiple tests to guarantee consistency in your results. Remember, shorter decay times indicate better antistatic performance in your workwear. Modern textile testing instruments have significantly improved the accuracy and reliability of these measurements.
- Clean and condition your fabric samples thoroughly before testing
- Confirm your testing equipment is properly calibrated and positioned on an insulating table
- Document all readings and compare them against industry standards for proper classification
Your results will help classify the workwear into specific performance grades – Class A for industrial workwear requiring the highest antistatic protection, or Classes B and C for less demanding applications.
This classification assures you're choosing appropriate protective gear for your specific workplace requirements.
Triboelectric Charge Assessment
You'll need to understand how charges transfer between materials through contact and separation to properly assess anti-static workwear.
Similar to ASTM test procedures, testing anti-static workwear requires carefully controlled laboratory conditions to achieve accurate results.
To set up your test equipment, connect the sample holder to a charge measurement device and guarantee proper calibration of your voltmeter or electrometer.
You can then measure the rate of static build-up by rubbing your fabric samples against standardized materials like PTFE felt wheels, recording both peak voltage and charge accumulation over time.
Understanding Charge Transfer Mechanisms
Testing anti-static workwear requires a solid understanding of how static charges develop and transfer between materials. When you're evaluating protective clothing, you'll need to take into account the triboelectric effect, where electrons move from one material to another through friction or contact.
Different materials have varying tendencies to either give up or accept electrons, which is why you'll find them arranged in a triboelectric series. Regular monitoring of surface resistance levels is essential since anti-static treatments can deteriorate with repeated use.
You can observe charge transfer mechanisms in your workwear through these key processes:
- Initial charge generation through movement and friction between synthetic materials like polyester and polypropylene
- Transfer of electrons between materials based on their position in the triboelectric series
- Dissipation of charges through conductive elements or grounding paths
When testing workwear, you'll want to monitor how charges build up during normal movement and how effectively they dissipate. Proper anti-static clothing should incorporate features like conductive threads or anti-static coatings to manage these charges.
Remember that synthetic materials are particularly prone to static buildup, so you'll need to pay special attention to their charge transfer characteristics during testing.
Test Equipment Setup Process
In accordance with standard testing protocols, setting up triboelectric charge assessment equipment requires careful attention to multiple components.
You'll need to start by assembling the sample holder, which consists of two aluminum plates of equal thickness. Mount the PTFE rubbing wheel, guaranteeing it's calibrated to maintain a 3-pound contact force and 200 rpm rubbing speed.
Position the capacitive static voltage sensor to accurately monitor post-rubbing voltage levels, and verify that your sample transfer mechanism moves smoothly. Connect your data acquisition system to record both peak voltage and charge decay measurements. The system should be capable of detecting body potential changes of more than 100 volts that can occur in just 10 seconds of movement.
Before testing begins, you'll need to cut three 8-inch diameter samples from your workwear material and precondition them for 24 hours in the test environment.
Don't forget to calibrate your system by checking voltage accuracy at +500 and +2000 volts. You must maintain environmental conditions at 75±5°F with relative humidity between 30% and 45%.
Replace the PTFE felt if you detect variations exceeding 10% using a charge plate monitor. Remember to wear gloves when handling samples to prevent contamination, and verify your ionizer is functioning properly to remove any residual static charge before testing begins.
Measuring Static Build-up Rates
With your test equipment properly calibrated, measuring static build-up rates becomes the next logical step.
You'll need to assess how quickly your workwear samples generate triboelectric charges through friction, which directly impacts their anti-static performance. Remember that different materials have varying electron affinities, so you'll want to test your samples against multiple reference materials from the triboelectric series. Working in environments with low humidity levels can significantly affect test results.
For accurate measurements of static build-up, you'll need to follow these essential steps:
- Precondition your fabric samples in a controlled environment, maintaining specific temperature and humidity levels to guarantee consistent results.
- Use standardized rubbing materials like PTFE felt, replacing them regularly to maintain uniform tribocharging characteristics.
- Monitor both positive and negative charge generation using electrostatic voltage measurements, as the total system should remain neutrally charged.
During testing, you'll want to pay special attention to nonhomogeneous fabrics with conductive yarn grids, as these may require modified testing approaches.
Don't rely solely on surface resistivity measurements, as they can be misleading. Instead, combine multiple evaluation techniques, including charge decay time and electromagnetic interference assessments, for a thorough understanding of the workwear's anti-static properties.
Grounding Path Verification Tests
Grounding path verification tests stand out among the most critical procedures for guaranteeing anti-static workwear safety. You'll need to follow specific methods to verify that your workwear maintains proper grounding and prevents static electricity buildup.
Start by using a surface resistance tester to measure resistance values, which should fall between 10^5 and 10^11 ohms. You'll want to test at least five random points on the fabric to get reliable results. Before testing, make sure you've washed the clothing and you're working in a controlled environment with temperatures at 20±5°C and humidity at 35±5%. Regular inspections and documentation help ensure system integrity over time.
For thorough testing, you'll need to employ the Three-Point or Fall-of-Potential Method. Position two probes at specific distances – one at 10X and another at the diagonal length from rod X. You must guarantee the grounding system remains isolated from the utility neutral during testing.
Don't forget to use an electrostatic field tester to measure static voltage values after rubbing the fabric. Keep detailed records of your measurements and compare them against national standards to confirm your workwear meets safety requirements.
If you're working in a smaller facility, you might want to think about outsourcing these tests to qualified suppliers.
Rotary Static Performance Evaluation
Through rigorous rotary static performance evaluation, you'll accurately measure how well anti-static workwear resists electrical charge buildup under friction conditions. This testing method uses frictional charging to assess how your workwear performs when rubbed against standard cloth materials, giving you vital insights into its antistatic capabilities.
You'll need specific equipment to conduct these tests effectively, including an ESD meter kit for resistance measurements, electrodes for voltage application, and a reliable voltmeter for charge readings. The testing process involves several specialized techniques that measure different aspects of static performance.
Here are three key evaluation methods you'll encounter:
- Frictional Charging Voltage Measurement – Rub your fabric sample against a standard cloth to measure the generated voltage.
- Triboelectric Charge Measurement – Use a Faraday cylinder to determine the total charge after friction.
- Electrostatic Decay Time Measurement – Apply voltage and track how quickly it dissipates.
Your testing should follow established standards like ESD STM 2.1-1997, which provides specific guidelines for ESD control evaluation.
Remember to maintain consistent tension conditions and proper sample-to-cloth interaction throughout your testing to guarantee accurate, repeatable results.
Human Body Voltage Testing
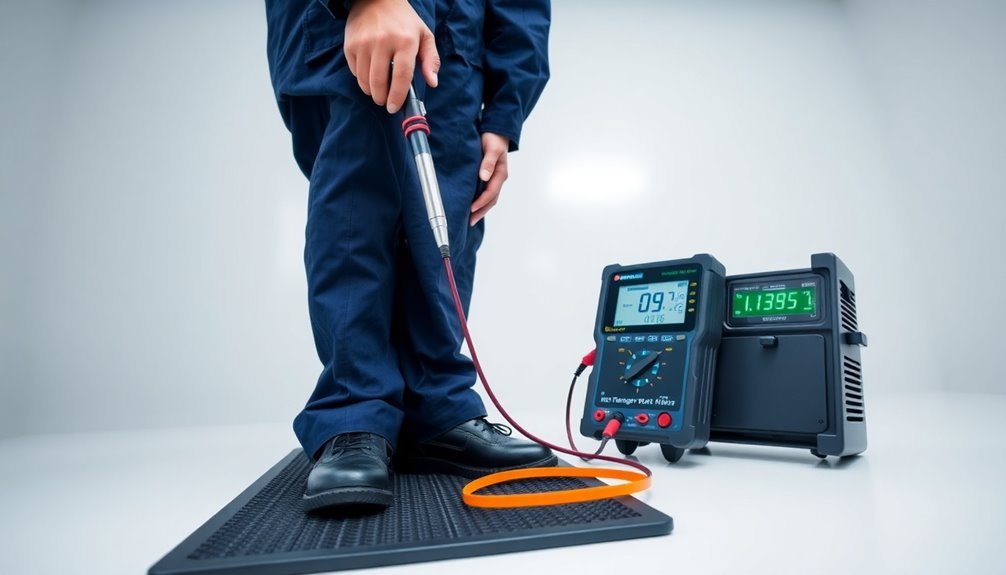
Building upon rotary static evaluations, human body voltage testing offers a direct way to measure how anti-static workwear performs in real-world conditions.
You'll need a digital voltmeter, a skin probe sensor, and a grounding probe to conduct this test effectively.
To begin testing, connect the grounding probe to a properly grounded object, then touch the skin probe sensor while wearing the anti-static workwear you're evaluating. The voltmeter will display the AC voltage present on your skin, which indicates how well the garment dissipates static electricity. Lower readings suggest better static control properties.
You'll want to follow specific protocols to guarantee accurate results. Keep the skin probe in direct contact with your skin and maintain a secure ground connection throughout testing. It's crucial to take multiple readings and compare measurements both with and without the workwear to determine its effectiveness.
Remember that environmental factors can affect your readings, so you should control for nearby electrical fields.
While this method provides valuable insights, you might want to complement it with other testing approaches like RTT and RTG measurements using an ESD meter kit for a complete assessment of the workwear's antistatic properties.
Frequently Asked Questions
How Often Should Anti-Static Workwear Be Replaced?
You should replace your anti-static workwear after 100 wash cycles or one year of use, whichever comes first. However, if you notice performance decline in test reports, replace it immediately.
Can Anti-Static Properties Be Affected by Washing Temperature?
Yes, washing temperature greatly affects your workwear's anti-static properties. You'll want to keep temperatures below 30°C, as higher temperatures can damage conductive fibers and remove anti-static agents from your garments.
What Happens if Anti-Static Workwear Gets Torn?
If your anti-static workwear gets torn, you'll face compromised conductivity and increased safety risks. You're no longer protected from static discharge, and you won't meet safety standards. You should replace or repair it immediately.
Are There Different Requirements for Winter Versus Summer Anti-Static Workwear?
Yes, you'll need different anti-static workwear for winter and summer. Winter gear requires additional insulation while maintaining static control, as cold, dry air increases static buildup compared to humid summer conditions.
Can Anti-Static Workwear Lose Effectiveness in High Humidity Environments?
Actually, your anti-static workwear often works better in high humidity since moisture helps dissipate static charges. However, you'll still need to watch for dry micro-climates around hot machinery where static can build up.
In Summary
You've now got the key tools to properly evaluate your anti-static workwear's effectiveness. From measuring surface resistivity to testing human body voltage, these seven methods will help you guarantee your protective gear meets safety standards. Don't skip regular testing – it's vital for maintaining workplace safety and protecting sensitive equipment. Put these techniques into practice to keep your static-controlled environment operating at peak performance.


Leave a Reply