Regular cleaning of your air ionizer is essential for both your health and the device's performance. A dirty ionizer can actually worsen allergies, disrupt sleep, and increase respiratory issues instead of helping them. When collection plates get clogged with debris, your unit works harder, leading to higher energy bills and a shorter lifespan. You'll also risk higher ozone emissions and poor air quality if you skip maintenance. Clean ionizers effectively remove allergens and bacteria while maintaining ideal ion production of up to 1 million ions per cubic centimeter. Let's explore how proper maintenance can transform your indoor air quality.
Understanding Your Air Ionizer
Air ionizers stand out from traditional air purifiers by using electrical charges rather than physical filters to clean your air. They work by releasing negative ions into your space through an ionizing electrode, which creates an electric field when high voltage is applied. These ions attach to airborne particles, making them heavy enough to fall to the ground. The technology traces back to Alexander Chizhevsky's research in the early 1900s.
You'll find several types of air ionizers on the market. Fanless models operate quietly and use less energy but clean the air more slowly. If you're looking for faster results, fan-based ionizers circulate ions more effectively, though they're noisier and consume more power. For specialized environments like cleanrooms, steady-state DC technology is preferred for eliminating ESD and EMI interference.
Electrostatic precipitator models collect particles on a positive-charge plate, while bipolar ionizers release both positive and negative ions.
It's important to understand your ionizer's limitations. They're less effective against larger particles like dust and pollen, and they don't eliminate odors or VOCs. Some models may produce ozone as a byproduct, which can irritate your lungs.
Additionally, the particles that fall to surfaces can become airborne again if disturbed, so you'll need to combine your ionizer use with regular surface cleaning for ideal results.
Health Benefits at Stake
Understanding how your air ionizer works is just the beginning – maintaining it properly can mean the difference between breathing clean air and exposing yourself to serious health risks. When you neglect your air ionizer's maintenance, you're compromising its ability to protect your health and well-being. Studies show that decreased blood pressure is among the key physiological benefits of a properly maintained ionizer. The recommended humidity level range of 45-75% must be maintained for optimal device performance.
| Health Area | Clean Ionizer | Dirty Ionizer |
|---|---|---|
| Respiratory | Removes allergens & bacteria | Worsens asthma & allergies |
| Air Quality | Effective ion emission | Poor particle removal |
| Safety | Controlled ozone levels | Excessive ozone production |
A dirty ionizer won't effectively remove airborne particles, leaving you vulnerable to respiratory issues and infections. You'll notice reduced efficiency in eliminating common allergens, bacteria, and viruses, which can trigger asthma attacks and seasonal allergies. Additionally, your compromised device might produce harmful levels of ozone, leading to throat irritation, coughing, and potential lung damage.
Beyond physical health, a poorly maintained ionizer can affect your mental well-being. You might experience disrupted sleep patterns, increased stress levels, and mood fluctuations. The device's inability to neutralize surface-bound pollutants and maintain proper air quality can contribute to long-term health complications, including respiratory diseases and reduced immune function.
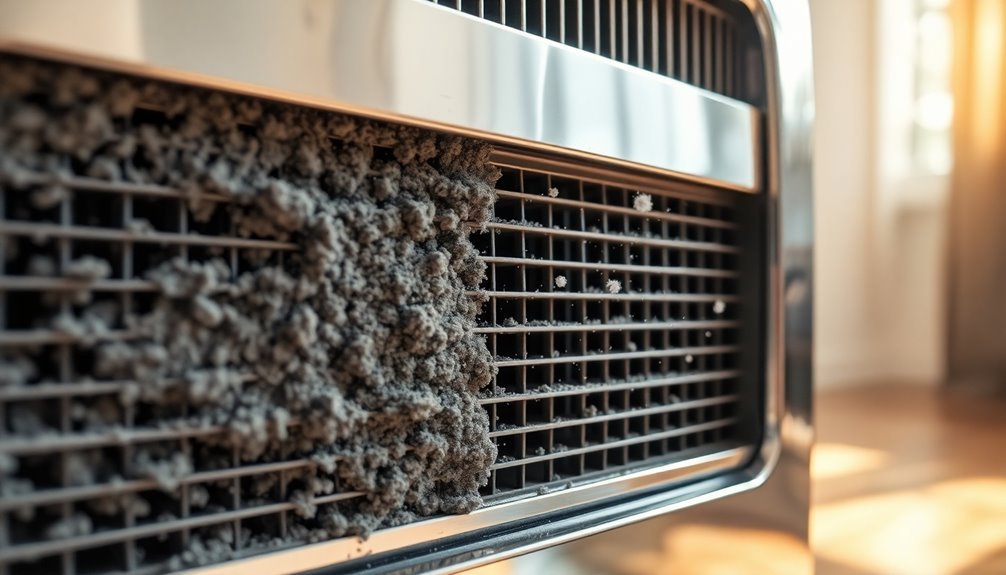
Signs of a Dirty Ionizer
Several clear warning signs indicate when your ionizer needs cleaning, and recognizing them early can prevent performance issues.
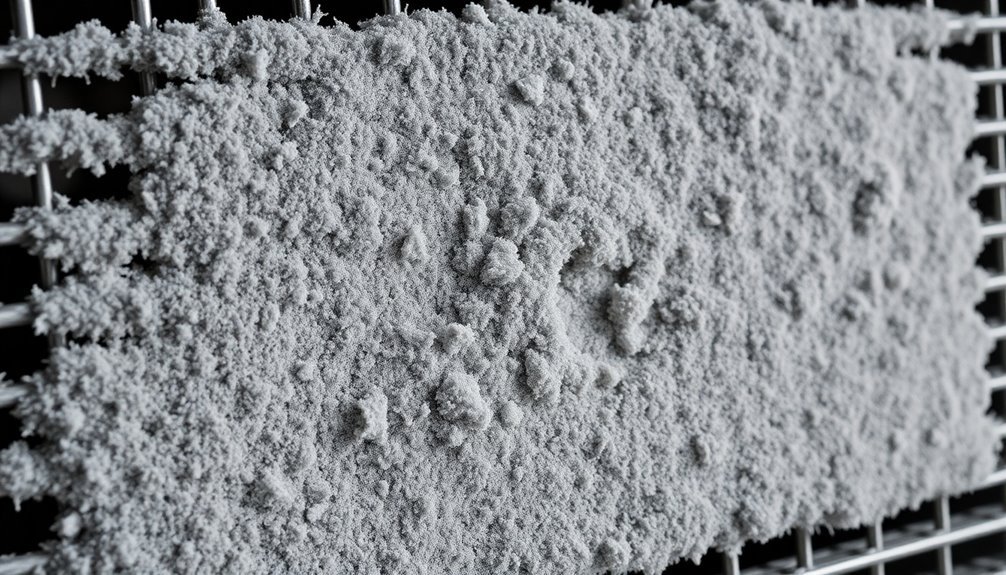
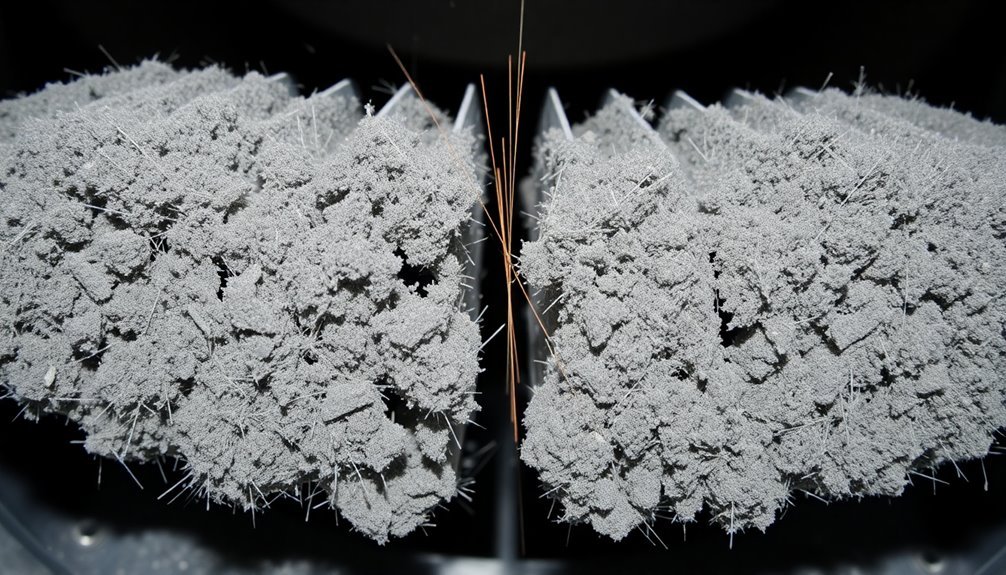
Poor indoor air can be up to 5 times more polluted than outdoor air when filters are dirty. You'll notice visible dust accumulation on collection cells, particularly on the leading edge and intake side. Dirt buildup typically extends deeper into plates as time passes. If you see dirt on the ionizer wires, it's a significant signal, as this buildup can prevent proper charging and pollutant collection.
Listen for unusual sounds from your unit. If you hear constant popping or zapping noises, similar to a bug zapper, your electrostatic filter likely needs attention. Grinding, rattling, or buzzing sounds can also signal problems with the fan or motor components.
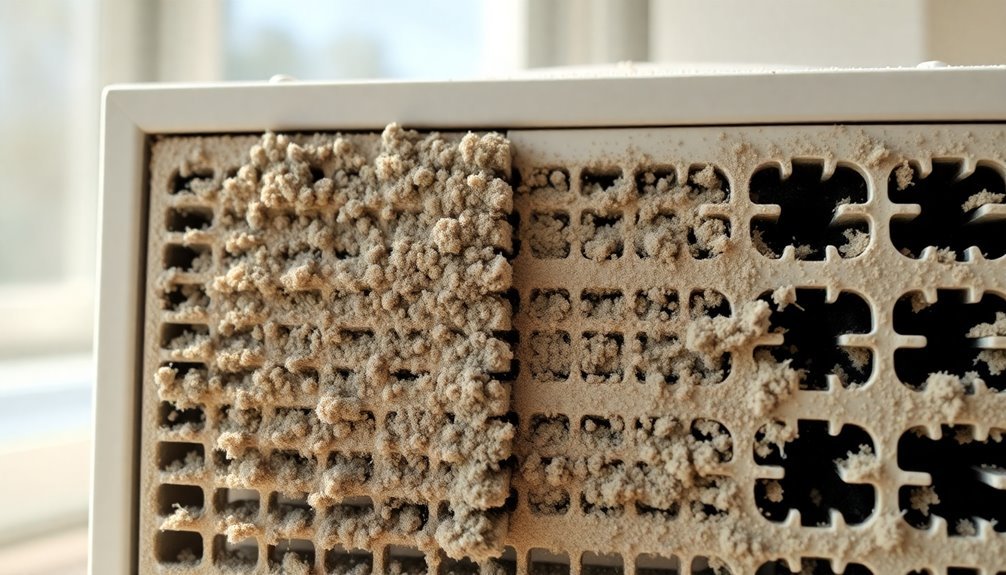
You'll experience reduced performance through decreased airflow and poor odor elimination. When your ionizer isn't working efficiently, you might notice increased allergy symptoms like sneezing and congestion.
Watch for excessive dust accumulation on nearby surfaces, as this indicates your unit isn't effectively capturing airborne particles.
To prevent these issues, inspect your collection cells and ionizer wires regularly. Follow the manufacturer's recommended cleaning schedule and replace filters as needed.
Regular maintenance will guarantee peak performance and protect your investment while maintaining healthy indoor air quality.
Efficiency and Performance Impact
When your ionizer is clean and well-maintained, it'll produce ideal levels of negative ions that effectively attract and remove airborne pollutants from your indoor environment.
Your ionizer's collection plates can trap more particles and contaminants when they're free from built-up debris, making the air purification process considerably more effective.
You'll also notice reduced energy bills since a clean ionizer doesn't have to work as hard to maintain its performance, leading to more efficient operation and lower electricity consumption.
The UV light components can provide enhanced purification when kept clean and unobstructed.
Regular cleaning helps prevent ozone gas buildup that could otherwise cause respiratory issues and headaches.
Optimal Ion Production Levels
Maintaining ideal ion production levels comes down to achieving the right balance and concentration of ions in your air ionizer. You'll need high concentrations, typically between 100,000 to 1 million ions per cubic centimeter, to effectively neutralize static charges in your environment. Regular cleaning helps minimize harmful ozone emissions that can occur as a byproduct of ionization.
Natural air ionization won't be sufficient for most applications, especially in industrial or cleanroom settings. Clean tunnels and process grouping layouts have become standard in modern cleanroom designs to optimize ionization effectiveness.
Your ionizer's performance depends heavily on both electrostatic and aerodynamic factors. When you've got conductors in the environment, they can disrupt ion balance through mirror charge effects, requiring adjustments to maintain peak performance.
While steady-state DC ionizers can achieve better balance than AC models, both types need regular monitoring and maintenance to sustain effectiveness.
You'll want to pay attention to your ionizer's placement, as this greatly affects ion delivery efficiency. Whether you're using ceiling or bar ionizers, proper configuration is essential.
To guarantee consistent performance, you should regularly check and adjust your ionizer's settings. Remember that environmental changes can affect ion balance, so you'll need to monitor and maintain your system regularly to keep it operating at maximum efficiency.
Pollutant Collection Effectiveness
Most air ionizers excel at capturing microscopic pollutants like viruses and bacteria but struggle with larger particles such as dust and pollen. While they effectively use negative ions to clump these particles together, they don't actually filter them out – instead, the particles settle on nearby surfaces, requiring you to clean more frequently.
You'll find that your ionizer's effectiveness varies depending on the type of pollutant. While it's great at dealing with microorganisms and can help neutralize bad odors by clustering odor-causing particles, it won't destroy gases or volatile organic compounds (VOCs).
Additionally, your ionizer may release small amounts of ozone, which can be harmful if levels become too high.
To enhance your ionizer's pollutant collection effectiveness, you'll want to take into account using it alongside other air purification methods. Combining your ionizer with HEPA filters can greatly improve overall air quality by addressing both small and large particles.
Adding pre-filters and activated carbon filters will help capture larger particles and handle gases that your ionizer can't process on its own. Remember to maintain these components regularly for best performance.
Energy Consumption Benefits
The energy consumption of air ionizers offers a remarkable advantage over traditional air purification methods. When you maintain your ionizer properly, you'll benefit from its energy-efficient operation, especially with fanless models that use minimal power.
However, you'll need to balance this efficiency with the longer purification times these units may require. By keeping your ionizer clean, you'll maximize its energy-saving potential while maintaining peak performance.
If you've integrated your ionizer with your HVAC system, you're likely experiencing even greater energy efficiency compared to standalone units. Regular maintenance of collection plates, particularly in electrostatic precipitators, guarantees you're not wasting energy due to reduced efficiency.
You'll find that different types of ionizers affect your energy consumption differently. While electrostatic precipitators might use more power, they offer superior performance.
If you're using a bipolar ionizer, you'll get improved purification while maintaining reasonable energy usage. When you combine your ionizer with HEPA filters, you'll achieve extensive air cleaning without greatly increasing power consumption.
The key is finding the right balance between energy efficiency and performance based on your specific needs and space requirements.
Maintenance Schedule Best Practices

Regular upkeep of your air ionizer's components guarantees prime performance and extends its service life. You'll need to establish a systematic maintenance schedule that accounts for your specific usage patterns and environmental conditions.
Track your ionizer's performance and adjust your cleaning frequency based on these observations. If you're operating in a dusty or smoke-filled environment, you'll need more frequent cleanings than in cleaner spaces. Follow your manufacturer's guidelines while developing your maintenance routine.
| Component | Cleaning Frequency | Maintenance Task |
|---|---|---|
| Filters | Every 3-6 months | Replace or clean thoroughly |
| Ionizing Wires | Monthly | Inspect and clean with brush |
| Electrodes | Every 6 months | Clean with appropriate tools |
| Exterior Surface | Weekly | Wipe with damp cloth |
Always power off and unplug your ionizer before performing any maintenance. Wear protective gear like gloves and masks when cleaning, and verify all components are completely dry before reassembly. Use compressed air for hard-to-reach areas and conduct annual deep cleanings to maintain ideal functionality. Remember to document your maintenance activities to establish patterns and enhance your cleaning schedule over time.
Essential Cleaning Tools Required
Proper cleaning of your air ionizer requires five essential categories of tools to maintain its effectiveness and longevity.
You'll need performance-focused tools like soft-bristled brushes and compressed air to remove debris from emitter points and surfaces. Anti-static wipes and microfiber cloths help you clean without leaving residue or damaging sensitive components.
To protect your ionizer during cleaning, you'll want to use static-dissipative gloves and non-abrasive cleaning pads. These protective tools prevent accidental damage while guaranteeing thorough maintenance.
For internal cleaning, precision tools like anti-static tweezers and narrow cleaning brushes are vital for accessing tight spaces.
When cleaning your ionizer, visualize these three key cleaning scenarios:
- Running a soft brush along the emitter points while wearing static-dissipative gloves
- Using compressed air to blast away dust from internal components
- Wiping external surfaces with an anti-static cloth in smooth, consistent motions
Don't forget to keep diagnostic tools handy, including an ion tester and static meter, to verify your ionizer's performance after cleaning.
These measurement tools help confirm your cleaning efforts have restored peak functionality to your device.
Step-by-Step Cleaning Process
Armed with the right cleaning tools, you'll want to follow a systematic approach to maintain your air ionizer's performance. Start by dusting the exterior with a microfiber cloth and vacuum the vents to guarantee proper airflow. You'll need to address both the exterior and interior components methodically.
| Cleaning Step | Why It Matters |
|---|---|
| Filter Maintenance | Prevents harmful particles from recirculating into your home |
| Ionizer Plate Care | Guarantees ideal ion production for fresher air |
| UV Lamp Cleaning | Maintains germicidal effectiveness |
| Reassembly Check | Protects your investment and family's health |
For washable filters, rinse them under lukewarm water and let them dry completely. If you've got disposable filters, replace them according to the manufacturer's schedule. Don't forget to clean the ionizer plates – they're essential for your unit's effectiveness. Remove them carefully and brush off debris with a soft cloth.
Proper Storage and Placement
Strategically placing and storing your air ionizer can greatly impact its performance and longevity. For best results, position your device in a central location at least 3 feet away from walls and furniture, allowing ions to distribute evenly throughout the space.
You'll also want to avoid placing it near air vents or drafty areas that can disrupt ion distribution.
When it comes to storage, keep your ionizer in a dry, cool place away from direct sunlight and strong magnetic fields. If you're storing it long-term, clean it thoroughly and use the original packaging or protective case to prevent damage.
For the finest performance, maintain these environmental conditions:
- Keep room temperature between 65°F and 75°F to guarantee optimal ion generation.
- Monitor humidity levels, maintaining them between 45% and 75% to prevent excess ozone.
- Ensure proper ventilation in the space where you're operating the device.
Remember to follow the manufacturer's guidelines and keep the device away from flammable materials.
Don't operate it near open flames or sparks, and regularly check for signs of wear or malfunction.
Common Maintenance Mistakes

Despite their effectiveness at improving air quality, air ionizers can become problematic when users make common maintenance mistakes. One of the biggest errors is neglecting to clean the collection plates and surrounding surfaces regularly, which leads to reduced performance and the redistribution of dirty particles throughout your space.
You're putting your health at risk when you ignore manufacturer guidelines or fail to monitor ozone levels. Your ionizer may emit higher levels of ozone than recommended, which can trigger respiratory issues and other health concerns.
Additionally, you'll notice increased energy consumption and shortened device lifespan if you don't follow proper maintenance protocols.
Watch for warning signs that indicate poor maintenance: unusual odors coming from the device, visible dust accumulation, or worsening allergy symptoms despite running your ionizer. If you're experiencing any of these issues, you'll need to take immediate action.
Don't forget to inspect and clean the device's components according to the manufacturer's schedule, and address performance issues promptly. Remember, skipping regular maintenance not only compromises your air quality but can also void your warranty and lead to costly replacements.
Maximizing Ionizer Lifespan
Owners who prioritize regular maintenance can greatly extend their air ionizer's lifespan. By following proper cleaning protocols and monitoring your device's performance, you'll guarantee peak operation while preventing potential damage to internal components.
Regular cleaning removes accumulated pollutants, reduces ozone emission risks, and maintains your ionizer's efficiency.
To maximize your ionizer's lifespan, establish a consistent cleaning routine:
- Wipe external surfaces weekly with a soft, dry cloth to prevent dust buildup and maintain proper airflow.
- Perform monthly deep cleaning using manufacturer-approved brushes and gentle cleaning solutions.
- Check indicator lights and monitor performance to identify when additional cleaning is needed.
You'll know it's time to clean when you notice visible dust, reduced efficiency, or unusual odors.
Don't wait for these signs to appear – stick to your maintenance schedule, especially if you're using the ionizer in heavily polluted environments.
Remember to handle components with care during cleaning, avoid harsh chemicals, and guarantee thorough drying after maintenance.
Following manufacturer guidelines for cleaning frequency and techniques will help protect your investment and maintain its effectiveness for years to come.
Safety During Cleaning

Before you start cleaning your air ionizer, you'll need to put on protective gear like surgical masks and gloves to shield yourself from accumulated particles and contaminants.
Always power down and unplug your unit before any maintenance to prevent electrical hazards.
Keep cleaning solutions away from electrical components and avoid mixing chemicals that could create harmful fumes or reactions.
Personal Protection Equipment Steps
Safety should be your top priority when cleaning an air ionizer, and proper protective equipment is essential. Before you begin the cleaning process, you'll need to wear single-use surgical gloves to protect your hands from dirt, cleaning solutions, and potentially harmful particles that may have accumulated in the filters.
Don't forget to put on a surgical mask, as it'll prevent you from inhaling dust and particles that become dislodged during cleaning. While specific eye protection isn't always mandated, wearing protective eyewear is advisable to prevent irritation from cleaning solutions or debris.
You'll also want to verify you're working in a well-ventilated space to minimize exposure to chemicals or particles.
Here's what your PPE routine should look like:
- Put on fresh surgical gloves, making sure they fit snugly and don't have any tears.
- Secure your surgical mask properly, with a tight seal around your nose and mouth.
- Wear protective eyewear that covers the sides of your eyes for complete protection.
Remember to maintain proper hand hygiene after completing the cleaning process, and always follow the manufacturer's specific cleaning recommendations for best results.
Power Down Before Cleaning
Powering down your air ionizer properly marks the first significant step in the cleaning process. You'll need to guarantee the device is completely turned off and unplugged from the power source to prevent any electrical hazards. Before proceeding with cleaning, it is vital to allow your air ionizer sufficient time to cool down, as internal components may retain heat from operation.
Always follow your manufacturer's specific guidelines for shutdown procedures, as different models may have unique requirements. You'll want to verify that all electrical components are inaccessible during the cleaning process to prevent any accidental start-ups.
| Safety Step | Why It's Important | What to Do |
|---|---|---|
| Power Off | Prevents electrical shock | Turn off and unplug device |
| Cool Down | Avoids burns | Wait for device to cool completely |
| Verify Safety | Confirms proper shutdown | Check manufacturer guidelines |
Remember that taking these precautions isn't optional – it's a significant part of maintaining your air ionizer safely. While it might be tempting to skip these steps when you're in a hurry, proper shutdown procedures protect both you and your device during the cleaning process. Check your owner's manual for any additional model-specific safety requirements before proceeding with maintenance.
Avoid Chemical Contact Hazards
Your air ionizer's cleaning process requires careful attention to chemical safety protocols. To protect both yourself and your device, you'll need to avoid harsh or abrasive cleaners that can damage the internal components.
Instead, stick to mild detergents or manufacturer-recommended cleaning solutions that won't leave harmful residues behind.
When handling your air ionizer's components, always wear protective gear such as gloves and a surgical mask. This prevents direct contact with cleaning agents and protects you from accumulated debris.
Remember to work in a well-ventilated area and never mix cleaning solutions, as this could create dangerous fumes.
Here's what proper chemical handling looks like:
- Choose only non-corrosive, manufacturer-approved cleaning solutions and apply them using lukewarm water – never hot water.
- Use gentle cleaning motions with a soft-bristled brush to avoid damaging sensitive components while removing debris.
- Allow all parts to dry completely in fresh air before reassembly, ensuring no cleaning residue remains trapped inside.
Prevention Tips
To maintain ideal performance and safety, preventive maintenance of your air ionizer requires consistent attention to key details.
You'll need to establish a regular cleaning schedule and monitor your device's performance to prevent issues before they arise.
Start by checking your ionizer's collection plates and filters regularly. When you notice any buildup, clean them immediately to maintain proper airflow and prevent bacterial growth.
You'll want to keep the device away from moisture and confirm it's positioned in a well-ventilated area to avoid overproduction of ozone.
Make it a habit to inspect your ionizer's components for signs of wear or damage. If you spot any issues, replace the parts promptly to maintain peak performance.
Don't forget to monitor the air quality output and adjust settings as needed to minimize ozone production while maximizing air purification effectiveness.
Always unplug your ionizer before performing any maintenance, and follow the manufacturer's guidelines strictly.
Frequently Asked Questions
Can Ionizers Effectively Remove Pet Dander From Multiple Pets in Large Spaces?
Ionizers alone won't effectively remove pet dander from multiple pets in large spaces. You'll need to combine them with HEPA filters and use more powerful units to achieve better results in bigger areas.
How Do Weather Conditions and Humidity Levels Affect an Ionizer's Cleaning Frequency?
You'll need to clean your ionizer more frequently during dust storms and high humidity, as these conditions increase particle accumulation. When it's humid, moisture can also cause buildup inside your unit.
Do Ionizers Interact Differently With Various Types of Indoor Plants?
Yes, your ionizer will interact differently with plants. While it'll benefit air plants and low-maintenance varieties through cleaner air, flowering and tropical plants may be more sensitive to the ozone ionizers produce.
What Happens if You Use Distilled Water Instead of Tap Water for Cleaning?
When you use distilled water, you'll prevent mineral buildup and scaling in your ionizer. It's cleaner and won't leave residue, though it's pricier than tap water and might require more frequent cleaning sessions.
Should Ionizer Maintenance Frequency Change When Used Near Cooking Areas?
Yes, you'll need to clean your ionizer more frequently near cooking areas since there's higher particle accumulation from cooking. It's crucial to prevent buildup that could reduce your ionizer's effectiveness and performance.
In Summary
Regular cleaning of your air ionizer isn't just about maintenance—it's essential for your health and the device's performance. By sticking to a consistent cleaning schedule, you'll guarantee ideal air purification, prevent harmful particle buildup, and extend your unit's lifespan. Don't neglect this important task; make it part of your routine cleaning habits and you'll breathe easier while getting the most from your investment.


Leave a Reply