
Your charge plate monitor requires regular calibration to maintain measurement reliability and comply with essential industry standards like ANSI/ESD STM3.1. Without proper calibration, you'll risk inaccurate readings that could lead to equipment damage, material waste, and costly rework. Calibration helps compensate for environmental factors like temperature and humidity changes while ensuring your measurements stay precise. It's also vital for meeting ISO certification requirements and avoiding regulatory penalties. Beyond basic accuracy, calibration provides detailed records for quality assurance and predictive maintenance – key factors that help protect your investment and operations.
Understanding Charge Plate Monitor Basics
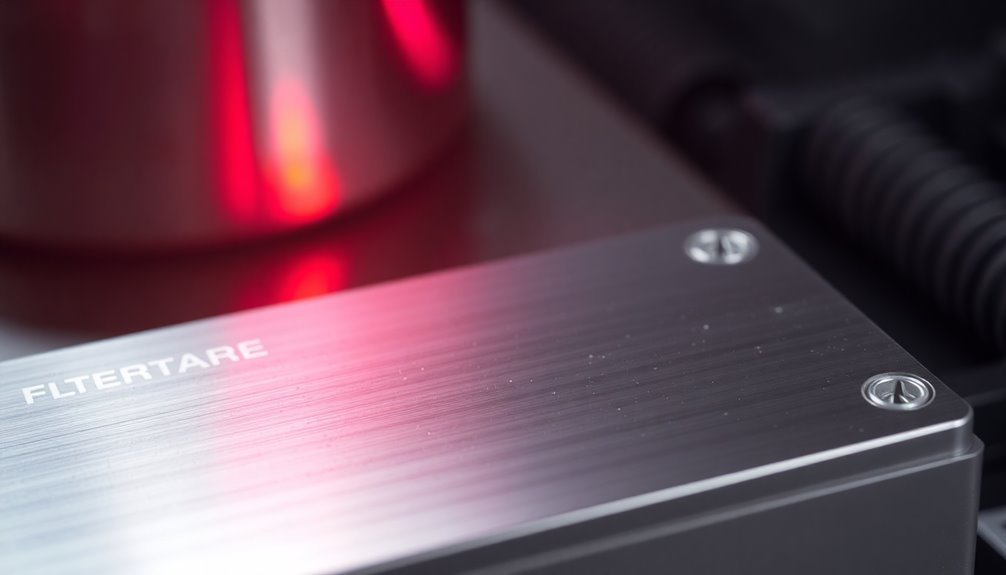
Every Charge Plate Monitor (CPM) consists of essential components that work together to measure electrostatic charges effectively. The main components include a metal plate and a fieldmeter that work with an oscillating chopper to take precise measurements.
Some models feature a 180-degree rotary head for flexible angle adjustments, while others come with compact 6" x 6" plates designed for tight spaces. The device maintains a total capacitance of 20pF to ensure measurement accuracy.
Before you begin using your CPM, you'll need to perform a zero-point adjustment by connecting the plate to a grounded body. Your device offers different measurement modes, including balance and static decay testing, and can handle voltages exceeding 5000 volts.
You'll notice helpful features like battery indicators and error displays that alert you to potential issues.
When operating your CPM, you must maintain proper grounding of both yourself and the device to guarantee accurate readings and safety. The device's versatility allows you to test ionizers, evaluate ESD materials, and conduct educational demonstrations.
However, you should be aware of its limitations, particularly when measuring Maximum Offset Voltage, which you can address by adjusting the distance between your ionizer and target.
Key Benefits of Regular Calibration
Regular calibration of your Charge Plate Monitor guarantees reliable measurements, protecting both your test accuracy and valuable equipment investments.
You'll maintain ISO compliance through consistent calibration practices, which is essential for quality control and regulatory requirements.
The periodic measurement of decay rates and voltages from ±1000V to ±100V ensures your ionizer neutralization capabilities are accurately assessed.
Ensures Measurement Reliability
Maintaining proper calibration of your charge plate monitor plays a vital role in guaranteeing measurement reliability across operations. When you regularly calibrate your device, you're guaranteeing accurate measurements that comply with industry standards while preventing costly production errors and equipment failures. Quality control and assurance helps maintain consistent results throughout your manufacturing process.
The calibration process involves comparing your device's measurements against known standards and making necessary adjustments to maintain accuracy. You'll need specialized equipment and, in many cases, professional calibration services to achieve optimal performance.
SCS recommends annual calibration for portable charged plate monitors, though your specific needs may vary based on usage and application.
To maximize measurement reliability through calibration, you should follow these essential steps:
- Schedule regular calibration checks based on your device's usage patterns and criticality
- Keep detailed calibration records to track maintenance history and guarantee compliance
- Use proper verification methods, such as DC high voltage generators
- Train your team on calibration procedures and their importance
Prevents Equipment Damage
Properly calibrated charge plate monitors serve as your first line of defense against costly equipment damage. When you maintain regular calibration, you'll prevent issues stemming from incorrect readings that could lead to improper adjustments and potentially harm your equipment.
Your charge plate monitor needs to operate within specified limits to avoid overload conditions. Regular calibration confirms you're detecting any deviations in performance before they become critical failures. You'll also be able to identify signs of wear and tear that could contribute to overload situations, protecting your investment from unnecessary damage.
Environmental factors like temperature and humidity can substantially impact your monitor's performance. Through calibration, you'll confirm your equipment remains accurate despite changing conditions, as the process helps adjust settings to compensate for these environmental influences. Maintaining reference standards through calibration ensures your measurements consistently meet industry specifications.
Don't overlook the importance of maintaining detailed calibration records. They'll provide you with a valuable performance history that supports predictive maintenance.
Maintains ISO Compliance
ISO compliance guidelines demand strict adherence to calibration standards for charge plate monitors. By maintaining regular calibration schedules, you'll meet essential requirements for ISO 9001 and ISO 13485 certifications while ensuring your measurement processes remain reliable and traceable.
Regular calibration of your charge plate monitor isn't just about accuracy – it's a fundamental aspect of quality assurance that helps you avoid non-conformance issues and potential regulatory penalties. Even small measurement deviations can result in material waste and rework.
Your calibration program must include:
- Documented procedures specific to charge plate monitor testing and verification
- Detailed calibration certificates with instrument information and traceability
- Records of calibration intervals based on usage and environmental conditions
- Evidence of calibration performed by qualified personnel
You'll need to maintain thorough documentation of all calibration activities, including certificates, measurement data, and maintenance records. This documentation serves as proof of compliance during audits and inspections.
Remember that automated reminder systems can help you track calibration due dates, ensuring you never miss required calibrations.
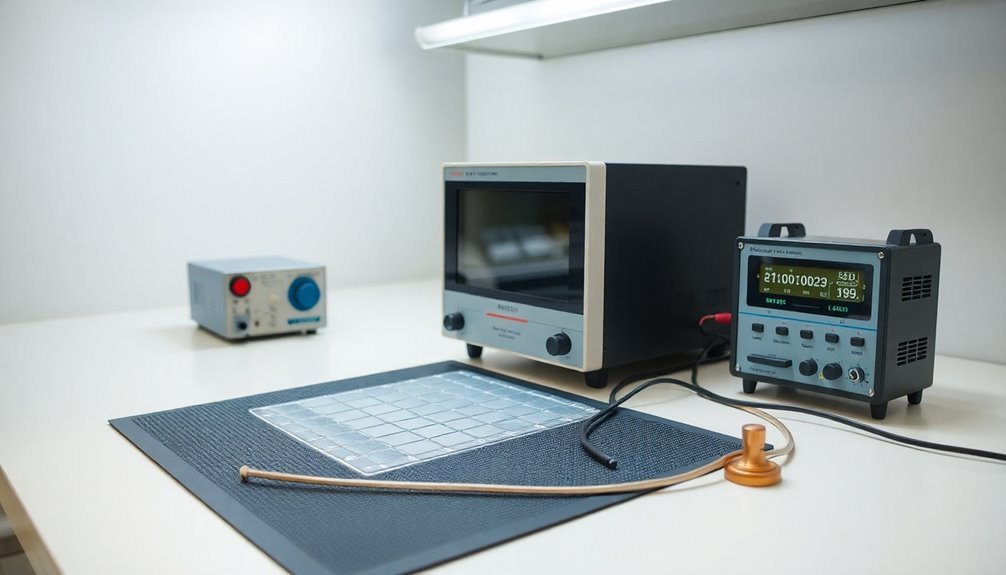
Required Calibration Equipment and Setup
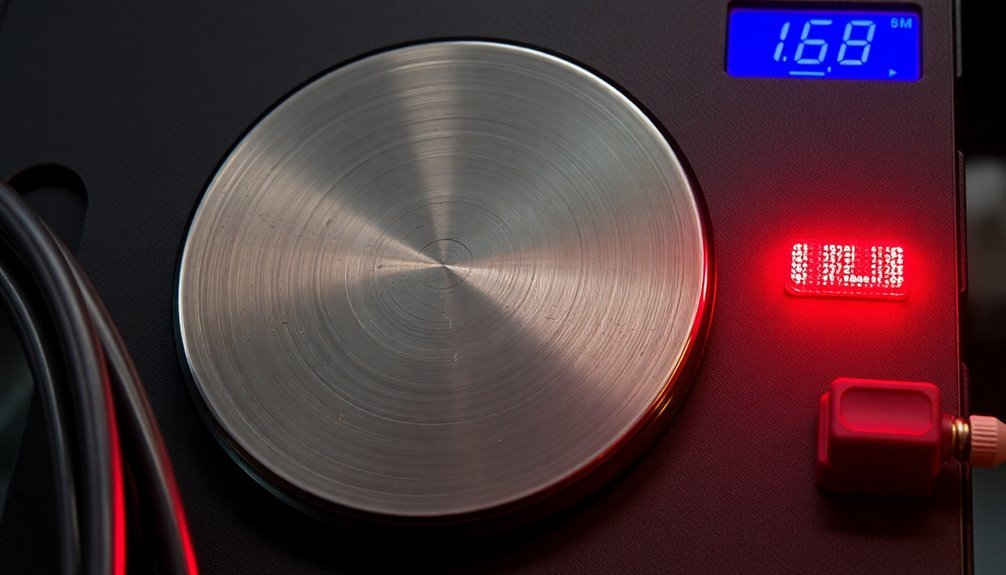
You'll need a certified charge plate monitor with a 180-degree rotary head and built-in measurement capabilities to perform accurate calibrations.
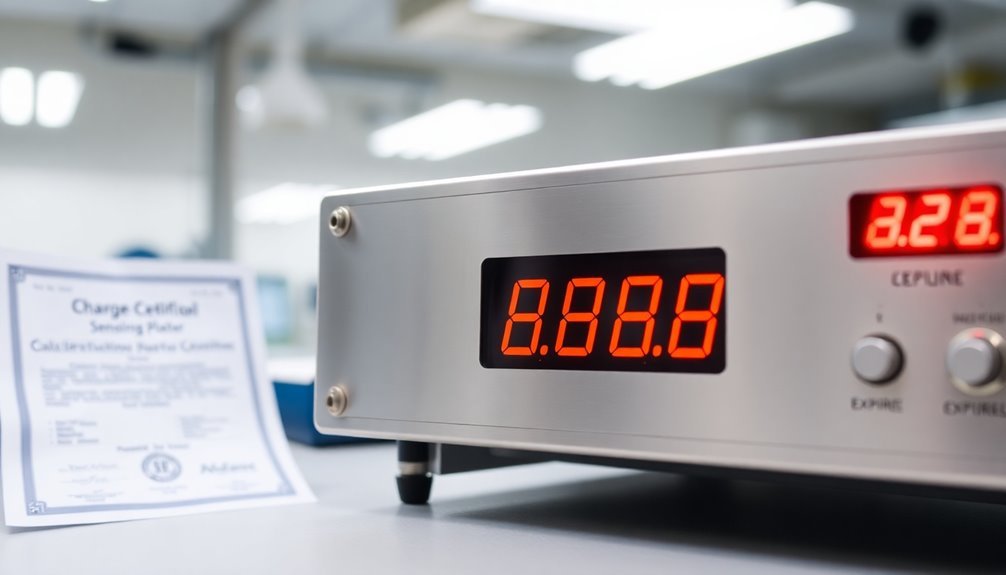
Having a certificate of calibration ensures your equipment meets NIST standards for reliable testing.
Setting up your calibration station requires specialized equipment like field meters, verification kits, and NIST-traceable standards to guarantee compliance with ESD protocols.
Your voltage generator must meet industry specifications and be properly configured to deliver consistent, reliable measurements during the calibration process.
Essential Calibration Tools Needed
Accurate calibration of charge plate monitors requires several essential tools and equipment. You'll need specific instruments and devices to guarantee precise measurements and meet industry standards like ANSI/ESD STM3.1 and ANSI/ESD SP3.3.
The calibration process demands proper setup with adjustable instrument saddles and reliable grounding devices to maintain accuracy throughout the procedure. Regular calibration helps maintain the high measurement accuracy of 0.001% that these monitors are designed to achieve.
To properly calibrate your charge plate monitor, you'll need these fundamental tools:
- Field meters (such as the Prostat PFM-711A or PFM-711B) for measuring electrostatic fields and verifying calibration accuracy
- Adjustable instrument saddles, like those found on the CPM-760A, to guarantee stable positioning during calibration
- Grounding devices, including snap fasteners and meter saddle assemblies, to maintain proper electrical connections
- Specialized mechanical adjustment tools specific to your equipment model
You'll also need access to an environmentally controlled facility that meets ISO 17025 accreditation requirements. These controlled conditions are vital for achieving accurate calibration results.
Remember that your calibration tools must be maintained and certified regularly to guarantee they're providing reliable measurements during the calibration process.
Proper Setup Requirements
Proper setup of a charge plate monitor requires meticulous attention to several critical specifications and environmental conditions.
You'll need to position your calibration plate at a distance that's at least 1.5 times the sensing aperture diameter, while ensuring the plate's radial extent is five times this separation distance for 1% accuracy. Regular traceable calibration standards help maintain measurement accuracy over time.
Your mounting setup must meet precise tolerances – the hole fit should be within 0.5% of the sensing aperture diameter, and the sensing aperture must be coplanar with its surrounding surface within 0.1% of the diameter. The calibration plate's surface must remain smooth, dust-free, and flat.
When setting up your voltage supply, you'll need to let it stabilize before starting calibration. Take your initial zero reading with the calibrator plates shorted together, then apply voltages that span from 25% of your most sensitive range to 25% of the least sensitive range.
Keep all static-retaining surfaces at least 1 meter away and earthed surfaces at minimum 0.5 meters from your setup. You'll need to test both polarities and verify your calibration by comparing fieldmeter readings with calculated electric field values.
Voltage Generator Specifications
With your charge plate monitor setup complete, the next consideration is selecting an appropriate voltage generator for calibration. Your voltage generator must meet specific requirements to guarantee accurate calibration of your charge plate monitor, including DC high voltage capabilities and precise output ranges from ±10 to ±1,000 V.
For reliable calibration results, you'll need a voltage generator that meets these critical specifications:
- Output voltage range of ±10 to ±1,000 V with permissible tolerances (e.g., ±7 to ±13 V for ±10 V setting, ±88 to ±112 V for ±100 V setting)
- Measurement resolution of 0.1 V to guarantee precise readings during calibration
- Calibration accuracy within ±1% of reading ±3 volts to maintain NIST traceability
- Error display and continuous audible alarm features to alert you of insufficient voltage application
You'll need to ground your charge plate monitor and perform zero point adjustment before beginning the calibration process. When using the voltage generator, verify you're following the manufacturer's recommended calibration intervals and procedures.
This approach maintains the accuracy and reliability of your measurements while meeting industry standards for precision voltage generation.
Proper Calibration Plate Specifications
Successful charge plate monitor calibration depends heavily on meeting precise calibration plate specifications. You'll need to guarantee your calibration plate has a radial extent at least five times the separation distance between the sensing aperture and plate to achieve 1% accuracy.
The spacing between plates must be at least 1.5 times the sensing aperture diameter. Your calibration plate's mounting hole requires a close fit with a spigot tolerance better than 0.5% of the sensing aperture diameter.
The surface must remain smooth, clean, and flat throughout the calibration process. For proper measurements, you'll need to maintain a radial distance of at least 15 sensing aperture diameters.
When setting up your calibration environment, keep all static-retaining surfaces at least 1 meter away from the setup, and earthed surfaces should be no closer than 0.5 meters to the calibration plate. You'll need to use insulators on the opposite side of the calibration plate from the voltmeter.
Remember to conduct calibrations within your device's specified operating temperature range and keep the plate free from dust and contamination to guarantee accurate results.
Common Calibration Errors to Avoid
Avoiding common calibration errors starts with understanding the key pitfalls that can compromise your charge plate monitor readings. You'll need to pay close attention to setup details, environmental factors, and procedural steps to guarantee accurate measurements.
Your calibration setup requires precise attention to physical parameters. Make sure your plates are sufficiently large and properly insulated, with spacing at least 1.5 times the sensing aperture diameter.
Keep the area clear of static-charged objects and earthed surfaces that could interfere with readings.
Here are the critical areas you need to monitor during calibration:
Setup Configuration
Mount your fieldmeter with a close-fitting hole, maintain proper plate size, and guarantee adequate spacing between components.
Environmental Control
Eliminate external voltage sources, remove static-charged surfaces, and keep the area free of dust and contamination.
Instrument Settings
Cover the appropriate measurement range (10% of most sensitive to 25% of least sensitive), and handle autoranging properly.
Procedural Steps
Follow the correct setup sequence, clear stored data, perform zero adjustments, and observe all safety precautions.
Remember to check for residual charge on cable connections and keep conductive objects away from your calibration setup.
When to Schedule Calibration
Now that you've mastered proper calibration techniques, determining the right timing for your charge plate monitor calibration is your next key step. You'll need to follow the manufacturer's guidelines in your operation manual as the primary reference for scheduling calibration intervals.
Your calibration schedule should account for how frequently you use your charge plate monitor and the environment it operates in. If you're using the device in a high-precision setting or safety-critical application, you'll want to calibrate more often.
Watch for signs that indicate immediate calibration needs, such as inconsistent readings or irregular offset voltages.
Don't wait for problems to arise – implement a preventive maintenance program that includes regular calibration checks. You'll need to document each calibration session and maintain detailed records of results.
If your charge plate monitor operates in harsh conditions or shows signs of wear, you may need to increase calibration frequency beyond the standard recommendations. Consider factors like power stability and device age when setting your calibration schedule.
For the most reliable results, you should have certified technicians perform the calibration, especially if your measurements must meet regulatory requirements.
Maintaining Calibration Standards
Maintaining proper calibration standards requires a systematic approach that aligns with established industry requirements. You'll need to guarantee your charge plate monitor meets specific standards like ANSI/ESD STM3.1 and ANSI/ESD SP3.3 to guarantee reliable measurements and data integrity.
When setting up your calibration system, position your instrument with its sensing aperture perpendicular to a clean, flat metal surface. The calibration plate's radial extent should be at least five times the separation distance between the sensing aperture and plate for 1% accuracy.
You'll want to keep static-retaining surfaces at least 1m away and earthed surfaces 0.5m away.
- Mount your instrument securely and use slip gauges to measure separation distance precisely
- Test across multiple voltage ranges to verify thorough accuracy
- Check both positive and negative polarities during verification
- Document zero readings and output signals throughout the process
Your verification procedures should include testing the calibration plates' adequacy by checking for signal changes when charged plastic approaches the plate gap.
Frequently Asked Questions
Can Extreme Temperatures Affect the Calibration Accuracy of My Charge Plate Monitor?
Yes, extreme temperatures will affect your charge plate monitor's calibration accuracy. They can cause metal parts to expand or shrink and disrupt electronic components, leading to unreliable measurements and reduced sensitivity in your device.
How Do Different Humidity Levels Impact Calibration Measurement Results?
High humidity can cause your measurements to decay, while low humidity increases static electricity. You'll notice less accurate readings in both extremes, so it's best to calibrate in controlled humidity conditions.
Is Calibration Affected by Electromagnetic Interference From Nearby Electronic Equipment?
Yes, your charge plate monitor's calibration is substantially affected by electromagnetic interference. You'll notice inaccurate readings when nearby electronic devices emit EMI, which can disrupt your monitor's sensitive measurement capabilities.
Does Altitude or Atmospheric Pressure Change Affect Charge Plate Monitor Calibration?
No, your charge plate monitor's calibration isn't substantially affected by altitude or atmospheric pressure changes. The calibration primarily relies on voltage measurements and plate spacing, which remain consistent regardless of these environmental factors.
Can Vibration or Mechanical Shock Compromise a Recent Calibration?
Yes, vibration and mechanical shock can disrupt your recent calibration. They'll affect the monitor's stability and accuracy, potentially displacing sensitive components. You'll need recalibration if your equipment experiences significant physical disturbance.
In Summary
You'll need to calibrate your charge plate monitor regularly to guarantee accurate readings and maintain ESD safety standards. By keeping up with calibration schedules and avoiding common errors, you're protecting sensitive equipment and maintaining quality control. Don't skip this essential maintenance step – it's vital for reliable measurements and compliance with industry standards. When in doubt, consult your manufacturer's guidelines for specific calibration requirements.
Leave a Reply