
Set up affordable static protection with these budget-smart tips: Create a DIY grounding solution using a spare power cord, make an anti-static mat from a yoga mat and aluminum foil, and maintain 40-60% humidity using household methods like damp towels. You can connect a wrist strap to your mat's grounding point, store tools in foil-lined containers, and use ESD-safe cleaning supplies. Don't forget to test connections monthly and verify grounding effectiveness daily. Keep workspace humidity ideal with simple solutions like houseplants or shallow water containers. For maximum protection without breaking the bank, there's much more to explore about smart ESD management.
DIY Grounding Solutions
With basic household items and careful attention to safety, you can create effective grounding solutions to protect against static electricity.
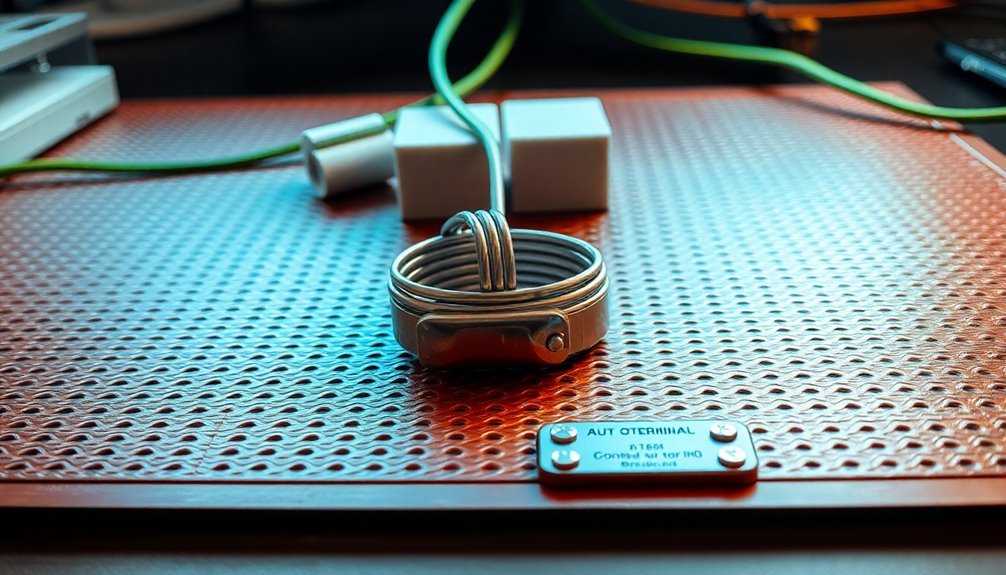
Start by using a spare power cord, removing the positive and neutral wires while keeping the ground wire intact. You'll need to connect this wire to a properly grounded electrical outlet's ground pin, which serves as your primary grounding point. Working on sensitive electronics requires you to disconnect all power sources before beginning any repairs or modifications.
You can also create your own anti-static mat using common materials like yoga mats combined with aluminum foil. Connect the conductive layer to your grounding wire, and always verify the connection with a multimeter to confirm proper resistance levels. Don't forget to document your resistance measurements for future reference.
To maximize your DIY grounding setup's effectiveness, you'll want to maintain proper humidity levels between 40-60% in your workspace. You can supplement your grounding solutions with anti-static sprays and ionizers to neutralize static charges in the air.
When handling sensitive electronics, store them in anti-static bags and consider installing anti-static flooring for thorough protection. Remember to regularly inspect all ground connections and perform resistance checks to maintain safety and effectiveness.
Smart Mat and Strap Combinations
When you're picking an ESD mat, look for bulk purchase deals and seasonal sales to get quality protection without breaking the bank.
You'll need to connect your wrist strap directly to the mat's grounding point or to a separate earth ground using a banana plug or alligator clip for maximum protection. The 6-foot cable length provides ample mobility while maintaining proper grounding connection.
Before each use, test your wrist strap with a simple continuity tester to verify it's functioning properly and maintaining the correct resistance levels.
To properly ground your ESD mat, verify the manufacturer's guidelines or specifications for the recommended grounding method. Different mats may have specific grounding requirements.
Identify the available grounding points in your workspace and connect one end of the grounding cord or wire to the designated grounding point. Then, connect the other end of the grounding cord to the ESD mat, which usually has a built-in grounding snap or eyelet.
Test the grounding using an ESD grounding tester or a multimeter set to resistance mode to confirm that the ESD mat is properly grounded. The resistance reading should be near zero or within the acceptable range specified by the manufacturer.
Affordable Mat Selection Tips
Since budget-conscious ESD protection doesn't mean compromising on quality, you'll find several affordable mat and strap combinations that offer reliable static protection. StaticTech's Dual-Layer Rubber Anti-Static Workstation Mats start at just $9.26, while their complete kits, including a wrist strap and grounding accessories, begin at $14.96. Most quality mats feature ergonomic anti-fatigue properties to ensure comfort during long work hours.
For exhaustive protection, consider pairing ACL Staticide's Dualmat Textured Dual-Layer mats, starting at $14.34, with a common ground point. If you're looking for a vinyl alternative, StatPro's 3-Layer Tabletop ESD Grounding Mats provide excellent value starting at $12.33.
When selecting your mat, focus on dual-layer or three-layer construction, as these offer thorough static dissipation. You'll want to choose between textured and smooth surfaces based on your work environment.
For larger workspaces, you can save money by purchasing rolls instead of individual mats, though remember you'll need additional grounding cords for every 10 feet of coverage. Don't forget to factor in comfort—mats like the Comfort-King Anti-Static series offer anti-fatigue properties that make them ideal for extended use while maintaining budget-friendly pricing.
Proper Grounding Connection Methods
Proper grounding connections form the foundation of effective static protection in any workspace. You'll need to guarantee your anti-static mat connects effectively to ground, whether through direct contact with conductive surfaces or via grounding cables to electrical outlets. When you're using grounding cables, make sure they include the standard 1 meg ohm resistor for proper static dissipation rates. Modern setups often implement wireless grounding solutions to minimize cable clutter.
| Surface Type | Required Grounding Method |
|---|---|
| Conductive Floor | Direct Contact + Heel Straps |
| Carpet/Wood | Cable to Outlet + Mat/Wrist Strap |
| Painted Surface | Cable to Outlet + Mat/Wrist Strap |
| Metal Desktop | Direct Contact + Wrist Strap |
For complete protection, combine your grounded mat with personal grounding equipment. You'll want to wear a wrist strap when working at your station and connect it to either the mat or a common ground point. If you're moving around, use heel or toe straps with your mat for continuous protection.
Test your grounding connections regularly to maintain effectiveness. Your ground resistance should measure less than 25 ohms, and all connections should be secure. Don't forget to inspect your cables and straps for wear or damage that could compromise their conductivity.
Essential Strap Testing Steps
Regular testing of your ESD wrist straps builds upon effective grounding practices to maintain complete static protection. You'll need to verify that your total system resistance stays under 35 megohms, following ANSI/ESD S20.20 standards. Daily testing and maintenance are crucial as wrist strap failures can occur unexpectedly.
When testing, wear the strap to confirm you're checking all components, including the wristband, ground cord, and skin interface.
Choose compatible components for your setup by matching ground points with your anti-static mat (typically using 10mm male studs with female snaps). You'll save money by purchasing your ground points and wrist straps together in bundled packages.
Connect your wrist strap to ground points that feature banana plug receptacles for secure, reliable connections.
Don't skip regular maintenance checks of your equipment. Look for common failure points like broken wires, dirty cuff interiors, or high skin resistance.
If you're handling particularly sensitive components, consider investing in continuous monitoring systems that provide instant feedback on strap failures. These monitors offer constant assurance that your grounding system is functioning correctly, which is especially vital in professional environments where static damage risks are high.
Humidity Control on Budget
You'll maximize your humidifier's effectiveness by placing it near cold spots and away from electronics while positioning it to distribute moisture evenly throughout your workspace.
Consider adding an Aqara weather sensor to monitor temperature, humidity, and pressure levels accurately in your space.
Natural humidity sources like indoor plants, open water containers, or damp towels can supplement your humidification efforts when funds are tight.
For basic humidity monitoring, you can start with an affordable DHT22 sensor connected to an Arduino setup, which provides reliable readings without breaking the bank.
Humidifier Placement Best Practices
Setting up your humidifier correctly can make a world of difference in maintaining best static protection while keeping costs down.
Position your humidifier at least 2 feet above the ground to guarantee proper mist circulation throughout your space. Place it on a firm, flat surface with a protective base or tray to catch any spills and prevent damage to your furniture. Using a clean, dry mat underneath the unit helps maintain surface protection and stability.
Choose a central location in your room for even humidity distribution, but keep the unit away from walls to avoid condensation buildup.
Don't place your humidifier near electronics or in direct sunlight, as this can cause damage and promote mold growth. If you're setting up in a nursery, maintain a 3-4 foot distance from cribs.
Direct the mist toward areas where you need humidity control most, but don't aim it too close to people or sensitive equipment.
Keep your humidifier away from heat sources or air-drying machines that could counteract its effectiveness.
Remember to monitor humidity levels regularly to prevent over-humidification, and position your unit where you can easily access it for maintenance and cleaning.
Natural Moisture Generation Tips
Through simple household items and natural resources, you can maintain proper humidity levels without investing in expensive equipment. Start by placing houseplants strategically around your space, as their natural transpiration process adds moisture to the air.
You'll get the best results by grouping several plants together in areas where static is most problematic. Placing them near heat-generating machines can help counter the dry micro-climates these devices create.
Create moisture sources by placing shallow water containers or damp towels near heat sources, which will accelerate evaporation and distribute humidity throughout the room. If you have an aquarium or decorative fountain, position it where it can benefit areas prone to static buildup.
During rainy weather, open your windows briefly to let in moisture-rich air, but monitor humidity levels to prevent excess dampness.
Replace carpeting with hardwood or tile flooring to improve moisture distribution and air circulation. You can also hang damp towels on drying racks or place bowls of water on windowsills where sunlight hits them.
Remember to maintain proper ventilation to prevent moisture from becoming stagnant and causing mold. Track humidity levels using an inexpensive hygrometer, aiming to keep relative humidity between 40% and 55% for ideal static prevention.
Tracking Without Expensive Equipment
Several practical methods exist for tracking humidity levels without investing in costly equipment. You can start by placing a basic hygrometer in your space, which provides reliable readings at a fraction of the cost of advanced systems. While smart humidifiers offer built-in sensors, you don't need them to maintain proper humidity control.
Simple observation methods can help you gauge moisture levels. Place a bowl of water near heat sources and monitor its evaporation rate – faster evaporation indicates drier conditions that need addressing.
Watch for static-related signs, too: if you're experiencing frequent static shocks, your humidity has likely dropped below 30%.
To maintain ideal conditions between 40-60%, you can create a basic monitoring routine. Check your space during different times of day, particularly in areas near machinery or synthetic materials.
If you're using Staticide, track its effectiveness as an indicator of humidity levels – when static problems return, it's time to boost moisture levels. Remember that localized dry spots might need extra attention, so move your monitoring tools around to identify problem areas.
This approach helps you maintain proper humidity without expensive equipment investments.
Essential Tool Modifications
Proper tool modifications form the foundation of any effective static protection setup. You'll need to guarantee all your hand tools, including pliers, wire cutters, and tweezers, are made from static dissipative materials. The handles should be conductive or static dissipative to prevent charge accumulation during use.
Your tools must integrate with your ESD protective worksurface, which provides a path to ground for static charges. When you're handling components, these tools will ground through both the worksurface and your own grounded connection.
You should regularly test your tools to confirm their resistance to ground falls between 1.0 x 10^6 to 1.0 x 10^9 ohms.
Store your tools in ESD-safe containers and clean them with ESD-safe cleaners to maintain their protective properties. If you're using holding fixtures, make sure they're made of conductive or static dissipative materials.
You can enhance your setup's effectiveness by using ionizers to neutralize static charges. Remember that your entire workstation functions as an integrated system – your tools, worksurface, and grounding connections work together to provide thorough static protection.
Home Office ESD Setup
Setting up ESD protection in your home office requires a systematic approach similar to professional environments, but on a smaller scale. You'll need to create a designated workspace where you can implement proper grounding systems and maintain consistent static control measures.
Start by establishing a common point ground connection that links to your home's equipment grounding conductor. You'll want to connect your anti-static mat and other ESD protective equipment to this single point to guarantee everything maintains the same electrical potential.
Don't forget to wear a properly connected wrist strap whenever you're handling sensitive electronics.
Create a complete ESD protected workstation by incorporating these essential elements:
- A static dissipative mat for your work surface, firmly connected to your common ground point
- A wrist strap with a reliable ground connection and a comfortable fit for extended wear
- Conductive storage containers or bags for protecting components when they're not in use
Regular upkeep is vital for your home setup. Test your wrist strap and surface mat connections daily, and keep your workspace clean and free from static-generating materials like plastic bags or styrene foam containers.
If you're moving around, consider using heel grounders to maintain continuous grounding protection.
Cost-Effective Storage Solutions
You'll find that making your own ESD storage boxes from aluminum foil-lined cardboard offers significant savings while maintaining effective static protection for your components.
Moisture-controlled shelving can be created by adding silica gel packets to repurposed conductive containers, which helps maintain ideal humidity levels for sensitive electronics.
Converting regular storage containers into ESD-safe options using conductive coatings or aluminum foil liners lets you maximize protection while minimizing costs.
DIY ESD Storage Boxes
Creating your own ESD storage boxes offers a cost-effective way to protect sensitive electronic components without breaking the bank. You can start with basic polypropylene bins and upgrade them using conductive coatings or antistatic sprays.
For enhanced protection, line your containers with conductive foam or metalized plastic bags, which create a reliable barrier against static discharge.
To build an effective DIY ESD storage system, consider these key steps:
- Apply a conductive coating to standard plastic bins, or cover them with aluminum foil to create an antistatic surface that prevents charge buildup.
- Install dividers made from conductive cardboard or fiberboard to organize components and prevent them from touching each other.
- Secure the lid with conductive tape and add a grounding point by connecting a wire from the container to a proper ground source.
Remember to standardize your box sizes for easy stacking and storage efficiency. You'll want to include compartments for different component types and guarantee proper sealing to maintain the ESD-safe environment.
For temporary solutions, you can use heat-sealed antistatic bags within your storage boxes for an extra layer of protection.
Moisture-Controlled Component Shelving
A well-designed moisture control system stands at the heart of protecting sensitive electronic components. When you're setting up moisture-controlled shelving, focus on maintaining humidity levels between 20%-60%RH to safeguard your electronic components and meet IPC standards.
You'll want to invest in a cabinet with regenerative desiccants, which eliminates the need for frequent replacements and keeps maintenance costs low. Look for models featuring multi-porous molecular sieves that automatically regenerate, ensuring a consistent dry environment for 15+ years of reliable service.
To maximize your storage efficiency, choose shelving with adjustable heights and ESD-safe materials. You'll benefit from smart features like humidity sensors and data logging systems that help you monitor conditions precisely.
When selecting a cabinet size, consider options like 718L or 1436L models based on your storage needs.
Don't forget to check for essential safety features: over-humidity alarms, door-open alerts, and quick recovery times after accessing components. These features help maintain proper moisture levels and extend your components' floor life while protecting against costly static damage.
The initial investment pays off through reduced component failures and improved manufacturing yield.
Repurposed Conductive Containers
For organizations working with static-sensitive components, repurposed conductive containers offer a practical and budget-friendly storage solution. You'll find that metalized plastic bags and conductive plastic containers provide effective ESD protection while keeping costs manageable. These materials help prevent static discharge events by maintaining surface resistivity levels below 1×10^6 ohm/sq and grounding quickly, often within two seconds.
When setting up your storage system, consider these proven approaches:
- Convert existing drawers into ESD-safe storage by lining them with conductive foam, ensuring components remain protected while maximizing your current space.
- Repurpose metalized plastic bags by cutting them to size and resealing them with a heat sealer, creating custom-fit protective pouches for different components.
- Transform standard metal bins into ESD-safe storage by ensuring proper grounding connections, offering a durable and cost-effective solution.
You'll want to test your chosen containers to verify they meet resistivity standards between 10^3 and 10^5 ohm/sq. While conductive coatings and specialized foam can be expensive, focusing on reusable solutions like metalized bags and properly grounded containers will help you maintain effective static protection without breaking your budget.
Workspace Layout Optimization
Efficient workspace layout serves as the foundation for effective static protection. You'll need to arrange your components and equipment in a logical manner that promotes smooth workflow while minimizing the risk of electrostatic discharge events.
Start by establishing clear pathways through your workspace to prevent accidents and guarantee easy access to all areas. Position your components to reduce walking distances, and install proper lighting to maintain visibility.
You'll want to use ESD-safe work surfaces and static-resistant flooring as your primary defense against static buildup.
Don't forget to implement proper grounding and bonding throughout your workspace. Install ionization systems where needed, and maintain appropriate humidity levels to reduce static risks. Make sure all your tools and equipment meet ESD safety standards.
Keep your workspace organized by following standardized procedures and conducting regular maintenance checks. You should monitor your static protection measures continuously and perform periodic audits to guarantee compliance.
Train your team members on proper static safety protocols and maintain documentation of your quality control measures. This systematic approach will help you create a cost-effective, static-safe environment without compromising on protection.
Basic Equipment Selection
Building on a well-organized workspace, selecting the right ESD-safe equipment forms the backbone of your static protection strategy. You'll need to focus on essential items that provide the most protection while staying within budget.
Start with an ESD workbench featuring dissipative laminate and built-in grounding points – it's the foundation of your safe work area.
For personal protection, you can't skip the basics. You'll need ESD-safe shoes with conductive materials to prevent static buildup, and protective gloves that meet EN 1149 standards for handling sensitive components.
When selecting ESD jackets, opt for Level 2 protection with surface resistivity less than 1 x 10^9 ohms for a good balance of protection and cost.
Picture your ideal setup with these three core elements:
- A sturdy ESD workbench with multiple grounding points and a matte-finish dissipative surface
- Comfortable ESD footwear with visible conductive strips for easy verification
- A properly fitted ESD jacket in dark blue or gray with carbon fiber threading visible in the fabric
Remember to verify that all equipment meets BS EN 61340-5-1 standards before purchasing, ensuring you're getting genuine ESD protection.
Safe Grounding Implementation
The implementation of proper grounding forms the cornerstone of any effective static protection system. To guarantee your facility's safety, you'll need to maintain a total electrical resistance of 10 Ohms or less in your grounding circuits while implementing soft grounding measures that limit current to 3 mA for personnel protection.
Start by establishing written policies that align with ANSI/ESD S20.20 standards. You'll want to identify all areas requiring static protection, including manufacturing floors and packing centers.
Connect all conductive equipment to earth ground and bond interconnected pieces to maintain equal potential, preventing dangerous static sparks.
Install visual indicators like LEDs to give your operators clear "GO / NO GO" feedback on grounding status. You can save money by choosing integrated systems like Earth-Rite MULTIPOINT II, which can handle multiple grounding stations while providing interlocking relay capabilities.
Don't forget to implement proper operator grounding through antistatic footwear, wrist straps, and specialized flooring.
Remember to verify your grounding systems regularly, especially for mobile equipment like trucks and railcars. Train your operators thoroughly on proper grounding procedures and maintain documentation of your static dissipation plan.
Maintenance and Testing Tips
Through consistent maintenance and testing, you'll maximize the effectiveness of your static protection systems while extending their operational life. Stick to gentle cleaning methods using ESD-safe cleaners and soft microfibre cloths. Don't use harsh chemicals or abrasive tools that can damage your protective surfaces – they'll end up costing you more in replacements.
Make these routine checks part of your maintenance schedule:
- Test the resistance between your antistatic mats and ground connections monthly, replacing any mats that show signs of wear or damage.
- Clean your ionizer electrode tips regularly and verify they're neutralizing static effectively.
- Check your wrist straps and ESD footwear daily before use to guarantee proper grounding.
Keep your work environment's humidity between 40-60% to minimize static buildup, and don't forget to inspect all grounding points periodically.
When cleaning ESD floors, start with an ESD-safe broom and dustpan before using approved cleaners. If you're working in a dustier environment, you'll need to increase your cleaning frequency.
Remember to use protective covers that you can easily clean or replace – they're much cheaper than replacing damaged equipment.
Frequently Asked Questions
Can I Use Aluminum Foil as a Temporary ESD Mat Substitute?
You can use aluminum foil as a temporary ESD mat, but it's risky. While it conducts electricity, it discharges too quickly and could damage your devices. It's better than nothing but not ideal.
How Often Should ESD Wrist Straps Be Replaced for Optimal Safety?
You should replace your ESD wrist strap annually for maximum safety. However, if you notice wear, damage, or failed tests sooner, don't wait – replace it immediately to maintain proper ESD protection.
What Household Items Can Effectively Clean ESD Mats Without Damaging Them?
You shouldn't use household items on ESD mats. Instead, use plain water with a lint-free cloth, or invest in specialized ESD mat cleaners to maintain your mat's protective properties and prevent damage.
Is It Safe to Daisy-Chain Multiple ESD Mats Together?
No, you shouldn't daisy-chain ESD mats together. It'll compromise your static protection by exceeding resistance limits and violating safety standards. Always ground each mat independently to a common ground point for proper protection.
Do LED Desk Lamps Generate Enough Static to Require Special ESD Protection?
You don't need to worry about LED desk lamps generating harmful static electricity. However, you'll want to handle them carefully during setup and maintenance since they're sensitive to static discharge from external sources.
In Summary
Static protection doesn't have to drain your wallet. You've now got the tools to create a safe, effective ESD workspace using budget-friendly solutions. Remember to regularly test your grounding points, maintain proper humidity levels, and keep your workspace organized. By implementing these 10 cost-effective strategies, you'll protect your sensitive electronics while saving money. Start with the basics and upgrade as needed.

Leave a Reply