To install ESD mats correctly, you'll need to start with thorough surface preparation by cleaning and leveling your workspace. Make certain to acclimate your mat at room temperature for 4-8 hours before installation. Use appropriate ESD-safe adhesives or double-sided tape for secure placement, and install grounding snaps every 10 feet with proper connections to a reliable electrical ground. You'll need to verify conductivity using a resistance megohmmeter to confirm readings fall within 1 x 10^5 to 1 x 10^11 ohms/square. Regular maintenance and testing are essential for long-term effectiveness, and proper installation techniques can make all the difference in protecting your sensitive electronics.
Understanding ESD Mat Types
When choosing an ESD mat, you'll encounter two primary categories: vinyl and rubber. While vinyl mats are more budget-friendly, they're less durable than their rubber counterparts. Rubber mats offer superior resistance to heat and chemicals, making them ideal for demanding environments. Pre-cut mats with grounding hardware included can simplify installation. Regular cleaning with neutrals is crucial for maintaining optimal electrical performance.
You'll need to decide between work surface mats and floor mats, as each serves distinct purposes. Work surface mats are thinner and designed for tabletop applications, while floor mats are built to withstand constant foot traffic and prolonged standing.
The mat's layer structure will affect its performance. You can select from single-layer, two-layer, or three-layer configurations. Two-layer mats combine a dissipative surface with a conductive bottom layer, while three-layer mats sandwich a conductive layer between dissipative layers.
To guarantee proper ESD protection, your mat must have a surface resistance between 1 x 10^5 and 1 x 10^11 ohms/square to be considered dissipative. Anything below 1 x 10^5 is conductive, while readings above 1 x 10^12 are insulative and won't provide ESD protection.
Pre-Installation Surface Preparation
A proper foundation is essential for installing ESD mats effectively. You'll need to thoroughly clean the subfloor, removing all debris and contaminants that could affect the ESD performance. Following strict material guidelines ensures optimal protection for sensitive electronic equipment.
Don't use household cleaners, as they can leave insulative residues that compromise conductivity. Instead, opt for recommended ESD mat cleaners that maintain peak performance. Setting up 1 to 10 megohms resistance is critical for proper grounding.
Before installation, you'll want to assess the subfloor's condition carefully. Check for cracks, unevenness, and moisture issues that could lead to future problems.
If you find any issues, repair and level the surface, and apply moisture barriers where necessary to prevent seepage that could compromise the ESD flooring system.
- Let your ESD mats acclimate by laying them flat for four hours at room temperature
- Test all grounding points and connections using a resistance meter
- Verify the electrical system's junction box is properly connected to earth ground
Remember to conduct pre-installation resistance testing from the ground snap to the common ground point, and measure surface resistance between points 10 inches apart.
You'll need to ascertain continuous conductivity throughout the system before proceeding with the final installation.
Tools and Materials Required
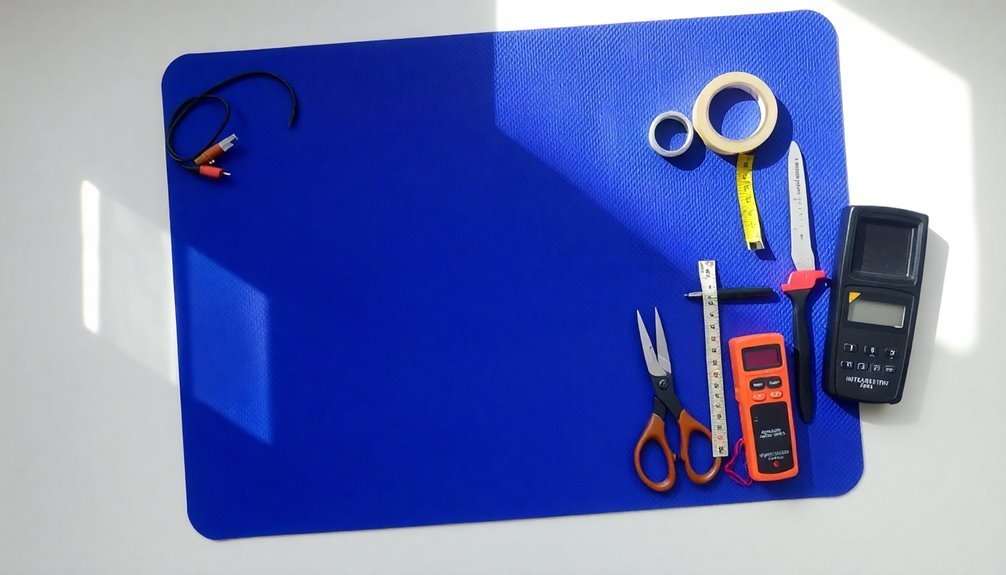
You'll need several essential tools for installing your ESD mat, including grounding hardware with banana jacks, snap kits, and a 1 meg Ohm resistor for safe static discharge.
The grounding kit must be installed every 10 feet of matting to maintain proper ESD protection.
Using materials made from natural rubber compounds, this specialized matting provides both conductivity and ergonomic benefits for workers.
Measuring tools help guarantee precise mat placement and proper connection points, while testing equipment verifies the mat's conductivity and grounding effectiveness.
The grounding hardware components, including the ground cord, attachment points, and wrist straps, work together to create a complete static-safe workstation that meets safety standards.
Essential Equipment List
Your grounding setup must include cables with proper terminals, 1 meg ohm resistors for safe discharge, and common point ground cords. Don't forget banana plugs, jacks, and snap connectors to guarantee secure connections between all components. Basic installation tools like screwdrivers and pliers are vital for proper assembly.
- Picture a clean workbench with a smooth, dark blue ESD mat firmly secured, its grounding cord neatly connected to a common ground point.
- Envision properly equipped personnel wearing wrist straps connected to the same ground point, with heel grounders providing additional protection.
- Visualize a workspace maintained at ideal humidity levels, free from static-generating materials like carpets or painted surfaces.
Remember to maintain your ESD equipment with appropriate cleaning supplies and regularly check all connections to guarantee continuous protection against static discharge.
Measuring and Testing Tools
Beyond gathering basic installation equipment, proper measurement and testing tools play an essential role in confirming ESD mat performance. You'll need a surface resistivity meter with resistance-to-ground functionality and a multimeter for continuity testing. Don't forget to include a current-limiting resistor (1 megohm) in your wrist strap ground cord for safety.
| Tool | Purpose |
|---|---|
| Surface Resistivity Meter | Measures mat's resistance to ground and surface resistivity |
| Continuity Tester | Verifies ground connection integrity and workstation continuity |
| Multimeter | Tests proper grounding and performs resistance measurements |
Before installation, you'll use these tools to confirm your workspace conditions. Test the surface resistance to verify it's less than 1 x 10^9 ohms and check continuity from the ground point to all workstation parts. After installation, you'll need to conduct regular verification tests to maintain ESD protection.
Remember to let your mat acclimate for at least 8 hours before installation and use your testing equipment to confirm all connections are secure. Regular retesting will confirm your ESD protection remains effective and meets safety standards.
Grounding Hardware Components
Proper grounding hardware selection forms the foundation of an effective ESD mat installation.
You'll need ground cords with banana jacks for connecting wrist straps, universal snap kits with varying screw lengths, and grounding snaps designed for different mat configurations. Each connection point should house a 1 meg Ohm resistor to guarantee safe grounding, while common point ground cords will help you connect both your table mat and wrist strap to the same grounding point.
When selecting your grounding components, consider these essential items:
- 15-foot low-profile ground cords with dual banana jacks, allowing you to connect multiple wrist straps while maintaining a clean workspace.
- Universal snap kits containing both short and long screws, enabling you to work with mats of varying thicknesses and compositions.
- Push and cinch snaps for soft mats, or screw-on field installable snaps for two-layer mats, depending on your specific mat type.
Choose bench mount grounds when you want to keep your workspace clear, or opt for dome-style ground cords for floor mats where accidental disconnection could be a concern.
Remember to inspect your hardware regularly for wear and store components properly when not in use.
Grounding Methods and Requirements
Grounding an ESD mat correctly forms the foundation of effective static protection in your workspace. You'll need to connect your mat to a reliable AC electrical ground, which you can identify by locating proper grounding points in your area. The most common grounding point is the center screw of an AC electrical face plate cover.
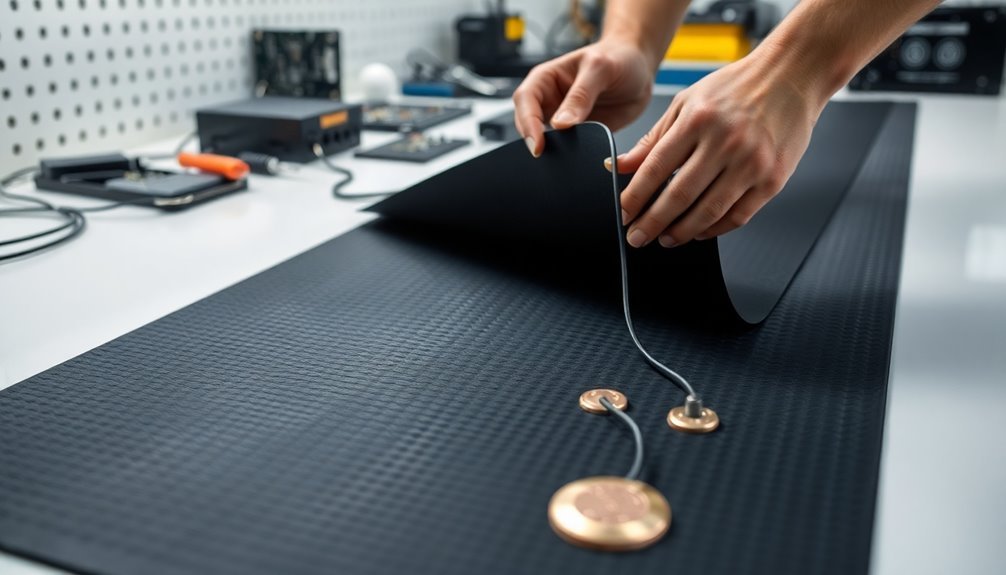
To install the grounding snap, you'll want to poke a small hole using a scratch awl first, then press the snap downward until its prongs fully penetrate the mat. Connect your grounding cord to both the mat's snap and your designated ground point.
For larger mats, install additional snaps every 10 feet to guarantee consistent protection.
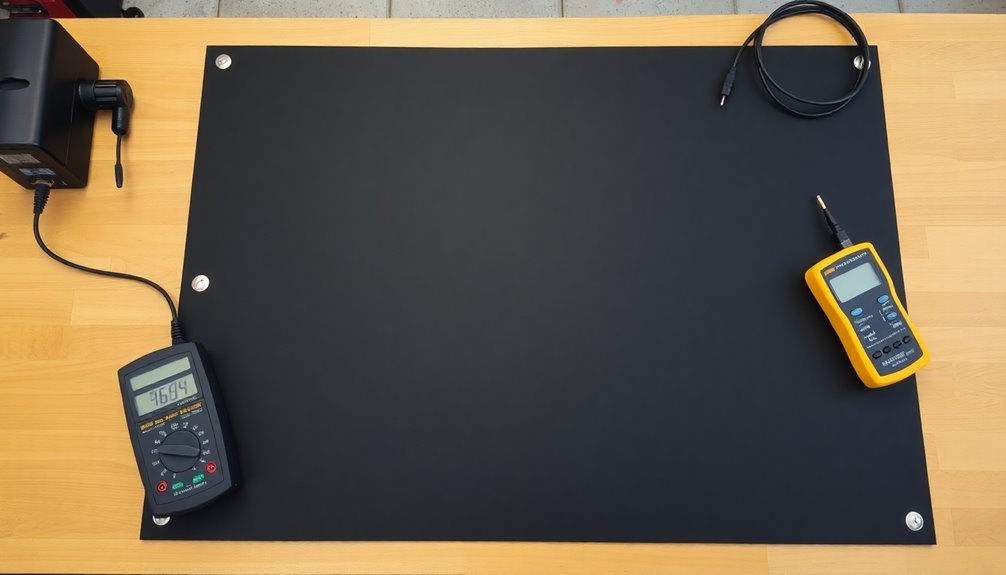
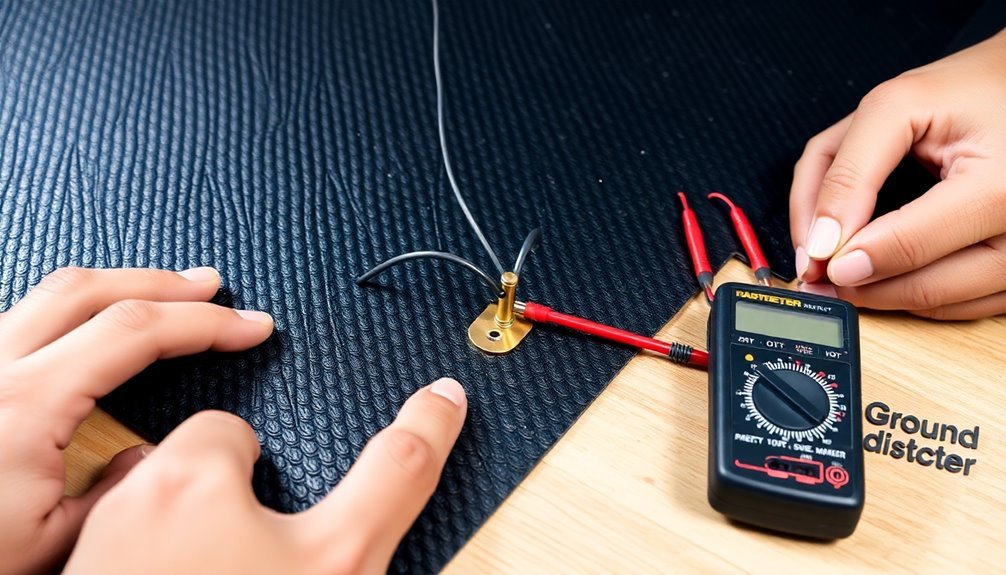
Don't forget to test your grounding setup using an ESD tester or multimeter set to resistance mode. You should get a reading close to zero or within your manufacturer's specified range. Remember to ground each mat individually rather than daisy-chaining them together.
Keep your mat clean with specialized cleaners to maintain conductivity, and perform regular maintenance checks to verify your grounding system continues functioning properly. Following these requirements will help prevent costly static damage to your electrical equipment.
Proper Mat Placement

Once you've established your grounding system, successful ESD protection depends on smart mat placement in your workspace. Before installation, let your mat acclimate by laying it flat for 4-8 hours at room temperature. This vital step prevents warping and guarantees proper conductivity when you're ready to install.
For peak performance, you'll need to carefully assess your installation area and address any subfloor issues that could affect the mat's effectiveness. Don't overlook the importance of a clean, debris-free surface, as contaminants can interfere with proper grounding.
- Position your mat where it'll make direct contact with your work surface, making sure the grounding snap location is easily accessible and won't interfere with your workflow.
- Avoid placing multiple mats in a daisy chain configuration – instead, connect each mat directly to a common ground point.
- Consider using conductive adhesives or copper strips along the edges to create a continuous path to ground, especially for larger installations.
After placement, perform resistance-to-ground tests to verify proper conductivity. Remember to schedule regular inspections and maintenance to guarantee your mat continues providing reliable ESD protection over time.
Installing Ground Connections
You'll need to choose between a direct mat-to-ground connection or a common point ground that connects both your mat and wrist strap to the same grounding point.
Before installing your selected grounding system, check that your grounding cable meets the required resistance of 1 megohm ± 20% using an ESD resistance meter.
Once installed, you must test your ground wire connections daily and monitor them with specialized equipment to guarantee consistent ESD protection.
Selecting Ground Connection Types
Prior to installing any ground connections, you'll need to identify the appropriate fastener type based on your ESD mat's composition. Different mats require specific grounding methods – single layer, dual layer, and 3-layer mats each have unique requirements.
For dual-layer mats with a dissipative top and conductive back, you'll want to use screw-on snap kits, while 3-layer mats need push and cinch snaps for proper grounding.
When selecting your ground connection, consider these critical components:
- The grounding cable needs a #10 ring terminal and should include a 1 meg ohm resistor to control discharge events.
- Your mat's surface material dictates the snap type – soft mats work best with push and cinch snaps, while firmer materials can handle screw-on options.
- The installation tools you'll need vary by fastener type – Phillips screwdrivers for screw-on snaps, punch tools for push and cinch types.
Your grounding cable should connect to a dedicated common point ground that's linked to equipment ground.
Don't use this connection point for multiple devices, as it can compromise the effectiveness of your static control system.
Testing Ground Wire Integrity
During ground wire installation, testing the integrity of your connections is a crucial step that requires specific measurement tools and procedures.
You'll need an ESD resistance meter and a resistance megohmmeter with 5 lb. electrodes to properly measure the resistance values between surfaces and ground points.
You should test both top-to-ground (RTG) and top-to-top (RTT) measurements to confirm complete functionality. If your RTG readings exceed 5 x 10^8 ohms, you'll need to replace the ESD mat.
Make sure you're testing your ground wire connections at least two to four times annually, and always perform additional tests when you move or install new workstations.
When conducting these tests, verify that your working surface resistance to ground stays below 1 x 10^9 ohms when using a grounded conductive surface.
Don't forget to include a current limiting resistor (1 megohm) in your ground cord to control electrostatic discharge events.
Keep in mind that regular testing should be part of your compliance verification plan, and you'll need to document these measurements to maintain proper ESD protection standards.
Testing for Proper Conductivity
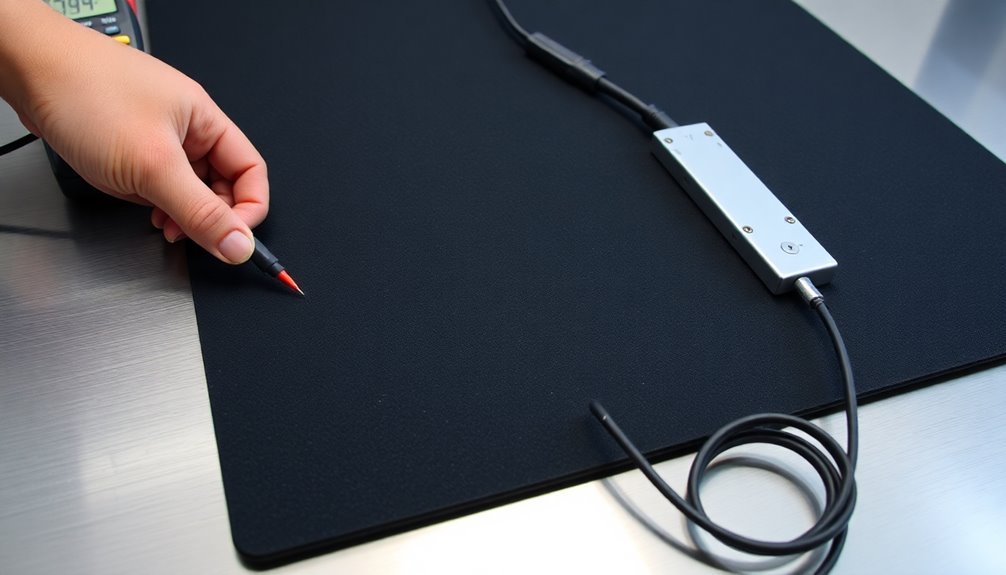
Testing an ESD mat's conductivity requires three essential measurements to guarantee proper functionality.
You'll need a resistance megohmmeter with 5 lb. electrodes to accurately measure the resistance-to-ground (Rtg) values. For compliance with ANSI/ESD S4.1 standards, your mat must register less than 1 x 10^9 ohms.
When testing your mat's conductivity, follow these critical measurements:
- Place the electrodes 36 inches apart on the mat's surface, ensuring firm contact without movement or shifting during measurement.
- Position one electrode at the mat's center and the other at the grounding point where the snap is installed.
- Test multiple points across the mat's surface, particularly in high-traffic areas where wear might affect conductivity.
You should perform these tests systematically, at least two to four times annually, and always after moving or installing new workstations.
If your measurements show Rtg values exceeding 5 x 10^8 ohms, you'll need to replace the mat.
Remember to maintain detailed records of all testing results to demonstrate ongoing compliance with ESD standards and identify any deterioration patterns over time.
Common Installation Mistakes
You'll find that improper grounding connections are among the most serious mistakes when installing ESD mats, as they can completely nullify the mat's static dissipation capabilities.
Failing to properly secure snap fasteners or using incorrect grounding techniques like daisy chaining can create discontinuities in the static discharge path.
Similarly, if you skip essential surface preparation steps like cleaning the subfloor or allowing the mat to acclimate, you'll risk poor conductivity and reduced ESD protection.
Improper Grounding Connections
Proper grounding connections serve as the foundation for effective ESD protection, yet many technicians make critical mistakes during installation. You'll need to avoid daisy chaining mat ground cords and instead use a common point ground cord. Your working surface must have a volume resistance below 1 x 10^8 ohms and electrically couple with the grounded surface for effective static dissipation.
When setting up your grounding hardware and cables, confirm you're using the right components. Select appropriate snap types for your mat layers – screw-on snaps work best for 2-layer mats, while push & cinch snaps suit 3-layer mats. Your grounding cable should terminate in a #10 ring terminal and include a 1-megohm resistor to control discharge events.
Three critical testing requirements you can't ignore:
- Measure resistance to ground (Rtg) using a megohmmeter with 5 lb. electrodes
- Verify that mat Rtg remains below 1 x 10^9 ohms
- Perform both top-to-top (RTT) and top-to-ground (RTG) resistance tests regularly
Replace any mat that measures above 5 x 10^8 ohms, as it's no longer providing adequate protection against static discharge.
Skipping Surface Preparation
Beyond grounding connections, surface preparation stands as one of the most overlooked aspects of ESD mat installation. You'll need to thoroughly clean your subfloor, removing all debris and contaminants that could interfere with proper conductivity.
Don't ignore cracks or uneven surfaces – these issues must be addressed before you proceed, as they can lead to tile lifting and delamination later.
Before you start laying your mats, you'll need to guarantee proper acclimation. Let your ESD mats lay flat for at least four hours at room temperature. This vital step prevents warping and allows the materials to adjust to your facility's temperature and humidity conditions.
If you skip this step, you're risking expansion or contraction after installation.
When it comes to adhesives, don't cut corners. You'll need to use conductive adhesives or copper strips that are compatible with your ESD flooring materials.
Make sure you're creating a continuous path for static electricity and properly bonding each tile to the subfloor. Following the manufacturer's guidelines for adhesive selection and application will guarantee your ESD flooring system maintains its integrity and performance over time.
Maintenance and Cleaning Tips
Regular maintenance of ESD mats involves specific cleaning protocols to maintain their static-dissipative properties.
You'll need to use specialized ESD cleaners since regular cleaning products can leave behind insulating residues that compromise the mat's effectiveness.
Don't use any cleaners containing silicone, as they'll create a barrier that prevents proper static dissipation.
To guarantee your ESD mats continue functioning properly, you should test their resistance to ground regularly.
If you find that a mat's resistance exceeds 5 x 10^8 ohms, it's time to replace it.
You'll want to conduct these tests at least two to four times per year, especially after moving workstations or benches.
- Wipe down your ESD mat with approved cleaners using smooth, consistent strokes from one end to the other
- Test the mat's resistance using a megohmmeter with 5 lb. electrodes placed at strategic points
- Document all maintenance activities and test results in your compliance verification plan
Remember to inspect your mats regularly for signs of wear, damage, or contamination.
Early detection of issues helps maintain workplace safety and guarantees continuous protection against electrostatic discharge.
Safety During Installation
While maintaining your ESD mats keeps them effective, installing them safely is just as important. When working with installation tools like Phillips head screwdrivers or awls, you'll need to handle them with care to prevent injury.
Don't rush the process, as proper safety measures can prevent accidents during installation.
Before you begin, verify that your electrical outlets have the correct wiring configuration. This step is vital because improper wiring can lead to electrical shock.
When connecting your grounding equipment, never attach your wrist strap through the worksurface, as this adds unnecessary electrical resistance and compromises safety.
You'll want to use only manufacturer-recommended screw-on snap kits for your specific type of ESD mat. Following the manufacturer's instructions for all grounding equipment and accessories isn't just a suggestion—it's essential for your safety and the mat's effectiveness.
Remember to test the ground connection using a continuity tester or multimeter before you start using the mat. By maintaining compliance with international standards like ANSI/ESD S6.1 and S4.1, you'll guarantee both your safety and the proper functioning of your ESD protection system.
Environment and Temperature Considerations
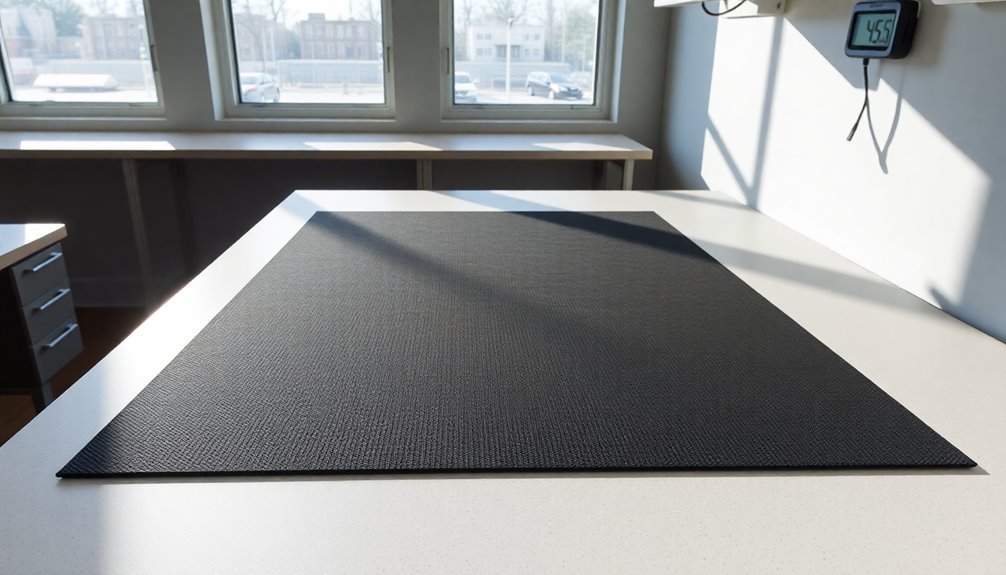
To guarantee peak ESD mat performance, proper environmental conditions must be maintained during and after installation. Your workspace's humidity level needs to stay between 40-60%, as this range effectively minimizes static buildup.
Before installation, you'll want to let your ESD mat acclimate to room temperature for at least 4 hours – this helps eliminate any wrinkles or deformations from shipping and storage.
When preparing your installation environment, consider these key factors:
- Clear out any debris, dust, or particles from your installation surface – even tiny contaminants can create bumps that affect the mat's conductivity.
- Remove potential static generators from the workspace, such as plastic materials or synthetic fabrics that could interfere with the mat's performance.
- Ascertain your grounding infrastructure is properly set up, including accessible earth bonding points and correctly wired electrical outlets.
You'll need to maintain these environmental conditions after installation too. Keep monitoring humidity levels, regularly inspect for static-generating materials in your EPA, and ascertain all equipment remains properly grounded.
If you're installing mats in high-traffic areas, pay special attention to temperature fluctuations that could affect the mat's performance over time.
Performance Monitoring Guidelines
Once you've installed your ESD mat, implementing a thorough monitoring system becomes imperative for maintaining its effectiveness. You'll need to regularly inspect grounding connections, check for wear and tear, and confirm proper cleaning with ESD-safe solutions. Don't forget to verify that your workspace maintains humidity levels between 40-60% to minimize static buildup.
Testing and calibration form the backbone of performance monitoring. You'll want to conduct regular resistance measurements using an ESD Resistance Meter, confirming your RTG stays below 1 x 10e9 ohms. Here's a quick guide to important testing parameters:
| Test Type | Frequency | Critical Value |
|---|---|---|
| RTT (Top-to-Top) | Monthly | Per STM 4.1-2017 |
| RTG (Top-to-Ground) | Weekly | <1 x 10e9 ohms |
| Ground Points | Monthly | Verify Connection |
When troubleshooting, check for common issues that might affect performance. Look for debris under the mat, verify grounding cord connections, and confirm you haven't placed the mat on insulative surfaces. If you notice significant wear or damage, don't hesitate to replace the mat – it's vital for maintaining consistent ESD protection.
Frequently Asked Questions
Can ESD Mats Be Stacked on Top of Each Other?
You shouldn't stack ESD mats on top of each other. It'll interfere with their static dissipation performance and proper grounding. Always use a single mat with its own grounding connection for ideal protection.
How Long Does a Typical ESD Mat Installation Certification Remain Valid?
You'll need to check your specific facility's requirements as certification periods aren't standardly defined. However, you should test your ESD mats 2-4 times yearly and whenever workstations are moved or installed.
Do ESD Mats Affect Wireless Signals or Electronics Not Touching Them?
You don't need to worry – ESD mats won't affect your wireless signals or electronics that aren't touching them. They're designed to only dissipate static electricity through direct contact with grounded surfaces.
Can ESD Mats Be Custom-Cut Without Compromising Their Static-Dissipative Properties?
Yes, you can safely cut ESD mats to custom sizes without affecting their static-dissipative properties. Just make certain you're using sharp scissors or a utility knife and allow proper acclimation before cutting to maintain effectiveness.
Are There Special Disposal Requirements for Old or Damaged ESD Mats?
You'll need to check local regulations and manufacturer guidelines for ESD mat disposal. Due to potential hazardous materials, it's best to wear protective gear and dispose of them according to your area's waste management rules.
In Summary
Installing ESD mats correctly will protect your sensitive electronic equipment and create a safer work environment. You'll need to verify proper grounding, regular cleaning, and periodic testing to maintain peak performance. Don't forget to monitor the mat's condition and replace it when signs of wear appear. By following these installation and maintenance guidelines, you've taken an essential step in preventing costly static damage.


Leave a Reply