
To properly ground your protective mat, you'll need copper grounding wires, snap connectors, and a verified ground point. Start by letting your mat lay flat for 4 hours at room temperature. Install at least two snap connectors per mat, securing them with speed nuts and washers until the prongs puncture through. Connect the ground cord's snap end to the mat connector and attach the other end to a verified ground point – typically a properly tested outlet or dedicated ground rod. Certify all connections remain tight and secure. Following industry standards and proper installation techniques will help guarantee maximum protection for your setup.
Required Tools and Materials

Assembling the right tools and materials before starting your grounding wire installation will guarantee a smooth and efficient process. You'll need several essential tools, including wire clamps, grounding snaps, and a sturdy shovel or post-hole digger for creating the ground rod holes.
For the installation itself, make certain you've got a ground mat, which is a prefabricated wire mesh that protects operators from touch potentials. The mats utilize silver brazed joints that provide exceptional strength to withstand heavy vehicle traffic and installation stress.
You'll also need ground wire for connecting the system to your electrical panel, and proper wire clamps to secure these connections.
Don't forget the core materials: a ground rod as your primary grounding element, an earth pit to house it, and earth-enhancing compound to improve soil conductivity. You'll want to have copper components on hand for your connections to verify low electrical resistance.
Safety equipment is non-negotiable. Equip yourself with protective gloves, eye protection, and appropriate headgear. Keep your safety manual within reach for reference.
For the technical work, you'll need a rod-driving hammer, wire cutters, and high-conductivity couplers if you're extending ground rods.
Having cable poles and connectors ready will help you manage and secure your grounding cables properly.
Understanding Mat Grounding Basics
Why are grounding mats essential for electrical safety? They create an equipotential zone that protects you from dangerous step and touch potentials while working near electrical equipment.
When properly installed, these mats limit electrical risks and provide a safe working environment. Three common designs include spiral wire, zig-zag, and grid-type mats.
You'll need to understand several key principles before installing grounding wires. Your mat must be electrically bonded to the equipment you're working on through a reliable ground cable assembly.
If you're working near pipelines, you'll want to install the mat under a few inches of high-resistivity washed stone and include a decoupler to maintain both cathodic protection and safety bonding.
The effectiveness of your grounding mat depends heavily on earth resistivity, which varies based on soil moisture, mineral content, and soil type. You should space grounding electrodes more than six feet apart for maximum efficiency.
When expanding protection, you can connect multiple mats in series.
Remember to keep your mat clean and protected from corrosion. Regular maintenance includes wiping with a damp cloth while avoiding harsh chemicals.
Never expose the mat to standing water, excessive heat, or direct sunlight, as these conditions can compromise its safety features.
Selecting Proper Grounding Points
Three critical factors determine proper grounding point selection: safety, reliability, and accessibility.
For maximum safety, you'll need to focus on electrical outlets that have been properly tested and verified using devices like the Desco 98130 AC Outlet Analyzer.
When connecting to outlets, you must include a 1 Mohm resistor in the plug to limit current flow and protect users. Maintaining daily testing protocols helps ensure optimal ESD protection.
Don't rely on makeshift solutions like conductive stakes or large metal objects, as these methods aren't consistently reliable. Instead, follow ANSI/EOS/ESD S6.1 standards by establishing a common point ground system.
You'll want to use approved grounding blocks and multi-grounding hubs for connecting multiple devices safely.
Your grounding installation requires regular maintenance and inspection. Set up a routine schedule to test connections, verify outlet wiring, and check ground cord integrity.
If you're dealing with complex installations or high-risk environments, consulting experts is crucial. Remember to implement protective measures like decouplers when isolating grounding mats from pipelines.
Always comply with industry standards and maintain proper documentation of your grounding system's testing and maintenance.
Mat Positioning Guidelines
With your grounding points properly selected, correct mat positioning becomes your next key focus. You'll need to guarantee each mat is placed with precision to maintain both safety and functionality.
When positioning multiple mats, start by performing a dry fit with joining trim to establish proper spacing without making permanent attachments.
- Position your mat carefully by grasping the long edges and maintaining a slight downward bow during placement to prevent width-wise bending.
- Establish an 18-inch spacing pattern for your fasteners to provide maximum stability and prevent mat damage.
- Align your edges using AE-2 or AE-3 aluminum edging to create safe, ramped approaches and protect wiring.
Install a minimum of two grounding snaps per mat to ensure proper static dissipation throughout the surface.
Before securing the mat, you'll want to thoroughly clean the installation surface, removing all debris that could affect mat performance.
When you're ready to fasten, use countersunk or low-profile screws to eliminate potential trip hazards.
For multiple mat installations, pay special attention to the connection points, guaranteeing proper alignment and spacing between units.
Remember to route all wiring through designated channels in the edging system to protect cables from damage during regular use.
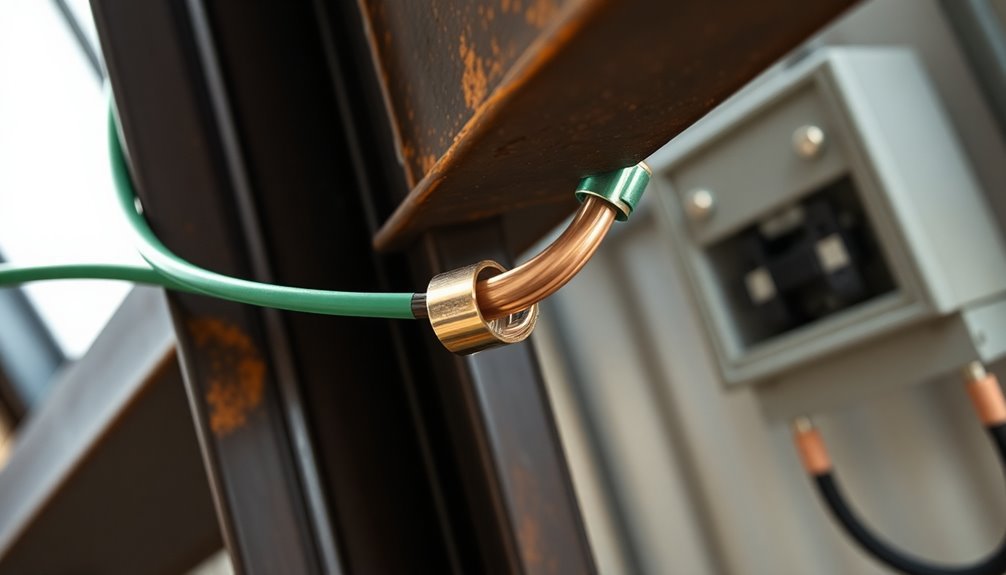
Installing Snap Connectors
Proper snap connector installation serves as a critical step in establishing reliable mat grounding. Before you begin, let your mat lay flat for 4 hours at room temperature to guarantee the best installation conditions.
First, select the appropriate snap connector type – either male or female – that's compatible with your 10mm grounding socket. Choose a location on the mat that's away from high-traffic areas but close to your ground point. Mark the spot and punch a hole using the designated tool. The nickel-plated brass material ensures optimal conductivity for your grounding system.
Insert the snap connector's base through the punched hole and secure it with a speed nut on the mat's back side. Use washers to guarantee a tight fit, then tighten the screw through the assembly.
Attach the appropriate top piece to complete the snap installation.
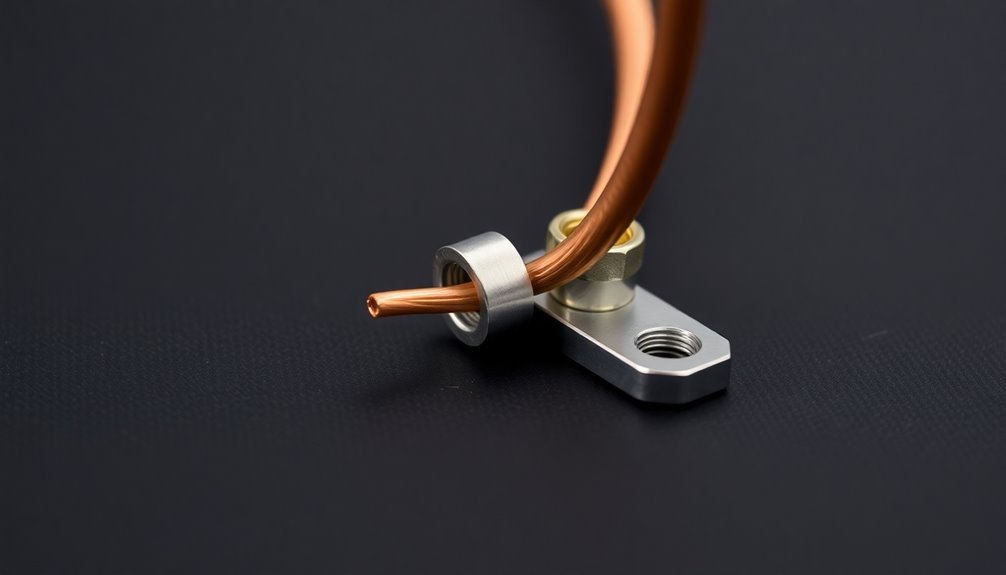
Once you've installed the snap, connect your ground cord by attaching its snap end to the mat connector. Run the cord to your verified ground point and secure it using a ring terminal. If needed, you can shorten the wire by cutting, stripping, and attaching a new ring terminal.
Secure the wire to your bench to keep it organized, then verify the electrical connection between the mat and ground.
Testing Ground Connections
Regular testing of your mat's ground connections helps guarantee maximum protection against static discharge. You'll need to verify that your grounding system meets safety standards and maintains low resistance values as specified by the National Electric Code (NEC).
- Test your mat's ground connections during initial installation and at regular intervals afterward
- Choose the appropriate testing method based on your setup and requirements
- Document all test results for future reference and compliance purposes
You can use several reliable methods to test your mat's ground connections. The selective earth ground testing method works well for specific sections of your installation, using a clamp meter and two earth stakes placed 20 meters apart. The recommended ground resistance should be 5.0 ohms or less for optimal protection of sensitive equipment.
If you need to test the entire system, the fall-of-potential method provides thorough results but requires complete power isolation.
For convenience, you might prefer the induced frequency testing method, which doesn't require power disconnection and works with live systems through the neutral return wire.
Whichever method you choose, confirm you're testing for both resistance values and potential corrosion issues. Early detection of problems helps maintain your mat's effectiveness and prevents safety hazards from developing.
Common Grounding Mistakes

Several common mistakes can compromise your grounding system's effectiveness and create serious safety hazards. When installing grounding wires for mat protection, you'll need to avoid incorrect wire sizing, improper connections, and insufficient bonding. Don't wrap excess ground wire in coils, as this increases resistance and weakens surge protection. Remember that each device needs individual bonding, even when using a grounded water pipe. Always ensure you reattach metal raceways after any project modifications.
| Common Mistake | Safety Impact |
|---|---|
| Wrong wire size | Increased impedance, overheating risk |
| Single rod installation | Inadequate resistance reduction |
| Improper bonding | Compromised equipment protection |
| Coiled ground wires | Reduced surge protection |
| Incorrect connections | Potential shock hazards |
You'll need to guarantee you're meeting NEC resistance requirements of 25 ohms or less, which often requires multiple grounding rods. Don't daisy-chain devices in ways that break equipment grounding continuity. Pay special attention to telecom and low-voltage equipment grounding requirements. When installing grounding electrode conductors, avoid excess bends and use only listed clamps. For mat protection specifically, match your grounding system to the mat's load-bearing capacity and consider site-specific conditions like soil type and slope.
Safety Precautions During Installation
Having covered common grounding mistakes, let's focus on protecting yourself during the installation process. Before you touch any wires or equipment, make certain you've taken essential safety measures to prevent accidents and injuries.
You'll need proper safety gear, including protective eyewear, clothing, and thick-soled shoes.
- Start by turning off power at the breaker and implementing lockout/tagout procedures – don't just rely on someone's word that the power is off.
- Use a voltage tester to verify all wires are dead before handling them, and double-check your readings.
- Keep your tools organized and within reach, making certain you have voltage testers, wire cutters, and needle-nose pliers readily available.
When working with grounding wires, maintain straight lines and avoid sharp bends. You'll want to keep Ethernet cables and ground wires within 6 inches of each other to prevent ground loop current.
Don't forget to use UV-rated materials for outdoor installations, and always test your bonding connections with a continuity tester.
After installation, verify all connections are secure by gently pulling on them, and document your work for future reference.
Maintenance and Inspection Procedures

An exhaustive maintenance schedule forms the backbone of any effective grounding system. You'll need to establish baseline figures through a commissioning inspection, then conduct regular 9-month interval checks to compare current results against these initial measurements.
Don't skip the 3-5 year intensive audits by qualified third-party companies, as they'll catch issues your routine checks might miss.
Your inspection routine should include 4-point tests to measure earth resistance, 3-point tests for RTG measurements, and 2-point tests for metallic components. Use quality ground resistance meters from trusted manufacturers like Fluke or AEMC.
You'll also need to monitor soil moisture levels, as they greatly impact your system's performance.
Don't overlook visual inspections for corrosion, damage, or loose components. Check your grounding electrode connections to the main panel, and confirm your wires aren't bunched, coiled, or under tension.
If you spot any issues, address them immediately. For mat protection specifically, you'll want to verify your ground resistance readings regularly and maintain proper wire tension to prevent high impedance paths that could compromise your system's effectiveness.
Meeting Industry Compliance Standards
Three major standards govern mat protection grounding systems: ANSI/EOS/ESD S6.1, NFPA guidelines, and TM 5-690 specifications. You'll need to guarantee your installation meets these requirements while maintaining effective voltage gradient control and proper connection to common point grounds.
- Follow ANSI/EOS/ESD S6.1's mandate that all elements in your ESD protected area connect to the same common point ground, guaranteeing electrical continuity throughout the system.
- Implement NFPA guidelines for grounding and bonding, including proper conductor sizing and placement of down conductors for lightning protection on opposite sides of structural boundaries.
- Adhere to TM 5-690's integrated practices for C4ISR facilities, particularly when dealing with electromagnetic threats and EMI control.
When you're installing grounding wires, you'll need to select appropriate grid spacing (2" x 2" or 4" x 4") and use copper-clad steel or solid copper wire that meets specified gauge requirements.
You must bond grounding conductors to the exterior of the structure, while keeping internal conductors connected to interior surfaces.
Don't forget to use 35% silver alloy brazing material for connections to guarantee long-term durability and maintain compliance with safety standards.
Frequently Asked Questions
Can Multiple Mats Be Connected to the Same Grounding Point?
Yes, you can connect multiple mats to the same grounding point. It's actually recommended as this helps maintain equal electrical potential and prevents dangerous voltage differences between mats while ensuring thorough protection for users.
How Often Should Grounding Cables Be Replaced Under Normal Use?
You'll need to replace your grounding cables every 15-20 years under normal conditions. However, you should inspect them every 1-3 years and replace them sooner if you notice corrosion, damage, or degradation.
Does Humidity Affect the Performance of ESD Mat Grounding?
Yes, humidity substantially affects your ESD mat's grounding performance. You'll notice reduced effectiveness in low humidity (below 30%) while high humidity (above 70%) can cause corrosion. For best results, maintain 40-60% relative humidity.
What's the Maximum Distance Between Mat and Grounding Point for Effectiveness?
You'll want to keep your ESD mat's ground connection within 3 meters of the grounding point for maximum effectiveness. Going beyond this distance can reduce charge decay rates and compromise static protection.
Can Static-Dissipative Floor Tiles Replace the Need for Grounded Mats?
Yes, you can replace grounded mats with static-dissipative floor tiles. They'll provide better facility-wide protection and durability. However, you'll still need proper grounding strips installed under the tiles for effective static control.
In Summary
You've now learned the essential steps for properly installing grounding wires for mat protection. Remember to test all connections regularly, maintain proper documentation of your installation, and don't skip any safety protocols. If you're unsure about any part of the process, it's best to consult a qualified electrician. By following these guidelines, you'll guarantee your mat grounding system remains effective and compliant with safety standards.


Leave a Reply