
You can ground your ESD mats effectively using five proven methods. Connect to a common point ground system by linking all conductive components to a single electrical ground point. Use direct electrical outlet grounding with a proper grounding cable and 1-megohm resistor for safety. Install through conductive flooring connections, ensuring floor resistance stays below 1×10^9 ohms. Set up table surface grounding by connecting to AC face plate covers while maintaining 40-60% humidity. Implement ESD equipment ground connections with built-in snaps or eyelets, avoiding daisy-chain setups. Understanding these grounding techniques in detail will enhance your workplace's static protection measures.
Common Point Ground System Installation
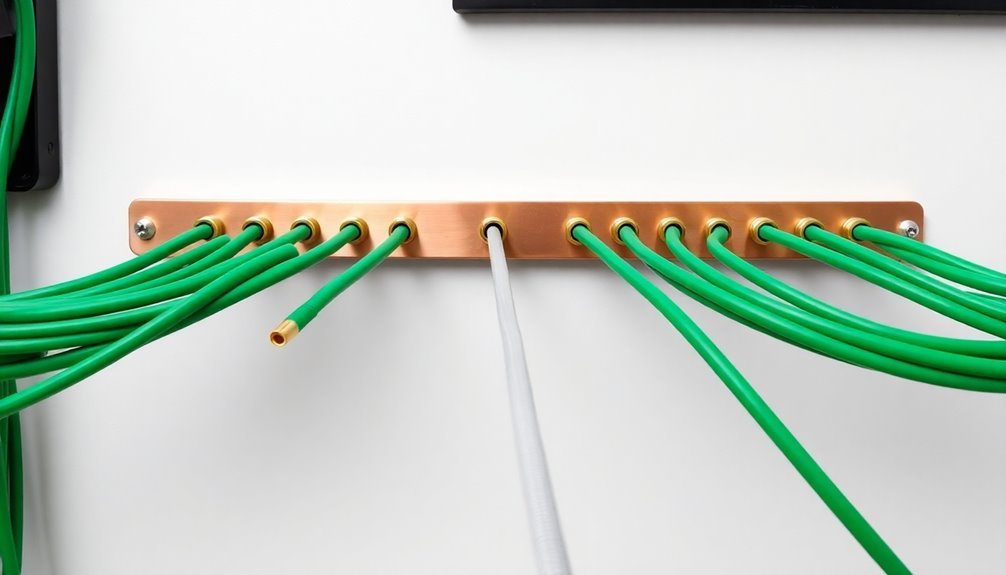
Every ESD workstation requires a properly installed common point ground system to effectively dissipate static charges.
You'll need to connect all conductive components at your workstation to a single electrical ground point to guarantee proper static discharge. This common point ground must link to your equipment grounding conductor, typically the green wire in your electrical system. Using CSA/UL compliant receptacles is essential for AC electrical outlet grounding. Effective grounding requires the resistance to ground to be less than 1.0 x 10^6 ohms.
To install the system, first determine the ideal location for your common point ground on the workbench.
Install a common point ground unit and connect it to the equipment ground using a wire with a ring terminal. You'll need to select appropriate grounding hardware based on your mat type – screw-on snap kits work best for 2-layer mats, while push and clinch snaps suit 3-layer or soft mats.
Don't forget to test your installation thoroughly.
Use a ground plug tester to verify your electrical outlet's ground connection and perform continuity tests between the common point ground and equipment ground.
You'll need to maintain this system through regular inspections and testing to guarantee it continues working effectively.
Document all maintenance activities and test results for future reference and compliance requirements.
Direct Electrical Outlet Grounding
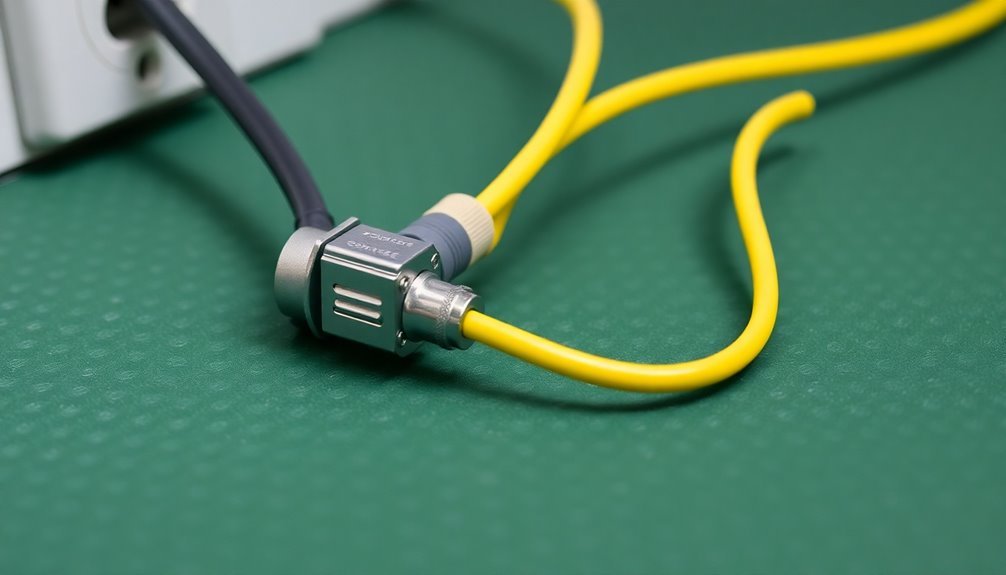
A reliable ESD mat grounding system starts with a direct connection to your electrical outlet. You'll need to attach a conductive snap to the corner of your ESD mat and connect it using a grounding cable that terminates in a #10 ring terminal. This terminal screws directly into your outlet's cover plate screw. Following manufacturer standards, ground pin contact must occur first in the socket connection. Proper maintenance requires regular cleaning of straps to maintain optimal performance.
| Component | Requirement | Testing Method |
|---|---|---|
| Grounding Cable | 1 megohm ± 20% | ESD Resistance Meter |
| Outlet Connection | Proper Ground Wiring | Continuity Test |
| Mat Surface | Static Dissipative | Surface Resistivity Test |
| Connection Points | Clean, Secure | Visual Inspection |
| System Performance | ANSI/ESD S6.1 Compliant | Daily Verification |
When you're setting up your grounding system, make certain you're using a cable with a built-in 1 megohm resistor for safety. Don't daisy chain multiple mats together, as this can compromise the overall resistance levels. You'll need to test your grounding setup daily using an ESD Resistance Meter to verify proper functionality. Keep your mat and connections clean, and consider installing real-time monitoring systems to alert you of any grounding failures immediately.
Through Conductive Flooring Connection

While direct outlet grounding works well for individual mats, connecting your ESD mat through conductive flooring offers broad protection across larger workspaces.
You'll need to verify your flooring meets specific ESD requirements, incorporating conductive elements like carbon, graphite, or metal-coated particles throughout the material. Testing should confirm resistance measurements below 1x10E9 ohms to comply with safety standards.
To establish this connection, you'll first need a properly installed conductive floor with an electrically conductive underlayment. The underlayment creates a unified ground plane that connects all floor tiles together.
For every 1,000 square feet of flooring, you'll need at least one grounding point using copper straps or conductor tape. These straps should connect to electrical outlets, building steel, or dedicated grounding bars. Every 1-4 tiles must be individually grounded when using dissipative matting for optimal performance.
You can link your ESD mat to this conductive flooring system, which then channels static charges to the building's ground through the established connections.
If you're working in a large facility, you might need multiple grounding points to verify effective static dissipation. This method's particularly useful in electronics manufacturing areas, laboratories, and other static-sensitive environments where you need thorough static control across entire workspaces.
Table Surface Grounding Methods
Several reliable methods exist for grounding ESD table surfaces, with each requiring specific components and installation techniques.
You'll need to connect your mat using appropriate grounding cables, which include mat grounds and common point grounds. Make certain to attach these cables securely to the mat using conductive snaps and connect them to a common ground point, such as an AC face plate cover. Regular monitoring of humidity levels between 40-60% helps optimize ESD control performance.
When selecting snaps, you'll find various options like screw-on, push-and-cinch, and rivet-style types. Choose the one that's compatible with your mat's structure (2-layer or 3-layer). Regular maintenance of these components helps prevent costly repairs and equipment malfunctions.
You'll need to position your ESD mat on a flat, debris-free surface, covering the entire work area. Use non-slip tape to secure it firmly to your workbench.
You should test your ground connection regularly to verify resistance remains below 1 ohm. Keep your mat clean and inspect it frequently for wear or damage.
Whether you're using a conductive or dissipative mat, proper grounding is essential for effectiveness. If you're working with non-ESD powder-coated benches, consider using ESD laminate tabletops for enhanced protection.
ESD Equipment Ground Connection
Properly connecting your ESD equipment to ground guarantees reliable static discharge protection during sensitive component handling.
You'll need to connect your ESD mat to an electrical outlet using a grounding cable with 1 megohm (1 x 10E6 ohms) ± 20% resistance. Secure the cord to the outlet's center screw using an eyelet or #10 ring terminal for a dependable connection.
Your ESD mat should feature a built-in grounding snap or eyelet to attach the grounding cord securely.
Don't daisy-chain grounding cables, as this can exceed the desired resistance levels. You'll want to implement common point grounding, connecting both your wrist strap and mat to the same grounding point for ideal protection.
Test your grounding system daily with a multimeter to verify proper resistance and connection security. If you notice loose or corroded connections, address them immediately to maintain effectiveness.
You can use real-time monitors to receive instant alerts about grounding failures. For standing workstations, incorporate heel, toe, or boot straps into your grounding setup.
Remember to clean your straps and mats regularly to guarantee they continue performing at their best.
Frequently Asked Questions
Can I Layer Multiple ESD Mats for Extra Protection?
No, you shouldn't layer ESD mats. It'll actually compromise their effectiveness by disrupting proper grounding and electrical resistance. Instead, use a single high-quality mat that meets your specific protection requirements.
How Often Should I Replace My ESD Mat's Grounding Cord?
You should replace your ESD mat's grounding cord annually at minimum, or sooner if you notice visible damage, failed resistance tests, or loose connections. Always check manufacturer guidelines for specific replacement schedules.
Does Humidity Affect the Performance of My ESD Mat?
Yes, humidity does affect your ESD mat's performance. You'll notice better static control in higher humidity, while low humidity can reduce its effectiveness. It'll still work, but environmental conditions matter.
Are Wireless ESD Monitoring Systems Reliable for Mat Grounding Verification?
No, you shouldn't rely on wireless ESD monitoring systems. They don't meet ANSI/ESD S20.20 standards, can't provide adequate grounding, and allow dangerous voltage buildup. Stick with traditional corded monitoring systems instead.
Can I Use the Same ESD Mat for Both Soldering and Electronics Assembly?
While you can use a dual-purpose ESD mat, it's better to have separate mats. Your soldering mat needs heat resistance, while your assembly mat should focus on ideal anti-static properties for sensitive components.
In Summary
You'll find that proper grounding of your ESD mats is crucial for maintaining a safe and effective static control environment. Whether you've chosen a common point system, direct outlet connection, conductive flooring, table surface methods, or equipment grounding, always verify your connections regularly. Don't forget to test your mat's resistance periodically to confirm it's providing peak protection for your sensitive electronic components.


Leave a Reply