To set up a static-safe soldering station, you'll need to establish proper ESD protection first. Start with an anti-static mat connected to a verified ground point, and always wear a properly connected ESD wrist strap. Your workspace should include a temperature-controlled soldering iron, rosin-core solder, and essential tools like ESD-safe tweezers and PCB holders. Don't forget to install a fume extraction system and maintain humidity levels between 40-60%. Keep your soldering tips clean and tinned, and remember to calibrate your equipment regularly. Following these fundamentals will help you discover the full scope of professional-grade soldering safety.
Choosing Your ESD Safe Station

Three key factors drive the selection of an ESD-safe soldering station: functionality, safety, and compatibility. When choosing your station, you'll need to verify it matches your local power specifications, typically 110-240V AC, and provides precise temperature control for various soldering tasks.
Consider the workspace you'll be using – some stations are compact and portable, while others are designed for permanent installation. Essential accessories include a high-quality soldering iron with interchangeable tips, a stable stand, and appropriate solder and flux materials.
For professional work, invest in a station that includes advanced features like digital controls and hot air capabilities. You'll want a variety of tips for different applications, and don't forget to factor in maintenance requirements.
Keep your setup complete with desoldering tools, helping hands, and PCB holders. Remember to include a fume extractor and ESD-safe mat in your setup to maintain a safe working environment.
Essential Safety Equipment
A complete ESD-safe workstation requires several essential pieces of safety equipment to protect both you and your electronic components.
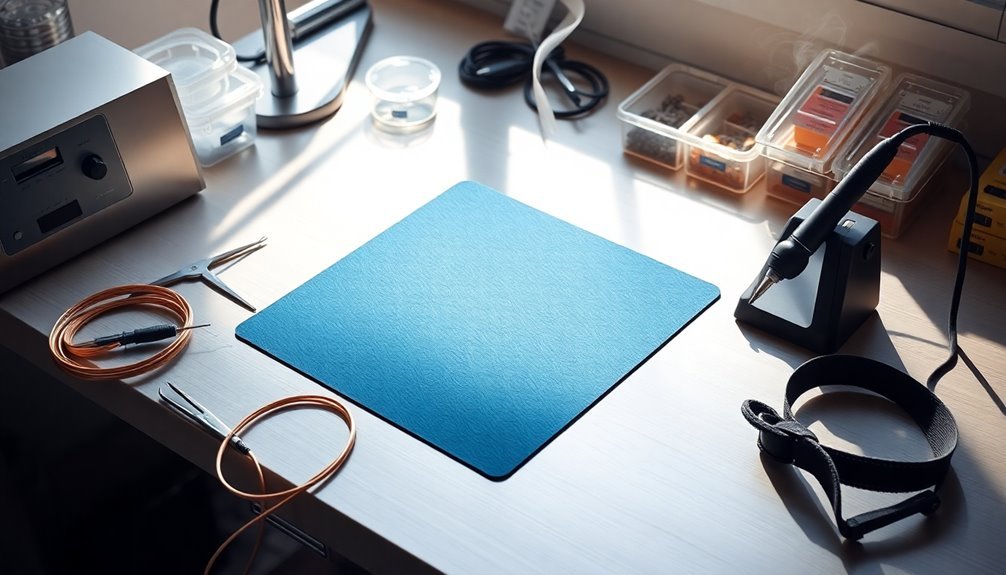
Start with an anti-static mat to ground your work surface and lay a complementary ESD-protective mat on your workbench. You'll need to wear an antistatic wrist strap connected to a proper ground point, and consider adding ankle straps for additional protection.
Your tools must include ESD-safe versions of tweezers, pliers, and other handling equipment. Store these properly and guarantee they're connected to ground through appropriate straps. Static charge transfer can damage sensitive electronics upon contact, making proper grounding essential. Regular testing of grounding equipment should be performed to ensure workplace safety.
Don't forget to use antistatic gloves when directly handling sensitive components, and keep your components in antistatic bags or containers when not in use.
If you can't achieve proper grounding in your workspace, install an ionizer near your work area to neutralize static charges. Position it where it can effectively cover your entire work zone.
Remember to maintain proper humidity levels and use conductive flooring materials when possible. Always inspect your safety equipment regularly for wear and damage, replacing any compromised items immediately to maintain your ESD protection system's integrity.
Setting Up Workspace Protection

Proper workspace protection forms the foundation of safe electronic soldering.
You'll need to start by establishing a grounded workspace using an ESD mat connected to a common grounding point. The recommended Weller mat provides a premium 900x600mm surface for optimal coverage. Connect your ESD wrist strap to the mat or grounding point to discharge any static buildup from your body.
Your soldering station requires specific ESD-safe equipment. Keep your workspace free of clutter to minimize the risk of accidental component contact. Use a soldering iron with a grounded tip and keep all tools ESD-protected. Install a static eliminator to neutralize charges in your work area, and store components in anti-static bags or containers when they're not in use.
When handling electronic components, always ground yourself first and handle them by their edges. Avoid touching pins or exposed circuitry, and minimize movement to prevent static buildup.
You'll want to maintain proper environmental conditions by keeping humidity between 40-60%. In dry environments, you can use a humidifier or anti-static sprays to combat static electricity.
Ensure all your equipment connects to a common grounding point and regularly monitor your workspace conditions. Remove any static-generating materials from your workstation to maintain a consistently protected environment for your sensitive electronic components.
Required Tools and Accessories
With your static-safe workspace established, you'll need a complete set of soldering tools and accessories to begin working safely with electronic components.
Start with a digital soldering station that offers precise temperature control, and equip it with various interchangeable tips for different soldering tasks. A reliable station like the CSI Premier 75W delivers consistent heating performance. You'll also need a sturdy iron stand to prevent accidents when the iron isn't in use. Regular temperature calibration checks will ensure your soldering work remains consistent and reliable.
For component removal and cleanup, you'll want both a desoldering pump and desoldering braid. Keep flux and flux remover handy to guarantee proper solder flow and clean joints.
Don't forget essential handling tools like ESD-safe tweezers and PCB holders to secure your work pieces.
Your inspection arsenal should include a magnifying lamp or head-mounted magnifier for detailed work. You'll need helping hands to hold components steady while soldering.
Install a fume extractor to protect yourself from harmful soldering fumes, and place an anti-static mat under your work area.
Temperature Control and Calibration

Your soldering station's digital display needs to match the actual tip temperature within ±10°F for reliable SMD work and IPC compliance.
You'll want to maintain your iron's temperature between 600-750°F for most electronics applications, adjusting based on your specific components and board materials.
Regular calibration checks are essential when you change tips or heating elements, and you should verify accuracy at least quarterly using professional calibration tools like the Hakko FG-100.
Digital Display Accuracy Requirements
Achieving precise temperature control starts with an accurate digital display system. You'll need a display that provides temperature readings within +/-1°C accuracy to maintain ideal soldering conditions. Your station's digital interface should offer real-time feedback, allowing you to make immediate adjustments when temperatures drift from your target settings.
When selecting a soldering station, look for high-resolution displays that show detailed temperature information. You'll find that modern stations often include microcontroller-based systems with programmable presets, making it easier to switch between commonly used temperature settings.
These advanced displays typically integrate with thermocouple sensors to deliver responsive and accurate measurements.
Don't forget to verify your display's accuracy through regular calibration checks. You'll need to calibrate your system whenever you change tips, heaters, or handpieces.
While some stations feature self-compensating technology that reduces calibration frequency, it's still essential to perform periodic verification. Compare the displayed temperature with actual measurements to confirm they match within specified tolerances.
Remember that proper calibration certification should comply with IPC J-STD-001 standards, guaranteeing your station operates within factory specifications.
Temperature Range Best Practices
Understanding proper temperature ranges builds directly on accurate display readings for ideal soldering performance.
You'll need to operate within 200-480°C (392-896°F) for most general-purpose soldering tasks, though specialized work may require temperatures up to 537°C (1000°F). Your station's temperature control features should include precise digital settings and automatic regulation to maintain consistent heat levels during use.
When you're working with vintage electronics, you'll often need higher temperature settings and robust irons to handle the job effectively.
However, if you're soldering sensitive components, you'll want to use lower temperatures with more precise control to prevent damage. It's vital that you select an ESD-safe soldering station that offers both accurate temperature control and static protection.
You should verify your station includes thermal recovery capabilities to maintain consistent temperatures during heavy use.
Don't forget to regularly calibrate your equipment to maintain accuracy over time. Choose a station that offers a wide range of compatible tips for various applications, and remember that proper temperature control directly affects both your soldering quality and the longevity of your equipment.
Calibration Steps and Timing
Regular calibration forms the backbone of reliable soldering station performance.
You'll need to calibrate your soldering station every two weeks using a tip tester that's calibrated to NIST standards, guaranteeing your equipment maintains accuracy and complies with industry protocols like IPC and MIL-STD.
To calibrate properly, you'll use a temperature simulator or thermometer to measure the tip temperature.
Set your simulator to specific points, such as 77°F and 1300°F, and adjust the calibration settings according to your manufacturer's instructions.
You should verify the calibration by measuring and recording readings at different input levels, repeating the process until you achieve accurate measurements.
You'll need to perform additional calibration whenever you replace the heating element or tip.
Your calibration toolkit should include a temperature simulator, decade box for resistance calibration, T/C simulator for temperature calibration, and a millivolt source for voltage calibration.
While some soldering stations may require more frequent calibration based on their design or usage patterns, maintaining a consistent calibration schedule helps prevent soldering defects and guarantees your displayed temperature matches the actual tip temperature.
Proper Grounding Techniques
You'll need to start by verifying your ground path using a multimeter to confirm proper resistance between your station's grounding point and earth ground.
Next, secure your ESD wrist strap snugly around your wrist and connect it to the verified grounding point, ensuring it makes consistent skin contact.
For metal surface bonding, connect all conductive surfaces to your main ground using appropriate gauge wire and screw terminals, maintaining a continuous path to prevent static buildup.
Ground Path Verification Steps
Proper verification of ground paths stands out as one of the most critical steps in maintaining a static-safe soldering station. You'll need to regularly check all connections to ascertain they're properly linked to your common point ground, which should be clearly marked with the ANSI/ESD S8.1 recommended symbol.
Start by testing your ESD mat's connection to the common ground point using a continuous monitoring system. You'll want to verify that your soldering iron's tip maintains a secure ground connection – if you're using a resistor in the ground path (such as a 1Meg or 470k 2W), ascertain it's functioning correctly.
Check that all auxiliary grounds, like water pipes or building frames, are properly bonded to your equipment grounding conductor.
Don't forget to test your personnel grounding systems, including your ESD flooring and footwear setup. You'll need to confirm that all workstation components share the same electrical potential through the equipment grounding conductor.
If you detect any potential differences or noise issues, re-route your ground connections and add filters as needed to maintain a clean, static-safe environment.
ESD Wrist Strap Connection
After establishing reliable ground paths, protecting personnel from static discharge becomes the next priority.
You'll need to properly connect your ESD wrist strap to guarantee you're at the same electrical potential as your soldering equipment and components.
Connect your wrist strap to a common point ground that's linked to the equipment grounding conductor (AC ground). Your wrist strap should include a built-in 1M ohm resistor for safety.
When setting up, attach the ground cord to the designated grounding point on your workstation or use a grounding plug connected to a proper receptacle.
Test your wrist strap connection regularly to verify it's functioning correctly. The resistance from your wrist strap to earth ground should measure approximately 1M ohm.
If you're using an ESD mat, confirm its ground connection measures less than 1 ohm to earth ground.
Don't forget to wear your wrist strap snugly and check it's making good skin contact.
Replace your wrist strap if it shows signs of wear or fails resistance testing.
For maximum protection, connect your wrist strap to the same ground point as your ESD mat and soldering station to maintain equipotential bonding.
Metal Surface Bonding Methods
With any static-safe soldering setup, metal surface bonding forms the foundation of your grounding system. You'll need to connect all metal surfaces directly to earth ground using appropriate straps and cables, guaranteeing a reliable conductive path throughout your workspace. Maintain ground impedance below 2 ohms and regularly check these connections for wear or damage.
Start by placing your soldering station on a stable, heat-resistant surface with an ESD-safe mat. You'll need to ground your soldering iron through its power cord and use a properly grounded metal base stand. Keep your cables organized to prevent shock hazards and guarantee consistent grounding connections.
Don't forget to maintain your equipment's grounding integrity through regular maintenance. Clean your soldering iron tip frequently to prevent oxidation and maintain good thermal conductivity. When replacing heating elements, follow the manufacturer's instructions carefully to preserve proper grounding connections.
For safety, you'll want to wear appropriate gear, including safety glasses and heat-resistant gloves. Use ESD wrist straps and other static protection accessories while working. Establish clear emergency procedures for electrical incidents and maintain proper ventilation to remove harmful fumes from your workspace.
Ventilation and Fume Management

Managing solder fumes effectively can mean the difference between a safe workshop and a hazardous one. You'll need to establish proper ventilation and fume extraction systems to protect yourself from harmful particles and gases that soldering produces. These fumes contain dangerous compounds like rosin and solvents that can cause respiratory issues and long-term health problems.
Start by positioning your soldering station near a window and installing a professional fume extractor with HEPA and activated carbon filters. You'll want to place the extractor's adjustable arm close to where you're soldering to capture fumes at their source.
Calculate the required CFM based on your workspace size to guarantee adequate air exchange. Don't rely solely on ventilation – use additional safety measures like respirators when necessary. Select lead-free and rosin-free solders whenever possible to minimize risks.
Maintain your extraction system regularly, checking filters and verifying proper airflow. Keep your workspace layout optimized for fume removal by avoiding obstacles that could create air turbulence.
Maintenance Best Practices
Proper maintenance of your soldering equipment guarantees reliable performance and extends its lifespan. You'll need to regularly clean your tips with a damp sponge or brass wool, avoiding abrasive materials that can damage the plating. Tinning your tips both before and after use protects them from oxidation while guaranteeing ideal thermal conductivity.
Temperature management plays an essential role in tip longevity. You'll want to reduce heat when the iron isn't in use and avoid prolonged exposure to high temperatures. Don't forget to inspect your equipment monthly, checking connections and calibrating your iron to maintain consistent performance.
| Maintenance Task | Frequency | Key Actions |
|---|---|---|
| Tip Cleaning | During Use | Use damp sponge or brass wool |
| Tip Tinning | Before/After Use | Apply fresh solder coating |
| Connection Check | Monthly | Inspect cords and connections |
| Calibration | Quarterly | Verify temperature accuracy |
Remember to store your equipment properly when not in use. Always return the iron to its stand, and confirm it's turned off or unplugged. When changing tips, handle them carefully and use only high-quality replacements that match your iron's specifications. Regular maintenance will greatly extend your equipment's service life while maintaining ideal performance.
Frequently Asked Questions
How Long Should I Let My Soldering Station Cool Before Storing It?
You'll need to let your soldering iron completely cool down, which typically takes 10-15 minutes. Don't rush this process; wait until the tip reaches room temperature before storing it safely in its stand.
Can I Use Regular Cleaning Solutions to Clean My Esd-Safe Mat?
No, you shouldn't use regular cleaning solutions on your ESD-safe mat. They can damage the surface and compromise its anti-static properties. Instead, use only ESD-safe cleaners that are specifically designed for these mats.
What's the Average Lifespan of a Quality Soldering Station Tip?
You'll typically get 3-6 months from a quality soldering tip with regular use. However, if you maintain it properly with cleaning and tinning, it can last up to a year or longer.
Should I Tin New Soldering Tips Before First Use?
Yes, you should always tin your new soldering tips before first use. It'll protect the tip from oxidation, improve heat transfer, and guarantee better solder flow during your projects. Don't skip this vital step.
How Often Should I Test My ESD Wrist Strap for Proper Functionality?
You should test your ESD wrist strap daily before starting work. If you're handling highly sensitive components, consider using continuous monitoring. Don't skip testing – it's essential for protecting electronic components from static damage.
In Summary
You'll find that maintaining your static-safe soldering station isn't just about protecting components—it's essential for your safety and work quality. Keep your workspace grounded, ventilated, and organized. Don't skip regular maintenance checks or neglect proper ESD protection. With the right setup and consistent care, you're ready to tackle any electronics project safely and effectively.


Leave a Reply