To test ESD footwear for compliance, you'll need specialized equipment including a metal grounding plate, in-shoe electrodes, and a resistance measurement device capable of applying 100V DC. Start by preconditioning your footwear in a controlled environment (20-23°C, 50-60% humidity). Use a WT5000 Walking Test Kit or EFM51.WT meter to conduct the six-step walking pattern test while monitoring voltage readings. Confirm proper grounding and maintain clean contact surfaces throughout testing. Your resistance measurements should fall between 750 kiloohms and 35 megohms to meet EN 61340-5-1 standards. Understanding the complete testing process reveals additional critical requirements for full compliance.
Required Testing Equipment and Standards

When testing ESD footwear for compliance, you'll need specific equipment and must follow established international standards. Your essential equipment includes a metal grounding plate, electrodes for in-shoe measurements, and a 12.5 kg weight to apply consistent pressure. Preconditioning at controlled temperature is essential before testing to ensure accurate results.
You'll also need a conditioning chamber to control temperature and humidity, plus a resistance measurement device that can apply 100V DC.
Your testing setup must incorporate a copper plate as the external electrode and either stainless steel balls or a conductive electrode inside the shoe.
You'll need to follow standards like EN 61340-4-3 for laboratory testing and EN 61340-5-1 for person-shoe-ground system evaluation. The ANSI/ESD S20.20 standard sets specific requirements for ESD footwear performance.
To meet certification requirements, your footwear must demonstrate contact resistance less than 35 megohm, with an acceptable range between 1 x 10^6 and 1 x 10^8 ohms. The absolute upper limit is 100 megohms.
Once certified, the footwear will receive a yellow ESD symbol, which is separate from the CE marking. You'll need to conduct daily testing before use within an ESD Protected Area to maintain compliance.
Body Voltage Testing Methods
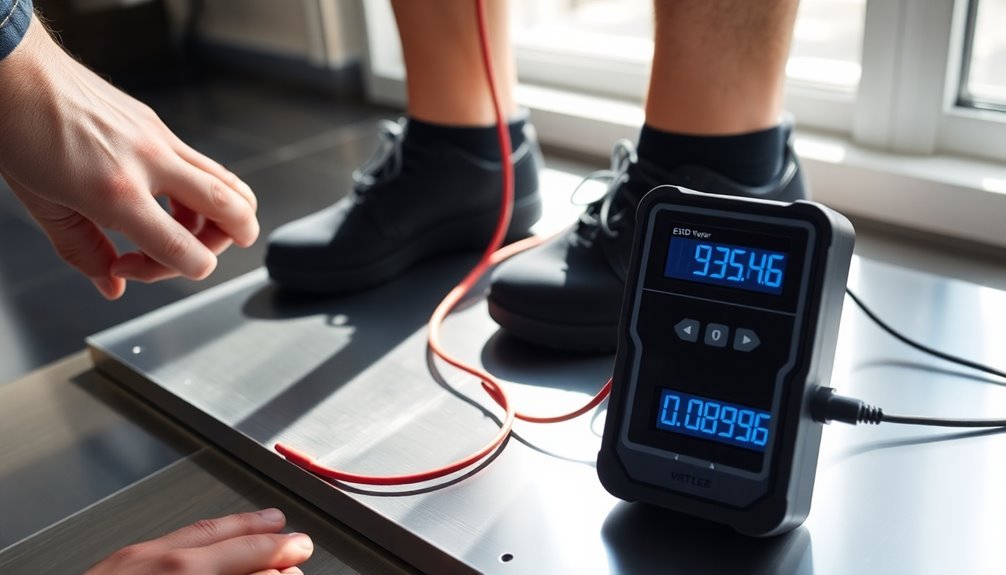
To perform accurate body voltage testing, you'll need either a WT5000 Walking Test Kit or an EFM51.WT meter connected to your testing computer. For additional verification, consider using the 7100.SRM200.VK verification kit to ensure measurement accuracy.
Your testing environment must maintain consistent temperature and humidity levels while keeping the testing area free from external electromagnetic interference.
Before beginning the six-step walking pattern, you must guarantee all equipment is properly calibrated and the ESD flooring surface is clean and properly grounded.
Equipment Setup Requirements
For accurate body voltage testing, proper equipment setup forms the foundation of reliable ESD footwear evaluation. You'll need either a WT5000 Walking Test Kit or an EFM51.WT Portable Walking Test Kit connected to a PC that has compatible data collection software. The setup must include static control footwear, ESD flooring, and appropriate test electrodes and connectors.
To begin testing, you'll need to position your test subject on the ESD flooring while wearing the static control footwear being evaluated. Make certain you've properly grounded the ESD flooring system before proceeding. Full foot contact must be monitored during movement since it affects measurement accuracy. The testing equipment should display real-time voltage readings and provide graphical output for analysis.
Your setup must comply with ANSI/ESD STM 97.2 and S20.20 standards, guaranteeing measurements don't exceed the maximum allowable body voltage of 100V. You'll also need to verify that your equipment has current calibration certification traceable to NIST standards.
Remember to maintain and test your equipment regularly to guarantee accuracy. When exporting data, you can use various compatible software options to analyze and document your results effectively.
Test Environment Conditions
Several environmental factors play an essential role in body voltage testing for ESD footwear compliance. Temperature and humidity greatly influence how much body voltage you'll generate during testing, with low relative humidity increasing the risk of static discharge. Third-party consultants often conduct these evaluations for unbiased results.
When you're conducting tests, you'll need to simulate real-world conditions that reflect your facility's actual environment. Your walking test protocol must incorporate a six-step pattern to accurately measure body voltage generation during movement.
You'll need to test all approved footwear types on your ESD floor to confirm the complete system meets ANSI/ESD S20.20 standards. For electronics manufacturing, you can't exceed 100V, while end-user environments must stay below 500V.
- Critical Warning: Failing to account for environmental conditions can lead to devastating equipment damage and production losses.
- Urgent Reminder: Your facility's static control depends on proper testing under realistic conditions.
- Safety Alert: Protecting sensitive components requires thorough testing at various humidity levels.
Remember that your walking test provides vital data about how your ESD floor and footwear system will perform in actual use. By capturing peak voltages during movement, you'll identify potential risk areas and confirm proper protection against static discharge events.
Resistance Measurement Procedures

Measuring resistance in ESD footwear requires standardized procedures to guarantee consistent and reliable results. You'll need to follow specific methods depending on your testing requirements. Regular testing helps prevent the approximately 30% of electronic failures caused by ESD issues.
For EN 61340-5-1 compliance, you'll stand on a conductive shoe testing electrode while wearing the safety footwear and place your hand on a metal plate. Your measured contact resistance shouldn't exceed 35 megohms.
When following EN 61340-4-3 standards, you'll first precondition the footwear in a controlled environment. Place the shoe on a stainless steel plate, insert a counter electrode inside, and apply a 12.5 kg weight. The resistance must stay below 100 megohms.
If you're using an ESD footwear tester, ground the device properly, put on your ESD shoes, and stand on the dual foot plate. Press the test button to check if your reading falls between 750 kiloohms and 35 megohms.
For system resistance testing, you'll need to measure the complete person-footwear-floor system. Conduct multiple tests with different footwear types under controlled conditions, maintaining 12% humidity (±3%).
Remember that resistance testing alone doesn't determine static generation propensity.
Environmental Testing Conditions
Proper environmental conditions down to the smallest detail can make or break your ESD footwear testing accuracy.
You'll need to maintain temperatures between 20°C and 23°C, while keeping relative humidity levels at 50% to 60%. Before you start testing, place your footwear in a conditioning chamber to guarantee it's properly acclimated to these conditions.
Keep your testing area free from dust and contaminants, as these can greatly interfere with your results. The testing must maintain proper grounding practices to effectively dissipate static electricity through the floor.
The cleanliness of contact surfaces is particularly vital – even minor debris can alter your measurements. Remember that temperature and moisture levels will directly impact discharge capacity, with cooler shoes showing increased contact resistance.
- Warning: If you don't maintain proper temperature control, you're risking unreliable test results that could compromise your entire ESD protection program.
- Critical: Failing to pre-condition your footwear can lead to false readings and potentially expose sensitive equipment to dangerous static discharge.
- Important: Ignoring humidity levels could invalidate your test results, putting your facility's ESD compliance at risk and potentially costing thousands in damaged components.
Monitor these conditions consistently throughout testing to guarantee reliable, repeatable results that meet industry standards.
Documentation and Record Keeping

Thorough documentation forms the backbone of any ESD footwear compliance program, with specific requirements outlined in TR53 and ANSI/ESD S20.20 standards.
Objective evidence from your verification processes will be carefully reviewed during formal audits.
You'll need to maintain extensive records of both daily testing and periodic verification activities for your ESD footwear.
For initial qualification, you must collect product specification sheets, third-party lab reports, or internal test data that reference ESD Association test methods. Your records should demonstrate compliance with ANSI/ESD S20.20-2014 limits.
When conducting daily tests, log all results in a standardized format that includes test dates, personnel involved, and specific measurements.
You'll also need to document system tests that evaluate the combined performance of footwear and flooring with a person. If you're using alternative test methods, develop and maintain tailoring statements explaining your approach.
Keep detailed records of your compliance verification audit results, which should include both footwear-only tests and flooring-footwear system verification using a charged plate analyzer.
Your ESD control program documentation must clearly define test procedures, limits, and verification frequencies, ensuring you can demonstrate consistent compliance with standards.
Regular Maintenance Testing Schedule
A well-structured maintenance schedule serves as the foundation for reliable ESD footwear performance.
You'll need to test your ESD footwear daily before entering any ESD Protected Area, ensuring resistance falls within 1 x 10^6 to 1 x 10^8 ohms. Following ANSI/ESD standards is crucial for maintaining proper safety compliance. Wear your heel, sole, and toe grounders on both feet, and use properly calibrated testers to verify their functionality.
Monthly checks are vital for your ESD protection system.
Verify your workstation grounding weekly, and conduct monthly self-audits with detailed checklists. Don't forget to clean and test ionizers, maintain preventive maintenance logs, and check wrist/heel strap testers monthly.
- Stay confident in your safety by testing the flooring-footwear system quarterly, ensuring it measures less than 100 Volts
- Protect your sensitive components by conducting RTG measurements with a Megohmmeter every three months
- Keep your workspace secure by replacing ESD pink foam in black trays every six months
Annual maintenance rounds out your testing schedule with vital calibrations of wrist/footwear testers and auditing equipment.
Remember to participate in annual ESD review training and maintain detailed calibration records per site procedures.
Common Testing Errors

When you're testing ESD footwear, you'll need to account for humidity levels, as dry conditions can lead to falsely high resistance readings and failed tests.
Your test setup must include proper ground connections, ensuring all components are securely fastened and making good contact with testing surfaces.
If you don't verify these critical factors, you'll risk unreliable results that could compromise your ESD protection program.
Incorrect Humidity Level Tests
Proper humidity levels frequently make the difference between reliable and unreliable ESD footwear testing results. When you're conducting ESD footwear tests, you'll need to maintain humidity levels between 40% and 60% RH, though specific standards like ANSI/ESD S20.20 require testing at 12% RH +/- 3%.
Testing at incorrect humidity levels can lead to false positives or negatives, potentially compromising your ESD protected areas.
To guarantee accurate results, you must use a controlled environment chamber and continuously monitor humidity levels throughout the testing process. You'll need to document all conditions and regularly calibrate your equipment to maintain compliance with ESD Association standards.
If you don't maintain proper humidity control, your test results won't be reproducible, and you might inadvertently approve or reject footwear incorrectly.
- Your entire ESD program could fail if incorrect humidity leads to false test results
- Your company risks non-compliance penalties if you don't follow proper humidity specifications
- Your employees' safety could be compromised if ESD footwear is incorrectly certified
Remember to adjust humidity levels as needed and keep detailed records of all environmental conditions during testing. This documentation provides essential traceability and helps guarantee your testing program remains compliant with required standards.
Improper Ground Connection Setup
Through careful examination of ESD footwear testing errors, improper ground connection setup stands out as a critical issue that can invalidate your entire testing process.
You'll need to verify both heel grounders are properly installed and tested, as wearing only one can break your ground connection when lifting a foot off the ESD floor.
When setting up your ground connections, you must properly place the conductive ribbon with direct skin contact through perspiration, keeping excess material tucked into your shoe.
The lined surface should make proper contact with your footwear, and you'll need to test both foot grounders individually if you receive a fail reading.
Your testing setup should verify resistance ranges between 1 x 10^6 to 1 x 10^8 ohms, and you'll need to test your footwear daily before entering an EPA.
Don't forget to clean your heel straps with conductive cleaner to prevent resistance buildup.
If you're using alternative grounding methods, consider dissipative shoes or conductive cloth inserts where direct skin contact isn't appropriate.
Remember to inspect your workstation's ground connection integrity and maintain clean foot grounders for peak performance.
Frequently Asked Questions
How Long Does ESD Footwear Certification Typically Remain Valid?
Your ESD footwear certification doesn't have a fixed expiration date. It remains valid until there's a standard revision, but you'll need to perform daily testing before entering ESD Protected Areas for ongoing compliance.
Can ESD Footwear Be Washed Without Losing Its Protective Properties?
You shouldn't wash most ESD footwear, as it can damage protective properties. Instead, wipe with a damp cloth and use a suede brush for crevices. Always follow your manufacturer's specific cleaning instructions.
What Causes ESD Footwear to Fail Compliance Tests Most Often?
You'll find ESD footwear fails compliance tests most often due to mismatched upper resistance settings, improper weight electrode use, and testing without considering humidity levels. Poor maintenance and incorrect test procedures also contribute considerably.
Do Different Sole Patterns Affect ESD Protection Performance?
Yes, your sole patterns greatly affect ESD protection, especially on hard floors. You'll need full sole contact for effective protection. On conductive rubber floors, you won't face as many issues with different patterns.
Is ESD Footwear Effectiveness Impacted by the Wearer's Weight?
Your weight can affect ESD footwear performance. While testing standards use a fixed 25-pound weight, heavier wearers may compress conductive materials more, potentially improving ground contact and electrical discharge capabilities.
In Summary
You'll need to regularly test your ESD footwear to maintain workplace safety and compliance. Remember to follow proper testing procedures, use calibrated equipment, and maintain detailed records of all tests. Don't skip environmental condition checks, and make sure you're documenting both pass and fail results. By avoiding common testing mistakes and sticking to your maintenance schedule, you'll keep your ESD protection reliable.


Leave a Reply