To install static control flooring, you'll need to start with a thorough site assessment and moisture testing of your subfloor. Prepare the surface by cleaning, leveling, and applying necessary moisture barriers. Select your ESD flooring material based on your facility's specific requirements, ranging from conductive to static dissipative options. Install copper grounding strips in a grid pattern and apply conductive adhesive using a square notch trowel. Lay your flooring material carefully, guaranteeing complete coverage and proper sealing of joints. Test the installation using a megohmmeter to verify resistance levels meet industry standards. The following detailed steps will guarantee your static control flooring provides maximum protection.
Site Assessment and Planning
When undertaking a static control floor installation, proper site evaluation and planning serve as critical first steps in ensuring a successful outcome.
You'll need to start by determining your industry type and identifying areas where electrostatic discharge sensitive (ESDS) components are handled. This initial evaluation will guide your specific ESD control requirements and help you comply with standards like ANSI/ESD S20.20 and BS EN 61340-5-1. Consider conducting an independent formal review of your existing static control measures before proceeding with new flooring installation.
Begin by evaluating environmental conditions, including temperature and humidity levels, as these factors substantially impact static control.
You'll want to conduct a thorough static threat evaluation to understand potential risks to your ESDS components and define clear goals for your static control measures. Don't forget to establish metrics to evaluate the effectiveness of your planned installation.
Before proceeding with installation, you must evaluate site conditions, including subfloor status and vapor testing results. Check for any necessary repairs and evaluate air quality conditions.
You'll also need to think about the layout of your ESDS handling areas and select appropriate flooring materials that meet your industry standards while remaining cost-effective.
Make sure to plan for long-term maintenance requirements as part of your overall strategy.
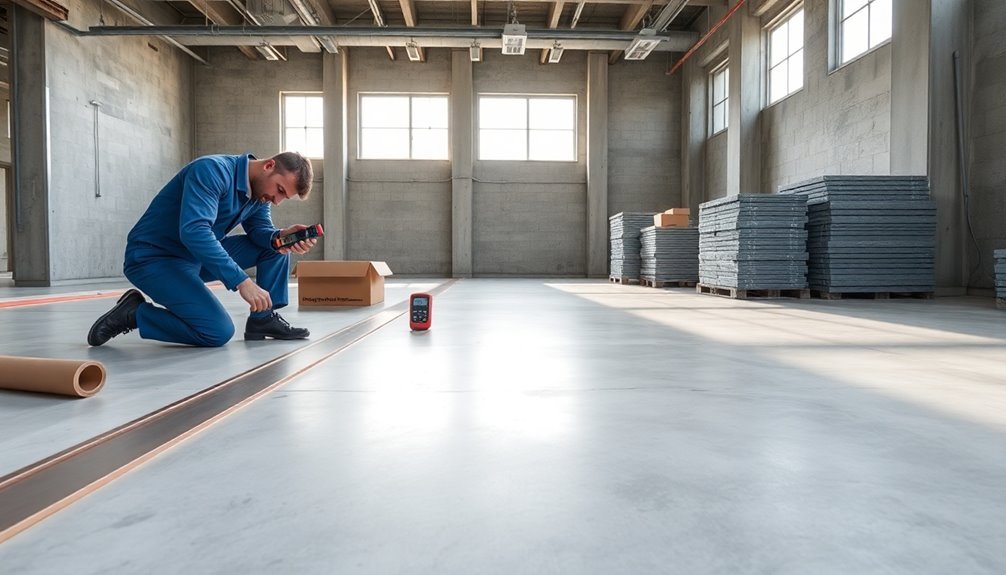
Subfloor Testing and Preparation
Before installing static control flooring, you'll need to conduct thorough moisture testing using RH probes for concrete or moisture content meters for timber subfloors.
Your moisture readings must fall within acceptable ranges – below 75% RH for concrete and between 9-14% MC for most timber species.
You must then prepare the subfloor through inspection, leveling, cleaning, and necessary repairs to guarantee it's compatible with your static control flooring material.
To ensure the subfloor is ready, several steps are crucial:
- Always test the subfloor for moisture: vapor problems can cause flooring failure and are not always visible. For concrete, the in-situ Relative Humidity test as per ASTM F2170 is recommended. This involves drilling a hole into the concrete slab and inserting a reusable relative humidity probe. The RH percentage value provides an indication of the moisture content within the concrete. Readings should be below 75% after a 24-hour testing period. A resistance meter test should be performed to verify the floor meets electrical resistance requirements for your facility type.
- The subfloor must be dry, clean, smooth, and free from paint, varnish, existing adhesive residue, wax, concrete curing agents, sealers, and hardeners. In renovation or remodel work, remove any existing adhesive residue so that 80% of the overall area of the original substrate is exposed. The subfloor must also be porous when installing static dissipative tile (SDT).
- Ensure the area to receive the flooring is maintained at a minimum of 65°F (18°C) and a maximum of 85°F (38°C) for 48 hours before, during, and after installation.
- Leveling and necessary repairs are essential to prevent any unevenness or defects that could affect the performance of the static control flooring.
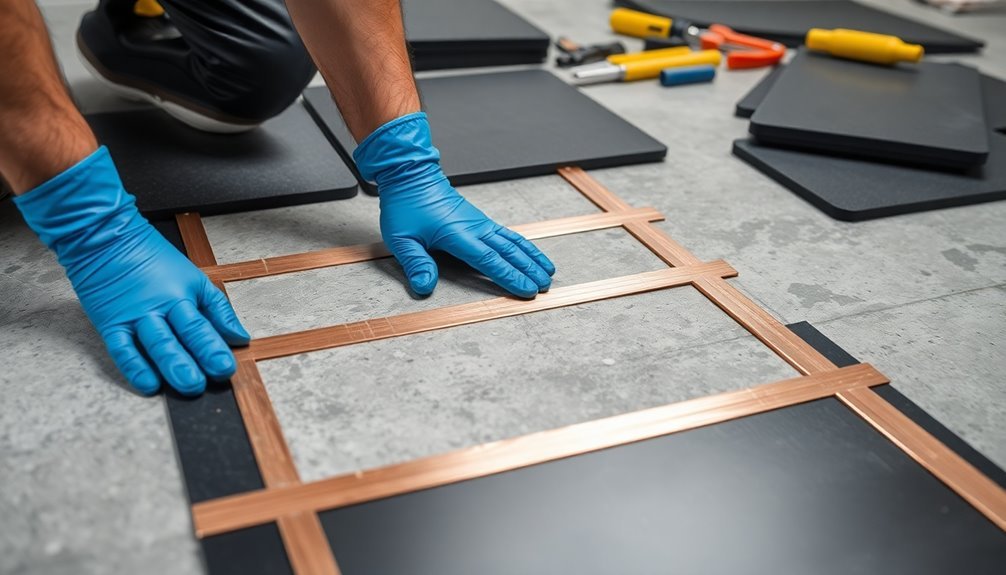
- Grounding is a critical aspect of static control flooring. Copper strips are typically used for grounding, and these should be installed according to the manufacturer's instructions. Grounding is usually done by an electrician to ensure it meets applicable code requirements.
Moisture Testing Methods
Through proper moisture testing, you'll prevent costly flooring failures and guarantee a successful static control floor installation. For concrete subfloors, you'll need to conduct three tests in the first 100 m2, adding one test for each additional 100 m2. Use surface-mounted insulated hood tests (maximum 70% RH) or in-situ probe tests (maximum 75% RH) following ASTM standards F2170-2011 and F2420-05.
For timber subfloors, verify that moisture content falls within 9-14% for most species, or 10-15% for cypress. Use reliable wood moisture meters to verify readings are in the 6-9% range before installation begins. Pay special attention to areas with integrated beams as these sections typically dry more slowly than other parts.
| Test Type | Maximum Level | Standard |
|---|---|---|
| Insulated Hood | 70% RH | ASTM F2420-05 |
| In-Situ Probe | 75% RH | ASTM F2170-2011 |
| Wood Moisture | 9-14% MC | AS/NZS 1080 |
Document all test results thoroughly, including jobsite address, subfloor type, test positions, and equipment used. You can use handheld moisture meters to identify potential moisture "hot spots" before conducting more detailed quantitative tests. Remember that environmental conditions can affect readings, so consider ambient humidity when interpreting results.
Surface Preparation Steps
A properly prepared subfloor serves as the foundation for successful static control floor installation. You'll need to thoroughly clean and inspect the surface before proceeding with any installation work.
Overlooking small details during preparation can result in ESD system failure later. Start by removing all debris, existing flooring materials, and contaminants that could interfere with proper bonding and conductivity.
Examine your subfloor carefully for cracks, unevenness, or damage. If you find any issues, you'll need to address them using appropriate leveling compounds. Make sure the subfloor is structurally sound enough to support both the new flooring and expected traffic loads.
Begin the cleaning process by stripping any existing finish using an auto scrubber or mop with a black abrasive pad. You'll need to rinse thoroughly with clean water to remove all stripper residue.
Let the surface dry completely, using forced air if necessary, and verify cleanliness by running your hand across the floor.
If your facility requires a conductive underlayment, install it according to manufacturer specifications. Consider adding a vapor barrier to protect against moisture issues.
Remember that each layer must be properly secured to prevent separation and guarantee ideal static control performance.
Material Selection and Specifications
You'll need to match your flooring's ESD rating with your facility's requirements, ranging from conductive tiles at 25,000-1,000,000 ohms to static dissipative options at 1,000,000-100,000,000 ohms.
When choosing between resilient tiles, epoxy, or rubber flooring, consider the expected foot traffic and equipment loads that will impact your surface's durability. For optimal installation results, ensure concrete subfloors maintain a maximum moisture level of 3 lb./1000 sq. ft./24 hours.
Your selected material's wear layer properties, such as thickness and coefficient of friction, will directly affect both its static control performance and longevity.
ESD Rating Requirements
Selecting appropriate ESD flooring materials requires meeting three critical rating requirements: resistance range, charge dissipation, and system resistance. You'll need to verify that your materials fall within 1 million to 100 million ohms and can dissipate a 5000V charge to less than 50 volts within 2 seconds. Your system resistance shouldn't exceed 3.5 x 10^7 ohms.
To verify these requirements, you'll need to conduct testing using ANSI/ESD STM 7.1, STM 97.1, and STM 97.2 standards. It's crucial to work with an independent testing laboratory, particularly under low relative humidity conditions, to evaluate your flooring materials accurately. Proper subfloor preparation is essential before testing to ensure accurate readings and optimal performance.
You must verify compliance with ANSI/ESD S20.20 and IEC 61340-5-1 standards throughout the selection process. Don't forget to take into account your specific environmental conditions, including humidity levels and the types of footwear that'll be used on the floor.
When evaluating materials, you'll need to assess both qualification and verification aspects – qualification confirms initial performance standards, while verification maintains ongoing compliance. Regular testing of your installed floor will help maintain these standards and catch any performance issues early.
Surface Type Considerations
When choosing from among static control flooring options, you'll need to take into account several distinct surface materials, each with unique properties and installation requirements.
Conductive vinyl offers built-in protection through embedded filaments, while static dissipative vinyl relies on conductive polish or wax for its protective qualities. You'll also find specialized options like rubber, carpet, and high-build epoxy flooring for specific applications. Surface preparation requires moisture and alkalinity tests before installation begins.
For healthcare and laboratory settings, vinyl's typically your go-to choice, though you'll want to evaluate other materials based on your facility's unique needs and specifications.
If you're installing in areas with diagnostic equipment or sensitive electronics, you'll need to carefully assess the conductivity levels – too high can pose safety risks, while too low won't provide adequate protection.
Your installation method will vary depending on your chosen material, but you'll always need a conductive underlayment and proper connection to the building's grounding system.
Remember that humidity levels and occupant footwear will affect your floor's performance, so factor these environmental conditions into your material selection. Your final choice should align with your specific application requirements while providing reliable static control protection.
Wear Layer Properties
Before installing static control flooring, understanding wear layer properties is essential for long-term performance and protection. The wear layer's composition, typically consisting of PVC resin mixed with plasticizers and stabilizers, determines its durability and static control capabilities. You'll need to select a thickness that matches your facility's requirements, with options ranging from 12 to 30 mils.
| Wear Layer Thickness | Durability Level | Best Application |
|---|---|---|
| 12 mils | Light | Low-traffic areas |
| 20 mils | Medium | Office spaces |
| 30 mils | Heavy | Industrial floors |
When selecting your wear layer, consider how it interacts with both static control properties and your facility's specific needs. The calendaring process fuses these layers together, creating a protective surface that must balance durability with static dissipation. You'll want to guarantee the wear layer doesn't compromise the floor's conductivity while still providing adequate protection against scratches and stains. Remember that thicker wear layers offer enhanced durability but must be carefully formulated to maintain proper static control properties through conductive elements like carbon or graphite.
Environmental Conditions
The success of static control floor installation hinges on maintaining proper environmental conditions throughout the process. You'll need to carefully control temperature and humidity while guaranteeing proper ventilation during installation.
The installation area must be maintained between 68°F and 85°F for three days before and after installation, with a minimum temperature of 55°F thereafter.
Critical environmental factors you must monitor:
- Moisture and Alkalinity: Test concrete slabs before installation to prevent failures and guarantee proper substrate conditions.
- Temperature Range: Keep the area between 68°F-85°F, and store materials within manufacturer-specified temperature ranges.
- Ventilation: Maintain adequate airflow to remove moisture and harmful vapors during installation.
Before you begin installation, make sure the subfloor is clean, dry, and free of contaminants. Store all materials in clean, well-ventilated areas away from direct heat sources.
You'll need to protect these materials from moisture and contaminants throughout the storage and installation process.
After installation, implement proper cleaning and maintenance procedures while regularly testing the flooring to guarantee it maintains ESD compliance.
Remember to follow all safety protocols when handling adhesives and chemicals during installation.
Grounding System Layout
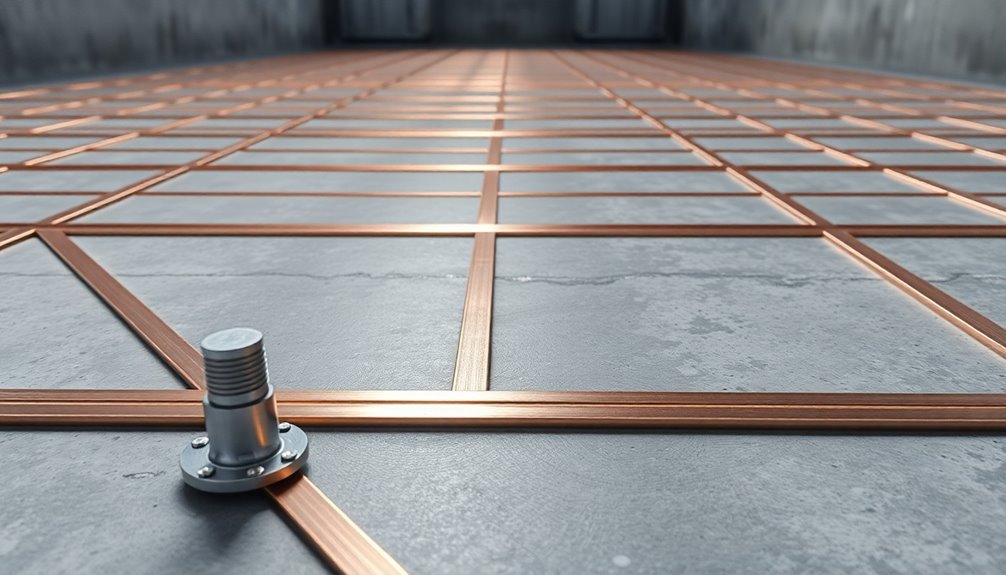
A proper grounding system layout serves as the foundation for any effective static control floor installation. You'll need to install copper grounding straps at the room's perimeter, with one strap required for every 1,000 square feet of ESD flooring.
To ground using electrical outlets, remove the center screw from the outlet cover and the grounding screw inside. Punch a hole in a 24-inch copper grounding strap, secure it to the outlet using the grounding screw, and let it run down to the subfloor.
For earth ground connections, drive a copper grounding rod 4-6 feet into the ground, leaving 2-3 inches exposed, then attach the grounding strap using a clamp.
You'll want to create an isolation barrier using cementitious underlayments on solid subfloors to guarantee consistent resistance.
Place earthing strips 150mm from one wall, laying them at 90-degree angles to each other.
Always establish at least two earth connections for redundancy, and use only approved materials like brass, copper, or stainless steel for your earth systems.
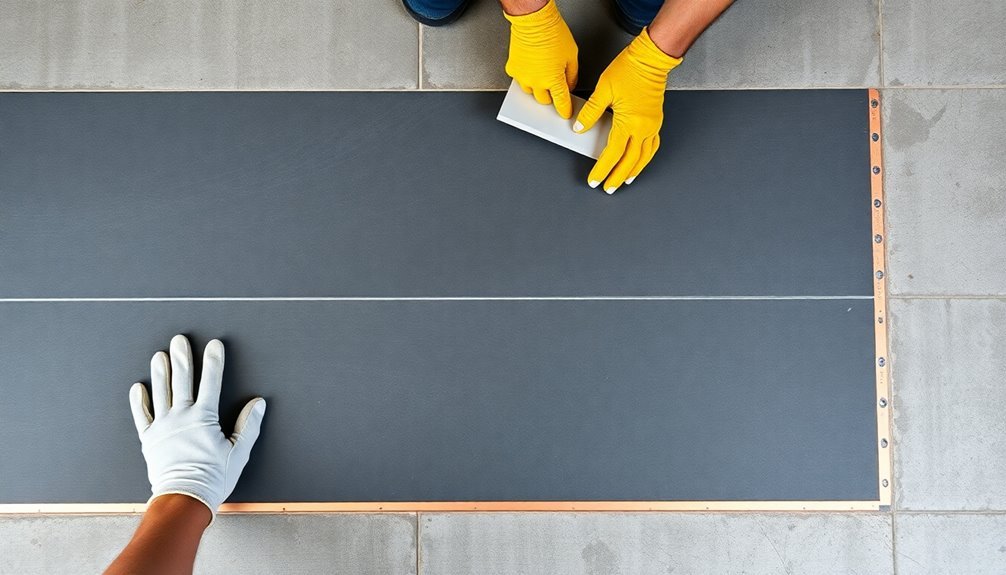
When installing ESD flooring, make sure you're using approved conductive adhesives throughout the installation process.
Adhesive Application Methods
Successful static control floor installation hinges on proper adhesive application methods. You'll need to choose between one-part acrylic adhesives and pressure-sensitive options like GroundTack, depending on your specific needs. For conductive performance, guarantee your selected adhesive is more conductive than the flooring material to effectively direct charges to ground.
When using one-part acrylic adhesives, you'll need precise timing during the drying process to avoid installation errors.
With pressure-sensitive adhesives like GroundTack, you can install tiles immediately without waiting for drying time.
For either option, you must install copper connector strips to link the adhesive ground plane to grounding points, with each strip covering 1,000 square feet.
Before applying any adhesive, prepare your subfloor thoroughly. Test for moisture, verify the surface is clean and contaminant-free, and determine if you need a vapor barrier.
You'll want to spread the adhesive evenly across the installation area, maintaining consistent coverage.
For modular carpet installations, GroundTack offers the added benefit of easy removal and reinstallation.
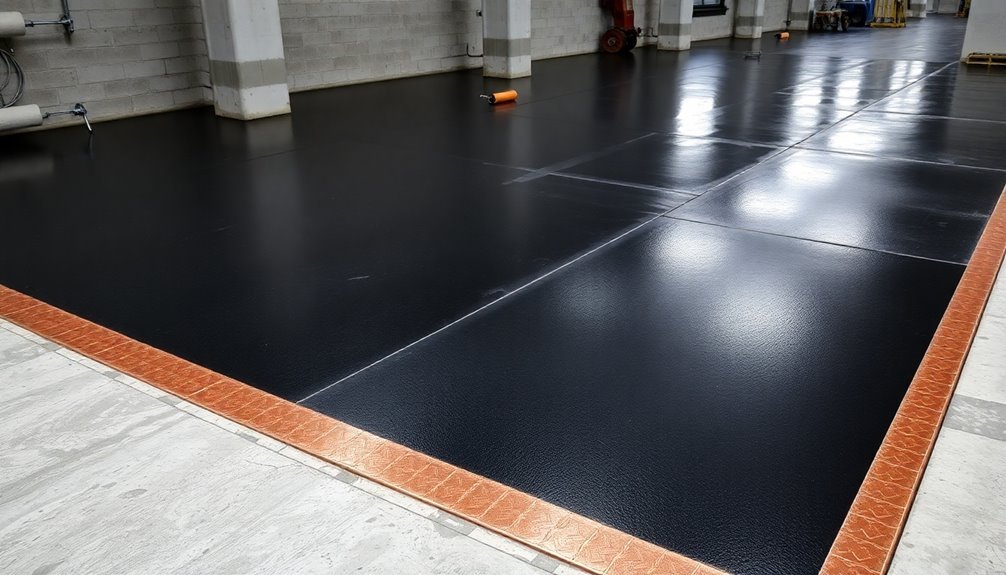
Floor Material Installation
You'll need to lay out your static control flooring materials in a systematic pattern that guarantees consistent conductivity across the entire surface.
When applying adhesives, you'll follow either the double drop method for sheet vinyl or use conductive adhesives for tiles, making sure to maintain even coverage for proper bonding.
To create secure seams, you must carefully bond the edges using appropriate techniques like heat welding or chemical bonding, guaranteeing no gaps that could compromise the floor's static-dissipative properties.
Material Layout Patterns
The proper layout of ESD flooring materials requires careful planning and precise execution to guarantee effective static control throughout the installation. You'll need to certify a traceable path to ground through conductive elements and appropriate underlayment.
Start by examining the room for defects and preparing the subfloor with a cementitious underlayment, allowing it to dry completely.
Install Copper Grounding Strips
Install copper grounding strips in a grid formation, keeping perimeter strips 150mm from walls and connecting them to earth points. You'll typically place these at 20-meter intervals or in a 600mm square grid pattern.
Apply Conductive Adhesives
Apply conductive adhesives throughout the installation area, as they're essential for all static-control floor coverings.
Connect to Ground
Connect the copper strips to an electrical outlet or earth ground to form a proper conductive ground plane.
When laying out your ESD flooring, you'll need to avoid traditional flooring patterns like straight, diagonal, or herringbone layouts, as they're not applicable to static control installations.
Instead, focus on creating an effective electrical path using the grid system. Always confirm the specific grid layout requirements with your end user before proceeding with the installation.
Adhesive Application Methods
After establishing the proper layout pattern, correct adhesive application becomes the next key step in ESD flooring installation. You'll need to start by selecting the appropriate conductive adhesive and verifying your subfloor is clean, dry, and properly tested for moisture.
If you're working with a porous subfloor, apply a primer before proceeding with adhesive application.
Use a 1/16" x 1/16" x 1/16" square notch trowel to spread the conductive adhesive evenly across the floor. You'll want to achieve full coverage at a rate of 180-250 square feet per gallon, depending on your subfloor's porosity. Don't use rollers for spreading the adhesive, and make sure you're working within the recommended open-time period.
Allow the adhesive to dry until it's tacky to touch, typically 45-60 minutes, before laying your floor material.
Pay special attention to cut tiles and high-traffic areas, verifying complete adhesive coverage. If you're installing over radiant heating, use only approved adhesives to prevent installation failure.
After placing the flooring, roll the entire surface with an 85-100 lb. roller to verify proper adhesive transfer and bond strength.
Seam Bonding Techniques
When it comes to seam bonding, proper technique is critical for creating a seamless ESD floor installation. You'll need to start by positioning your seams correctly – running them parallel to major traffic areas and keeping them at least six inches away from existing seams and underlayment joints. Never place seams perpendicular to doorways or entrances.
Key steps for perfect seam bonding:
- Use the double cut technique to cut through both pieces simultaneously while holding your knife perfectly vertical for clean 90-degree edges.
- Apply a small bead of seam sealer along the edge starting from the center, being careful not to use too much.
- Guide seams together by hand and immediately wipe away any excess sealer with a damp cloth, followed by a dry cloth.
Before cutting any seams, you'll want to remove trapped air and wrinkles from the material.
When using the full spread installation method, fold back seam edges and apply pressure-sensitive adhesive. After bonding, roll seams firmly with a hand roller.
Remember to protect your sealed seams and guarantee the adhesive is tacky but doesn't transfer when touched before proceeding with the installation.
Sealing and Joint Treatment
Proper sealing and joint treatment serve as critical components in static control floor installations, requiring careful attention to both electrical conductivity and structural integrity.
You'll need to apply sealants according to manufacturer specifications while guaranteeing they don't compromise the floor's static dissipative properties. Your sealant should help maintain Body Voltage Generation below 15 volts in both high and low humidity conditions.
Before applying sealants, you'll need to restore any eroded concrete and address all cracks appropriately.
When treating joints, use conductive adhesives for non-moving joints and flexible conductive sealants for moving joints. If you're working with interlocking tiles, guarantee the joints maintain electrical continuity from tile to tile.
Your maintenance plan should include regular cleaning with appropriate products that won't affect conductivity. Don't use harsh chemicals that could compromise the floor's static control properties.
You'll want to conduct routine inspections and testing to verify the floor's effectiveness. Keep detailed records of all maintenance activities and performance tests for future reference.
Performance Testing and Verification
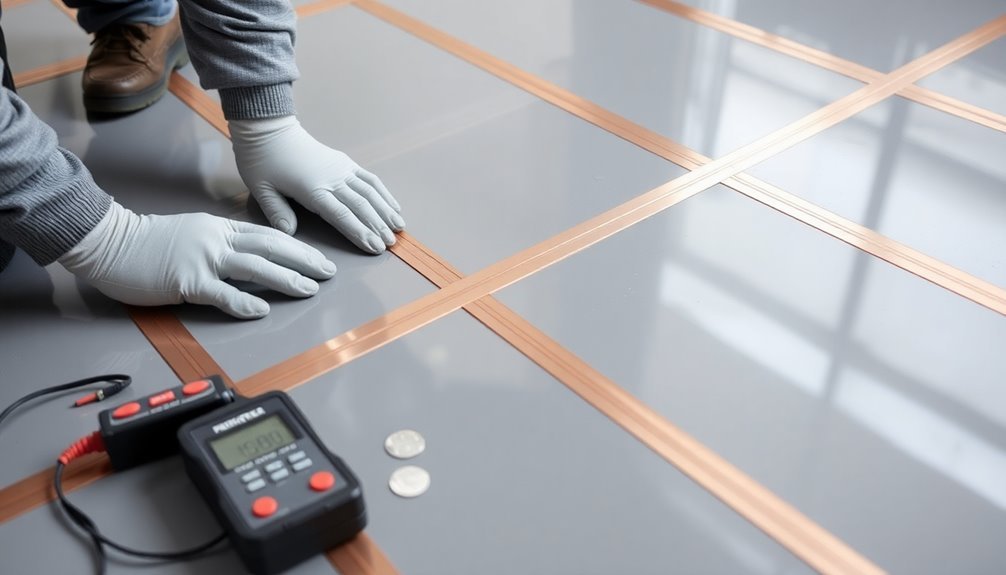
Performance testing forms the backbone of any static control floor installation's success. You'll need to conduct various tests to verify your static control flooring meets industry standards and performs as intended.
Start with electrical resistance testing using a megohmmeter or multimeter following ANSI/ESD STM 7.1 standards, measuring the floor's conductivity and static dissipative properties.
Before installation, you must perform moisture testing using ASTM standards F-2170, F-1869, or D4263. Keep relative humidity below 75% and verify moisture vapor transmission rates don't exceed 3 pounds per 1,000 square feet.
Once installed, conduct static voltage generation testing using a static charge plate recorder to measure real-world performance under different environmental conditions.
Complete a thorough ESD audit through an independent consultant to evaluate the entire system's effectiveness.
You'll want to test conductive floors for resistance values below 1.0 x 10^6 ohms, while static dissipative floors should measure between 1.0 x 10^6 and 1.0 x 10^9 ohms.
Document all test results and maintain records for future reference and compliance verification. Regular testing verifies your static control flooring continues to meet performance requirements throughout its lifecycle.
Maintenance Requirements and Schedules
Successful maintenance of static control flooring requires a systematic approach to preserve its ESD properties and extend its lifespan. You'll need to establish a cleaning schedule based on your facility's traffic volume and develop procedures using only approved static control cleaning solutions.
You must perform regular sweeping with anti-static tools and implement thorough scrubbing techniques to remove accumulated soil. If you're using water-based cleaning methods, add a softener when dealing with hard water to prevent mineral buildup.
Different floor types require specific care – ESD vinyl needs periodic buffing or waxing, while ESD carpet and rubber call for routine vacuuming and steam cleaning.
To maintain compliance with IEC-61340-1-5 standards, you'll need to conduct regular surface resistance testing. Don't use strong cleaners that can damage conductive particles, and avoid products that leave residual films.
Document all maintenance procedures and train your team accordingly. Work with your chemical suppliers to confirm you're using appropriate cleaning agents, and focus on preventative maintenance rather than corrective actions.
Remember that neglecting regular maintenance can compromise your floor's electrical performance, leading to costly repairs or replacements.
Frequently Asked Questions
How Long Should We Wait Before Allowing Foot Traffic After Installation?
You'll need to wait at least 48 hours before allowing normal foot traffic on your newly installed floor. If you're planning to use wheeled loads or place furniture, wait 72 hours instead.
Can ESD Flooring Be Installed Over Existing Floor Coverings?
Yes, you can install ESD flooring over existing floors, but you'll need to assess the surface condition, moisture levels, and structural integrity first. Some ESD options like carpet tiles and interlocking vinyl work particularly well.
What Happens if the Grounding System Fails During Operation?
If your grounding system fails, you'll risk equipment damage from static discharge, potential fires, worker injuries, and costly downtime. It's vital to monitor the system regularly and fix issues immediately for safety.
Are There Special Cleaning Products Required for ESD Floors?
Yes, you'll need specialized ESD floor cleaners to maintain static control properties. Don't use regular household cleaners as they'll leave insulative residues that compromise your floor's conductivity. Always choose cleaners designed for ESD surfaces.
How Often Should Conductivity Testing Be Performed After Installation?
You should test your ESD floor's conductivity monthly to maintain proper static protection. Don't skip testing, as it helps you detect performance issues early and guarantees your floor's continuous effectiveness in preventing electrostatic discharge.
In Summary
You'll find that proper static control floor installation requires careful attention to detail from initial planning through final testing. By following these steps and maintaining regular upkeep, you've created a reliable static-free environment that protects sensitive equipment and meets safety standards. Remember to document your installation process and keep maintenance records to verify your static control flooring continues performing as designed.


Leave a Reply