
Your static dissipative workbench installation needs five essential elements to succeed. You'll need to select materials with surface resistivity between 10^6 to 10^9 ohms and properly implement a grounding system using secure metallic crimps or banana plugs. You must conduct regular resistance testing following ANSI/ESD standards and maintain strict workplace safety protocols, including proper personal protection equipment. Don't forget environmental controls – keeping ideal humidity levels and using ESD-safe cleaning methods matters too. Understanding these fundamentals is just the first step to creating your ideal ESD-protected workspace.
Key Material Selection Requirements
When selecting materials for a static dissipative workbench, you'll need to focus on surfaces that maintain a surface resistivity between 10^6 to 10^9 ohms while meeting ANSI/ESD S20.20 standards. Your primary material options include ESD laminates, stainless steel, phenolic resin, rubberized ESD mats, and conductive polymers, each offering distinct benefits for different work environments.
You'll want to take into account how your chosen materials handle environmental conditions like outgassing and debris. ESD laminates offer cost-effectiveness and durability, while stainless steel provides excellent longevity. Adjustable height options make it easier to accommodate different workers and tasks.
If you're working with electronics assembly, you'll need surfaces that can safely dissipate static charges without damaging sensitive components.
The material must integrate well with high-quality steel frames and grounding systems. Look for options that include embedded carbon layers or anti-static powder coatings for enhanced protection.
Your work surface should handle 100,000 ohms and maintain its protective properties over time. Remember that regular testing will be necessary to verify your materials continue meeting compliance standards, so choose materials that allow for easy maintenance and testing procedures.
Proper Grounding System Setup
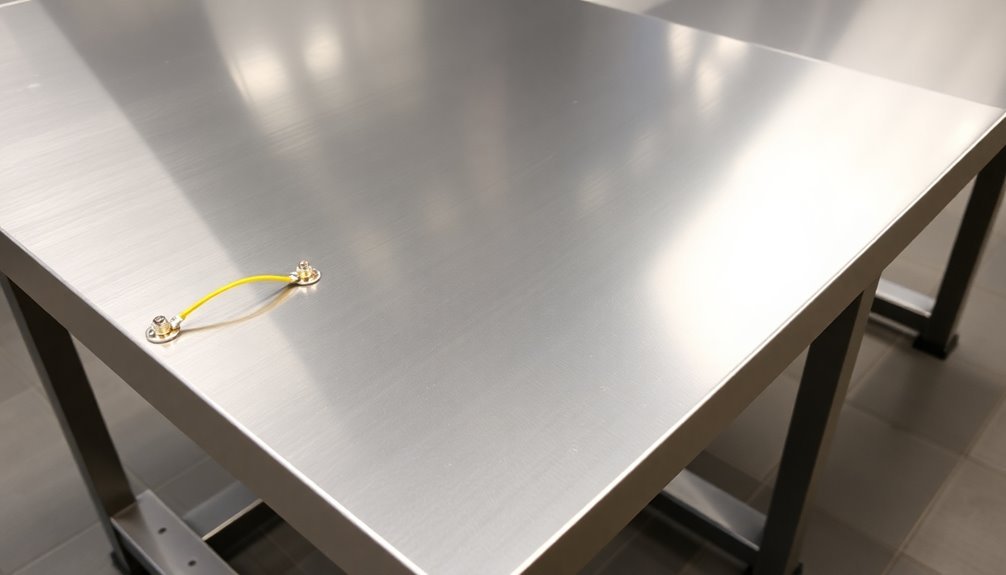
You'll need to carefully connect your grounding cables using secure metallic crimps or banana plugs to establish reliable paths from your workbench components to the common point ground.
Installing connections with resistance of 1-10 megohms will ensure proper charge dissipation while preventing dangerous surges through the system.
Your common point ground must link directly to the equipment grounding conductor, ensuring all conductive elements share a single reference point for effective static dissipation.
To maintain system integrity, you should regularly test the impedance between your worksurface, floor mats, and ground connections using appropriate measurement tools.
Grounding Cable Connection Methods
For a properly functioning static dissipative workbench, secure and reliable grounding cable connections form the foundation of your ESD protection system. You'll need to use firm-fitting connecting devices like metallic crimps, snaps, and banana plugs to guarantee consistent grounding performance. Don't use alligator clips, as they're not recommended for reliable ground connections.
Start by connecting the common point grounding wire to your work surface mat's stud, making sure it's properly secured. You'll need to verify that nearby outlets are properly grounded using a ground/polarity tester before making any connections. Static discharge damage can permanently destroy sensitive electronic components if proper grounding isn't maintained.
The ground wire from your work surface should connect directly to Ground using appropriate connectors.
When setting up your floor mat grounding, you'll need a dedicated floor mat grounding cord connected to Ground. Your personnel grounding system must include either wrist straps or foot grounders worn on both feet.
Remember to establish a common point grounding system using an earth bonding plug for all components.
To maintain system integrity, regularly check all connections and verify they're secure. Your grounding system should create a complete path from personnel through the work surface and floor mats to Ground.
Common Point Ground Implementation
Implementing a common point ground system requires careful attention to the fundamental components and their connections. You'll need to establish a single common point that connects all grounding conductors to the same electrical potential, guaranteeing proper static charge dissipation throughout your workstation.
Start by connecting your ESD protective worksurface to the common point ground, verifying a resistance between 1.0 x 10^6 to 1.0 x 10^9 ohms. You'll need to integrate all equipment and personnel grounding into this same point using appropriate grounding hardware and cords. Installing overhead ionizers helps neutralize any remaining electrostatic charges that could affect sensitive components.
| Component | Connection Method | Resistance Requirement |
|---|---|---|
| Worksurface Mat | Ground Cord with 1MΩ Resistor | 10^6 – 10^9 Ω |
| Floor Mat | Ground Cord to Common Point | 10^6 – 10^9 Ω |
| Personnel | Wrist Strap/Foot Grounders | <35 x 10^6 O |
Don't forget to verify your connections regularly and guarantee all external equipment is properly grounded. You'll want to position your common point ground at the workbench's edge or back, making it easily accessible for testing and maintenance. Remember to implement soft grounding through 1MΩ resistors for your mats and maintain system resistance values below 1Ω for ground wires.
Regular Impedance Testing Protocol
Building upon a solid common point ground system, regular impedance testing serves as the cornerstone of maintaining proper ESD protection.
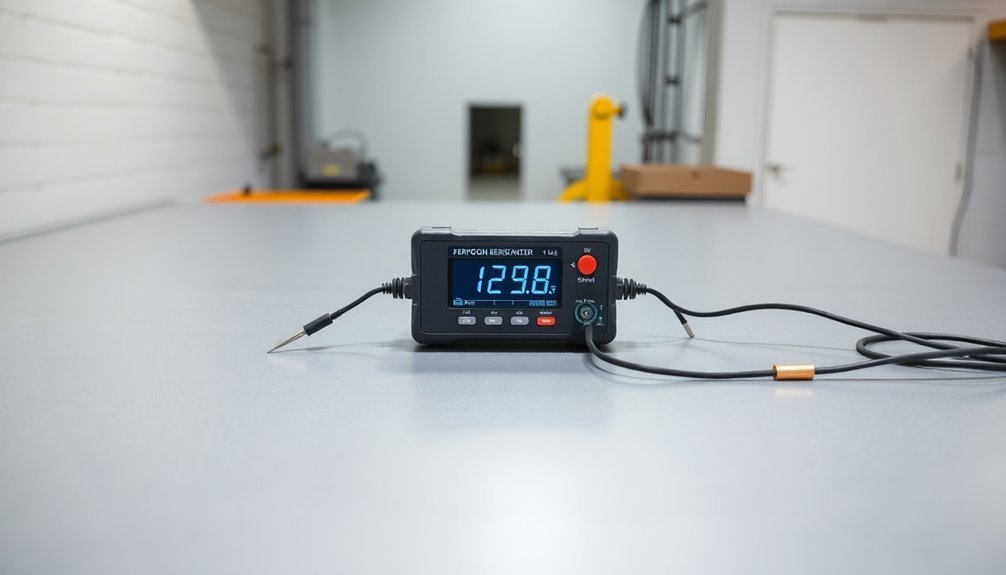
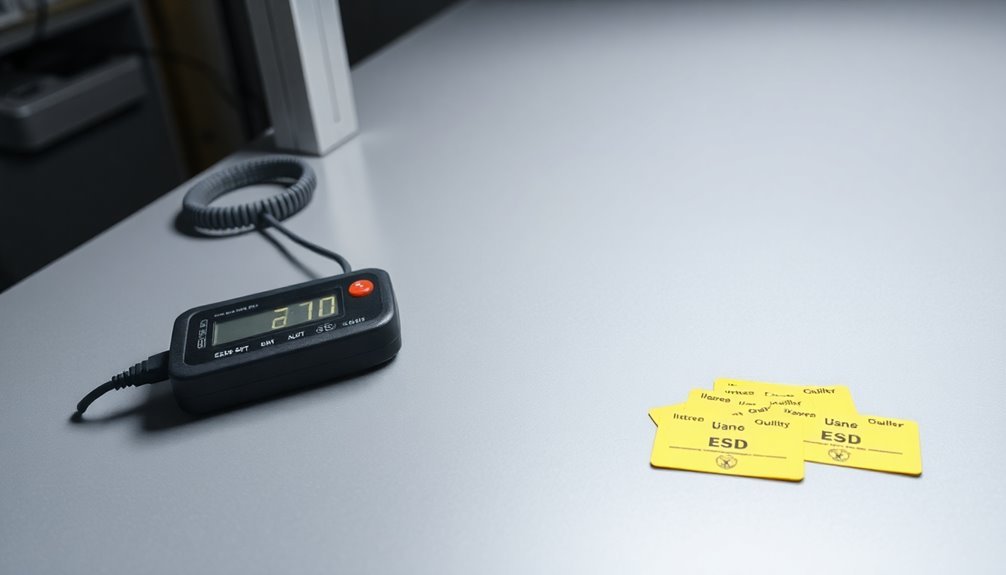
You'll need to conduct systematic tests using an ESD tester to verify that your grounding system's impedance falls within specified limits.
Start by testing each workbench's connection to the ground point, whether it's connected to an AC ground or an ESD ground bus bar. You must check both resistance-top-to-top (RTT) and resistance-to-groundable point (RTG) measurements on your ESD mats, following ANSI/ESD S4.1 standards. Static dissipative materials should have surface resistance values between 1 x 10^6 and 1 x 10^9 ohms.
Don't forget to verify that your auxiliary ground maintains less than 25 ohms impedance to the electrical outlet.
Your testing protocol should include regular checks of all grounding cords, wrist straps, and floor mats. You'll want to document these measurements to track any degradation over time.
If you're using AC ground, confirm you're testing both neutral and equipment ground wire connections. Remember, you can't rely on visual inspection alone – proper impedance testing reveals hidden issues that could compromise your ESD protection.
When you discover any values outside acceptable ranges, take immediate corrective action to maintain system integrity.
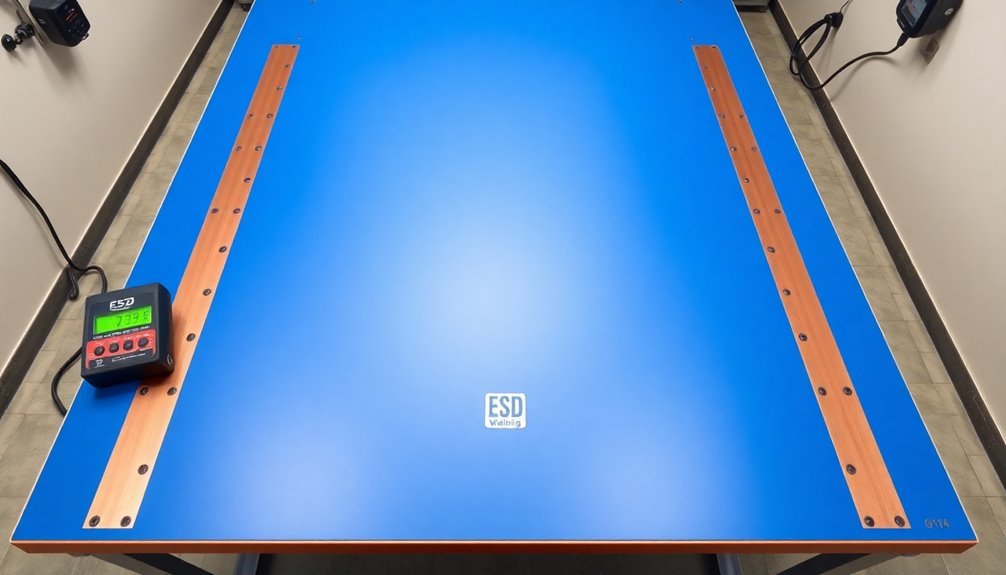
Surface Resistance Testing Methods
To guarantee proper ESD protection, surface resistance testing on static dissipative workbenches requires two primary methods: RTT (Resistance-Top-To-Top) and RTG (Resistance-To-Groundable Point).
You'll need to perform RTT testing using two 5-pound electrodes placed 10 inches apart, verifying they're at least 2 inches from edges and 3 inches from grounded points.
For RTG testing, you'll use one 5-pound electrode and connect a lead to a grounded point. All ESD sensitive items must be removed from the workbench surface before beginning any testing procedures.
When conducting these tests, you'll want to focus on three key areas: the most frequently used surface, the center, and the furthest point from ground. You'll need a calibrated surface resistance test kit with proper electrodes to achieve accurate measurements.
Your target range for a dissipative surface should fall between 1 x 10^6 and 1 x 10^9 ohms, as per the ANSI/ESD S4.1 standard.
Remember to maintain detailed records of your test results and perform testing under controlled environmental conditions.
You'll need to verify your test equipment receives annual calibration to NIST traceable standards, and you should always isolate the workbench electrically during testing to prevent interference with your measurements.
Workplace Safety Protocols
You'll need to follow a strict inspection schedule to maintain your static dissipative workbench's safety features, including daily visual checks and weekly resistance measurements.
Your personal protection protocol must include properly worn wrist straps, ESD-safe footwear, and protective garments whenever you're at the workstation. Using an appropriate common point ground ensures all workstation equipment maintains the same electrical potential.
In case of an ESD incident, you should immediately power down affected equipment, document the occurrence, and follow your facility's emergency response procedures for potential equipment damage.
Regular Inspection Schedules
Regular inspections stand out as a critical component of maintaining a safe and effective static dissipative workbench environment.
You'll need to implement a thorough testing schedule that covers all essential components of your ESD protection system.
Check your grounding systems daily by inspecting cables and connections for wear or damage. You should test wrist straps each day and perform bend tests every six months. Don't forget to verify your continuous monitors semi-annually using calibration units.
Your work surface requires quarterly testing to guarantee it maintains proper static dissipative properties. You'll want to measure surface resistivity to confirm it stays within the acceptable range of 10^6 to 10^9 ohms.
Clean the surface regularly to prevent contamination that could compromise its anti-static properties.
Keep detailed records of all your inspections and tests. You'll need to document grounding system checks, resistance measurements, and ionizer performance data.
Make sure you're following ANSI/ESD S20.20 guidelines by developing a testing frequency that matches your risk exposure and product value.
Replace any worn-out components immediately to maintain system integrity and workplace safety.
Personal Protection Requirements
Three essential layers of personal protection form the foundation of a safe static dissipative workbench environment. You'll need to start with proper antistatic clothing, including garments made from static dissipative materials that prevent charge buildup during your work.
Your outermost layer must include an ESD wrist strap connected to a reliable ground point, ensuring continuous discharge of any static electricity from your body.
The second layer focuses on your extremities. You must wear ESD gloves with protective coatings or copper/carbon thread weaving when handling sensitive components. Don't forget foot grounders to maintain an uninterrupted path to ground, complemented by appropriate antistatic headgear when required by your facility's protocols.
Your final layer involves proper training and consistent implementation. You'll need to understand how to correctly use and maintain your PPE, regularly test equipment functionality, and stay compliant with ANSI/ESD S20.20 standards.
Make sure you're performing daily checks of your wrist straps and foot grounders before starting work, and maintain awareness of proper grounding techniques throughout your shift. These protective measures aren't optional – they're vital for maintaining an ESD-safe workspace.
Emergency Response Procedures
An exhaustive emergency response plan forms the backbone of workplace safety in static dissipative workbench environments. You'll need to establish clear protocols for emergency situations, ensuring all personnel understand their roles and responsibilities during incidents involving static-sensitive equipment and materials.
- Assess and document all available resources specific to your static workbench area, including specialized equipment shutdown procedures, nearby emergency services, and evacuation routes that minimize static discharge risks.
- Train your team on proper emergency response procedures, including how to safely power down static dissipative workbenches, use emergency equipment, and follow evacuation protocols without creating additional static hazards.
- Regularly test and update your emergency procedures through practical exercises, ensuring all employees can execute them effectively while maintaining static safety protocols.
You must designate specific evacuation wardens who understand both general emergency procedures and the unique requirements of static-sensitive environments.
Establish clear communication channels for alerting first responders about the presence of static-sensitive equipment and materials.
Make sure to regularly review and update your emergency response procedures, incorporating feedback from drills and actual incidents to improve your plan's effectiveness.
Ergonomic Design Principles
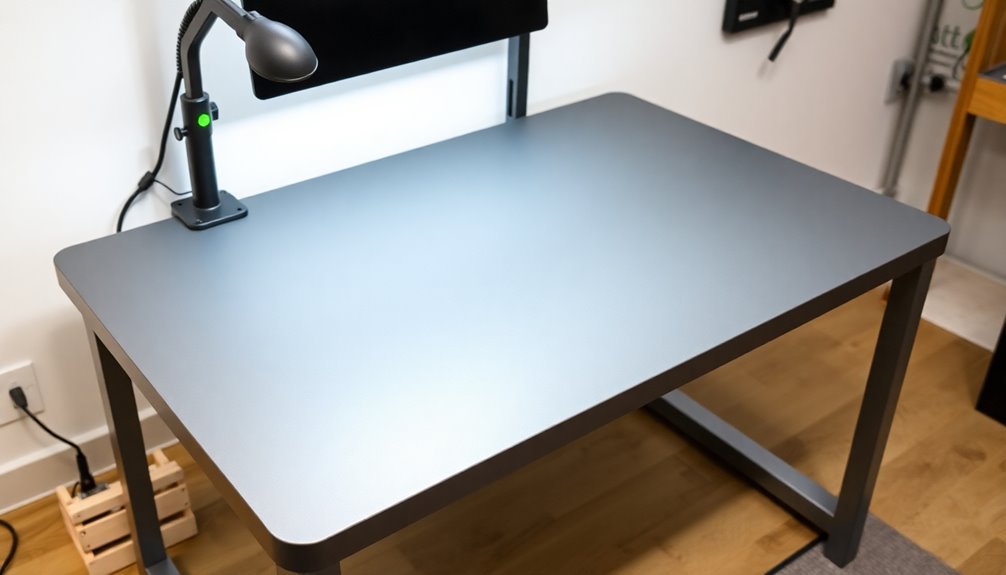
Through careful implementation of ergonomic design principles, static dissipative workbenches can maximize both safety and productivity.
You'll want to position your workbench at an optimum height of 1,125 millimeters, whether it's used for sitting or standing tasks. Make sure you've got electrical height adjustability to accommodate different users and activities throughout the day.
Organize your workspace into distinct handling zones for two-handed, one-handed, and extended reach tasks. You'll need adequate legroom and unobstructed access, especially if you're accommodating wheelchair users.
For lighting, install 4,000 Kelvin fixtures with diffuse illumination to reduce shadows and prevent glare. Don't forget to make the lighting adjustable for different tasks.
Position your tools and materials strategically, keeping heavy items in lower containers within easy reach. You'll want to promote flowing movements that curve upward away from the body.
For seating, invest in chairs that are steplessly height-adjustable with adaptable armrests. Include footrests to support proper posture, particularly for higher seating positions.
Remember to encourage dynamic activities by alternating between standing and sitting throughout the workday.
ESD Protection Equipment Integration
Proper integration of ESD protection equipment forms the foundation of a reliable static-safe workspace. You'll need to carefully select and connect various components while maintaining common point grounding to guarantee all elements stay at the same potential.
When you're installing your workbench, it's vital to verify that the resistance to ground measures less than 1 ohm for AC ground and 25 ohms for auxiliary grounding.
- Choose ESD laminates and materials based on your required protection level (Class 0-3), guaranteeing they meet ESD Association standards for static dissipation.
- Install grounding jacks and cables strategically to avoid daisy chaining, and implement a thorough common point grounding system.
- Integrate essential accessories like wrist straps, ESD-safe storage bins, and constant ground monitors based on your specific protection requirements.
Your workbench should incorporate power outlets and cable management systems for efficiency while maintaining ESD protection integrity.
Don't forget to implement regular testing procedures to verify grounding continuity and effectiveness.
When you're selecting materials like stainless steel, consider special handling requirements to prevent outgassing and contamination.
Regular Maintenance Checks
Regular maintenance checks serve as the cornerstone of a reliable ESD-protected workspace. You'll need to establish a systematic approach to inspect and maintain your workbench's grounding system, including regular checks of cables, connections, and wrist straps.
Don't forget to test ground points with an ESD tester and replace any worn components immediately.
Keep your ESD surfaces clean using appropriate methods. You'll want to avoid abrasive cleaners that can damage the dissipative surface. Instead, use a cotton cloth with diluted ammoniated detergent to remove dirt and prevent grease buildup that could compromise static dissipation properties.
Environmental control plays a vital role in maintenance. You should maintain proper humidity levels and keep your workspace organized with designated containers for components.
Make sure you're regularly inspecting all elements of your bench, including shelves and storage areas, to verify their static dissipative properties remain effective.
Implement a regular testing schedule to verify your workbench's performance. You'll need to check surface resistivity, test ground points, and monitor wrist strap functionality.
Consider using continuous monitoring systems for critical components to guarantee consistent ESD protection.
Power Distribution Planning
Effective power distribution planning forms the foundation of a safe and functional ESD workbench setup. You'll need to carefully consider outlet placement, cable management, and grounding mechanisms to create an efficient workspace that protects against static electricity and electrical hazards.
When you integrate power outlets properly, you'll minimize the risk of tangled cables while ensuring easy accessibility to power sources.
- Position your power outlets strategically to prevent exposed cords and maintain a clean workspace. Built-in power panels should include both grounded and non-grounded sockets with switch buttons for versatility.
- Implement thorough cable management systems to keep your workspace organized and prevent potential hazards. These systems should incorporate built-in power panels and grounding cables to maintain safety standards.
- Install proper grounding mechanisms, including wrist strap jacks and grounding wires, to create safe paths for static electricity discharge. Remember to use high resistance dissipative surfaces instead of conductive ones to prevent rapid discharges.
Environmental Control Measures
Safety in your ESD workspace depends heavily on thorough environmental control measures that protect against static discharge risks.
You'll need to start with proper flooring controls by removing any carpeting and installing ESD-safe materials, including anti-static acrylic floor polish and conductive floor mats with carbon fibers at workstations.
Your humidity control strategy plays a vital role in minimizing static risks. You'll want to maintain ideal humidity levels using humidifiers or dehumidifiers, while consistently monitoring the environment for areas that might develop high ESD risks due to dry air conditions.
Make sure you've established clear procedures for humidity management and regular assessment.
For your workbench setup, you'll need to guarantee proper isolation from floor static charges using insulated floor glides. Don't connect your workbenches electrically to the floor, but do implement a direct grounding system to the ESD ground bus bar or AC electrical ground.
You must avoid daisy chaining and regularly test your grounding connections with impedance meters.
Remember to equip your personnel with proper grounding devices like wrist straps or static dissipative footwear when handling ESD-sensitive components.
Frequently Asked Questions
How Often Should Static Dissipative Surfaces Be Cleaned and With What Products?
You'll need to clean static dissipative surfaces weekly to monthly, depending on traffic. Use anti-static cleaners like StaticWorx ScrubWorx or ACL 4020, and apply them with lint-free cloths or damp mops.
Can Multiple Workbenches Share a Single Ground Connection Point?
Yes, you can safely connect multiple workbenches to a single ground point. However, you'll need to guarantee each connection maintains proper resistance and regularly test the setup to prevent potential interference issues.
What's the Maximum Recommended Weight Capacity for Static Dissipative Workbench Surfaces?
You can load up to 6,600 lbs on static dissipative workbenches with 16-gauge cold-rolled steel frames. That's the maximum weight capacity you'll find in standard ESD workbenches that meet industry requirements.
Do LED Lights Affect the Performance of Static Dissipative Workbenches?
LED lights can affect your workbench's static dissipative performance if they're not properly shielded and grounded. You'll need to guarantee proper installation with adequate grounding to prevent electromagnetic interference with your static control system.
How Long Do Static Dissipative Surface Treatments Typically Last Before Requiring Replacement?
You'll find that static dissipative surface treatments typically last 3-5 years with proper maintenance. However, your workbench's longevity depends on usage, environmental conditions, and regular cleaning to prevent insulating buildup.
In Summary
You'll find success with your static dissipative workbench installation by focusing on proper material selection, grounding systems, and regular testing protocols. Don't forget to integrate ESD protection equipment and maintain environmental controls while ensuring ergonomic comfort. Keep up with maintenance checks and safety procedures. When you've addressed these key elements, you'll have a reliable, safe, and efficient ESD-protected workspace.


Leave a Reply