
To test electrical floor resistance, you'll need a calibrated ohmmeter and two 5-pound probes placed 3 feet apart. First, verify your floor surface is clean and in a Saturated Surface Dry condition. Control humidity at 15% ±3% and allow the floor to condition for 72 hours at 75°F. Apply 10 volts for 15 seconds during testing, and if readings exceed 1.0×10^6 ohms, retest with 100 volts. Perform at least 5 tests per 5000 ft² of continuous floor surface. Document all measurements, including temperature and humidity. Following proper safety protocols and industry standards will guarantee your testing accuracy and reliability.
Pre-Test Floor Surface Preparation
Prior to electrical floor testing, proper substrate preparation serves as the foundation for accurate results. You'll need to guarantee your substrate meets essential requirements: it must be structurally sound, clean, durable, flat, and at minimum saturated surface dry (SSD). The surface should also be pitched according to specifications.
Before installation, you'll need to thoroughly clean all substrates, as this step is critical for ESD flooring performance. As the owner or contractor, it's your responsibility to provide an acceptable substrate, and you should verify all criteria are met before proceeding. The resistance test meter must be calibrated to measure between 1.0 x 10E3 to 1.0 X 10E10 ohms for accurate readings.
When installing flooring samples, place them on insulative support material like rigid plastic sheet stock. You'll need to use the specified adhesive for your particular flooring material and create a seam to simulate actual installation conditions. Remember to replicate factory installation methods precisely.
Don't overlook the conditioning phase. You must maintain a controlled environment with 12% humidity (±3%) for at least 72 hours before testing. All samples need identical conditioning to guarantee reliable results.
Any deviation from these preparation steps can lead to flooring failure or inaccurate test measurements.
Environmental Testing Conditions
After preparing your floor surface, maintaining proper environmental conditions during testing becomes the next key focus. You'll need to carefully control humidity levels at 15% ±3% to guarantee accurate results. While field testing might seem convenient, it won't provide the reliable data you need – a controlled laboratory environment is essential for precise measurements.
To get accurate readings, you'll want to condition your samples at low relative humidity. This step helps expose any potential shortcomings in the flooring material and prevents false readings that could occur in high-humidity conditions. Remember that some ESD materials, particularly vinyl products with special waxes, can perform differently at varying humidity levels. Materials require 72 hours minimum conditioning before any testing can begin.
| Environmental Factor | What You Need to Know |
|---|---|
| Humidity Control | Maintain at 15% ±3% |
| Testing Location | Use controlled lab environment |
| Sample Conditioning | Pre-condition at low RH |
| Standard Compliance | Follow ANSI/ESD S20.20 & STM 7.1 |
While temperature isn't specifically standardized in ESD floor testing protocols, you should still monitor environmental conditions throughout your testing process. Always document your testing conditions and guarantee you're following industry standards like ANSI/ESD S20.20 for consistent, reliable results.
Required Testing Equipment
From the ground up, proper electrical floor testing requires specific equipment to guarantee accurate measurements.
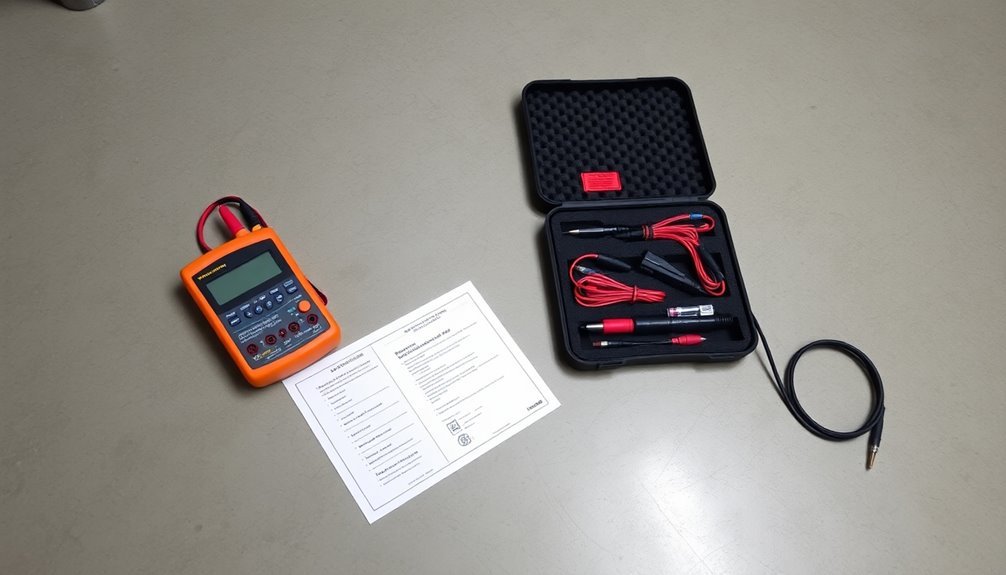
You'll need a reliable ohmmeter as your primary measurement tool, along with two 5-pound probes that you'll place 3 feet apart on the floor surface. A voltmeter and power supply are essential for applying the required 10 volts during testing procedures.
Your probes should be equipped with proper connectors, such as banana jacks or BNC connectors, to assure secure attachment to the ohmmeter.
When setting up your equipment, you'll need to follow either ASTM F150 or ANSI/ESD STM 7.1 guidelines for standardized testing methods.
To achieve accurate readings, you'll use specific measurement techniques including four-wire measurement, point-to-point testing, and point-to-groundable point measurements. The target resistance reading should be 1.0 x 10E9 ohms for most applications.
Remember that you're responsible for maintaining and calibrating all equipment regularly.
Don't proceed with testing unless you're qualified to do so, as proper expertise is vital for accurate results.
Keep detailed records of all measurements to demonstrate compliance with ESD standards and maintain a documented testing history for your facility.
Floor Surface Cleaning Methods
Proper testing equipment is only effective when used on a correctly prepared surface. You'll need to follow specific cleaning procedures to guarantee accurate resistance measurements of your electrical floor.
Start by cleaning the floor surface with a neutral detergent, using a damp mop to remove dirt and debris. Once you've thoroughly cleaned the area, rinse it with clean water to eliminate any detergent residue. Don't proceed with testing until the floor has completely dried. The ideal resistance range of 10E5-10E8 ensures safe static discharge when testing clean surfaces.
Make sure there aren't any waxes or sealers on the surface, as these can interfere with your measurements.
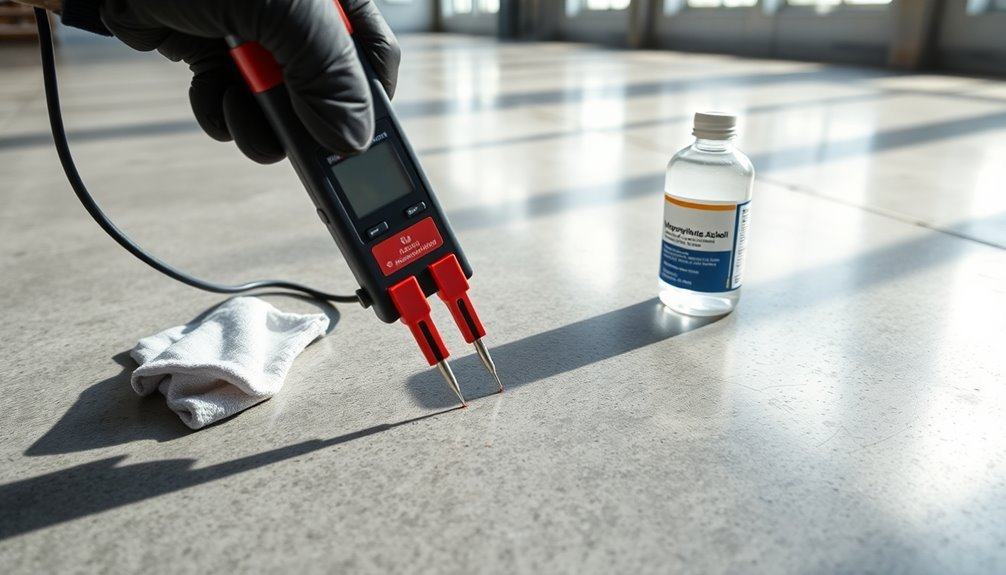
Your electrodes require special attention too. Clean them with a 70% or stronger isopropanol-water solution, using a clean, low-linting cloth. Let them air dry completely before use.
You'll need to clean your electrodes regularly to maintain their effectiveness and prevent contamination.
Remember to conduct your tests under ambient temperature and humidity conditions. You must comply with industry standards like ANSI/ESD STM 7.1 throughout the process.
Keep your testing environment clean and free from contamination, and always follow proper electrical safety protocols when handling equipment.
Point-to-Point Testing Procedure

The heart of electrical floor testing lies in point-to-point measurements. You'll need to verify your Key Resin Conductive Epoxy Flooring System has cured for at least 72 hours at 75°F before beginning any tests.
Clean your electrodes with 70% isopropanol solution and confirm the floor surface is free from sealers or wax. Quarterly testing schedule is recommended to maintain optimal floor performance.
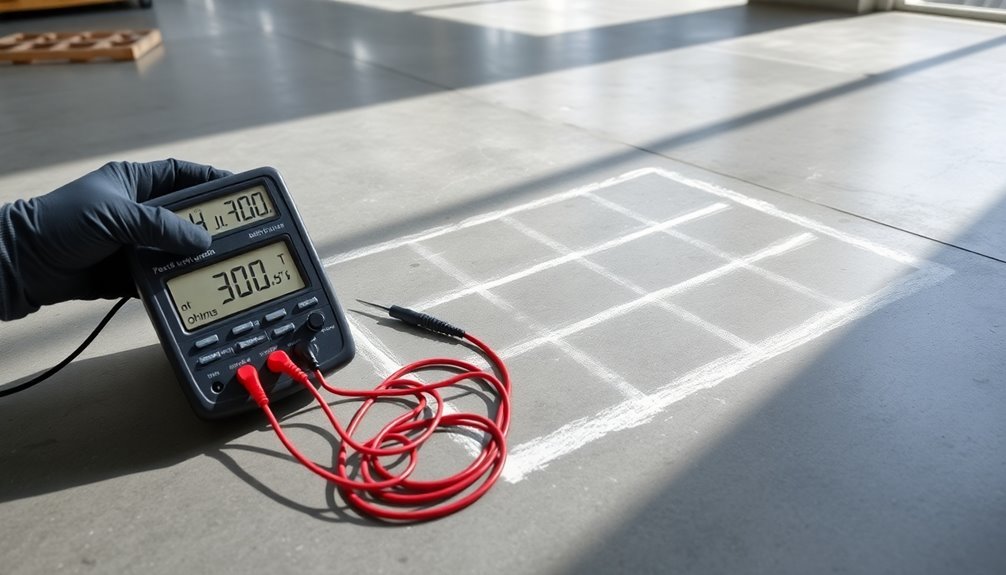
To conduct the test, place your floor electrodes 3 feet apart and apply 10 volts for 15 seconds using your megohmmeter. If readings exceed 1.0×10^6 ohms, switch to 100 volts and retest.
You'll need to perform at least 5 tests per continuous floor surface or per 5000 ft², whichever is greater.
Your target resistance range should fall between 2.5×10^4 and 1.0×10^6 ohms. Record all values, including test voltage, date, temperature, and relative humidity.
Don't forget to document the test equipment used. Create a detailed data summary showing minimum, maximum, mean, and median values, along with electrode positions.
If you notice any readings outside the specified range, contact technical services immediately. Remember, floors that are too conductive can pose safety risks to personnel working near energized equipment.
Ground Connection Setup
After confirming your floor's resistance values, establishing reliable ground connections becomes your next priority.
You'll need to choose between three primary methods: copper bus bars, ground straps on I-beams, or direct attachment to steel support columns. Each method requires proper surface preparation and secure connections to guarantee ideal ESD protection. Conductive adhesive must be applied under the grounding straps to ensure proper electrical contact.
For a straightforward approach, you can connect to an ESD electrical outlet using these essential steps:
- Start by removing the outlet's center screw and locating the internal grounding screw.
- Create a small hole in your 24-inch copper grounding strap and secure it to the outlet.
- Run the strap down the wall to reach your subfloor.
- Test the connection using a volt ohm meter to verify resistance of 5.0 ohms or less.
If you're working with ground rods, drive them 4-6 feet into the earth, leaving just a few inches exposed.
Don't forget to maintain at least one grounding strap per 1000 square feet of ESD flooring. Always test your electrical receptacles with an approved circuit tester before making connections, and conduct regular continuity tests to guarantee your ground connections remain compliant.
Recording Test Measurements
Recording accurate measurements during electrical floor testing serves as your foundation for compliance documentation and performance tracking. You'll need to carefully document each resistance reading you obtain, noting whether the values fall within conductive (<1.0 x 10E6 ohms) or **static dissipative** (>1.0 x 10E6 to <1.0 x 10E9 ohms) ranges.
Start by recording the specific test method you're using, such as ANSI/ESD STM 7.1, along with the date, time, and environmental conditions. Write down the type of measuring equipment you're using and verify that you've noted its calibration status. Before beginning measurements, ensure power is completely off to prevent damage to your testing equipment.
Make sure you're recording resistance values in the correct units (ohms, kilohms, or megohms) and document any instances where you needed to adjust the meter's range due to over-limit readings.
Don't forget to include the names of all personnel conducting the test and their roles. Create detailed notes about your probe placement positions, typically 36 inches apart, and document any variations from standard testing procedures.
If you're testing multiple floor areas, clearly label each location's measurements. This thorough documentation will prove invaluable for compliance verification and tracking floor performance over time.
Safety Protocols During Testing
You'll need to adhere to strict safety protocols when performing electrical floor testing, starting with proper personal protective equipment and establishing clear high-voltage area boundaries.
Your testing area must include warning lights, barriers, and emergency stop buttons that are easily accessible to prevent accidents and maintain controlled access. Regular independent lab testing helps ensure continued safety compliance during electrical resistance measurements.
Make sure you're familiar with emergency response procedures, including the location of first-aid equipment and proper CPR techniques, before beginning any electrical testing work.
Personal Protective Equipment Protocol
Safety protocols during electrical floor testing require strict adherence to personal protective equipment (PPE) guidelines.
You'll need to guarantee that all personnel involved in testing operations are properly trained and qualified before entering the testing area. Remember that anti-static materials must be avoided during safety testing, including robes, benches, and floor mats.
Essential PPE components for electrical floor testing include:
- High-voltage insulation gloves that meet current safety standards
- Safety footwear with proper electrical hazard ratings
- Protective goggles to shield against electrical arcs
- Approved safety helmets for head protection
You must place high-voltage insulation mats in the testing area to isolate operators from ground contact.
Before beginning any work, verify that all PPE has been inspected and is in good working condition.
Don't forget to post clear warning signs around the testing area to prevent unauthorized access.
If you're overseeing the testing process, guarantee that your team maintains proper PPE protocols throughout the entire procedure.
Remember to check your testing devices both before and after use to confirm they're functioning correctly and meeting IEC 61010-1 safety standards.
High-Voltage Area Management
Three critical elements form the foundation of high-voltage area management: isolation, access control, and proper equipment setup.
You'll need to isolate your test area from the main factory assembly space using non-metallic materials for work surfaces and confirming proper grounding connections to prevent electrical hazards.
Set up your safety equipment strategically. Install indicator lights and a signal tower to show when high voltage is present, with red indicating active testing and green for safe conditions.
Position dual remote palm switches at least 21.6" apart to prevent single-hand activation, and place an emergency stop button on the area's perimeter for immediate power cutoff.
You'll need to implement strict access protocols. Only allow authorized personnel in the test area, and verify unqualified workers are supervised by qualified operators.
Post internationally approved warning signs like "DANGER – HIGH VOLTAGE" around the perimeter. Don't forget to lay down high-voltage insulation mats to protect operators from ground contact.
Maintain your setup by performing daily tester checks with both PASS and FAIL samples at shift start.
Always verify test parameters before beginning and follow proper discharge procedures for DC-tested products.
Emergency Response Procedures
Properly executed emergency response procedures form the backbone of electrical floor testing safety.
You'll need to establish clear protocols and guarantee all personnel understand their roles during emergencies. Make sure you've got emergency equipment readily accessible, including fire extinguishers and emergency switches, and maintain warning systems that clearly indicate when testing is in progress.
Your emergency response plan should include these critical components:
- First aid readiness – Train all testing personnel in CPR and basic first aid procedures, keeping emergency medical supplies within immediate reach.
- Warning system implementation – Install visible warning lights and signage to indicate active testing zones and maintain clear communication channels.
- Emergency shutdown protocols – Establish and practice quick-response procedures for immediate power disconnection and system shutdown.
- Emergency contact chain – Post emergency contact numbers and establish a clear reporting hierarchy for different types of incidents.
You'll need to conduct regular emergency drills to guarantee everyone knows how to react during various scenarios.
Document all emergency procedures and maintain detailed records of drills and any actual incidents.
Remember to review and update these procedures regularly based on drill outcomes and changing safety requirements.
Testing Documentation Requirements
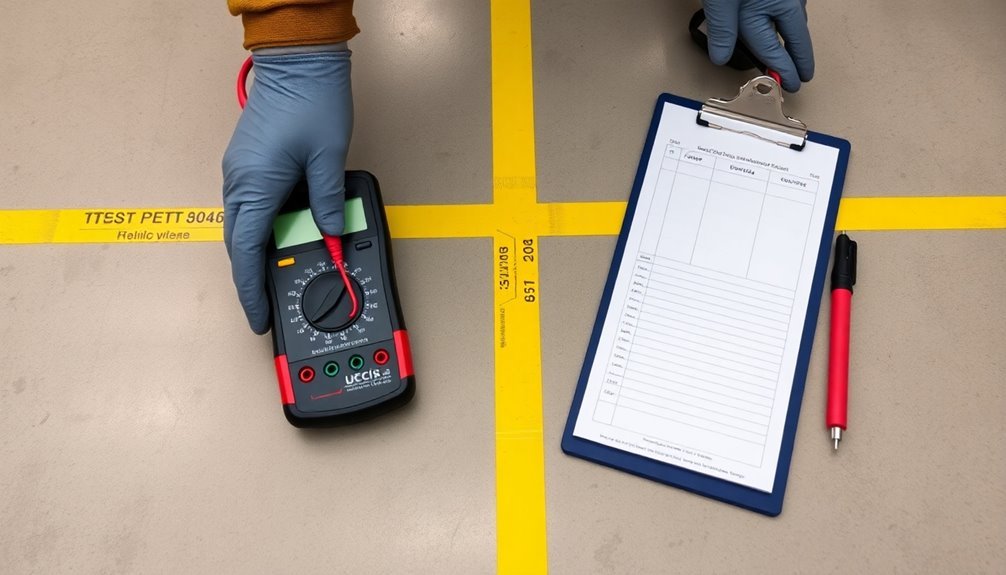
You'll need to record your test specifics daily, including time, location, and measured values to maintain accurate documentation for electrical floor testing.
Confirm you're verifying and documenting your equipment calibration status before each testing session, as this validates the reliability of your results.
These records will serve as critical references for compliance verification and should be stored in your secure electronic database with standardized forms.
Record Test Specifics Daily
Daily documentation of electrical floor testing is essential for maintaining safety compliance and guaranteeing quality control. You'll need to record thorough details about each test you perform, including the date, method, equipment used, and your name as the test conductor.
Your documentation should follow standardized fields and comply with relevant standards like IEC 62353. When recording test specifics, make sure you're capturing the complete testing environment and conditions.
You'll need to maintain both electronic and physical records that include product identification, visual inspection notes, and specific measurements taken during the testing process.
To effectively manage your daily records, follow these key steps:
- Document all test parameters immediately after testing, including temperature, humidity, and other environmental conditions.
- Take detailed photos of any visual defects or areas of concern, attaching them to your digital records.
- Record all measurement values using standardized units and formats for consistency.
- Include your electronic signature and timestamp on each test record for validation.
Remember to use a computerized system that allows for easy searching, analysis, and review of historical test data. This systematic approach guarantees you're maintaining traceable, accurate records for compliance purposes.
Equipment Calibration Verification Records
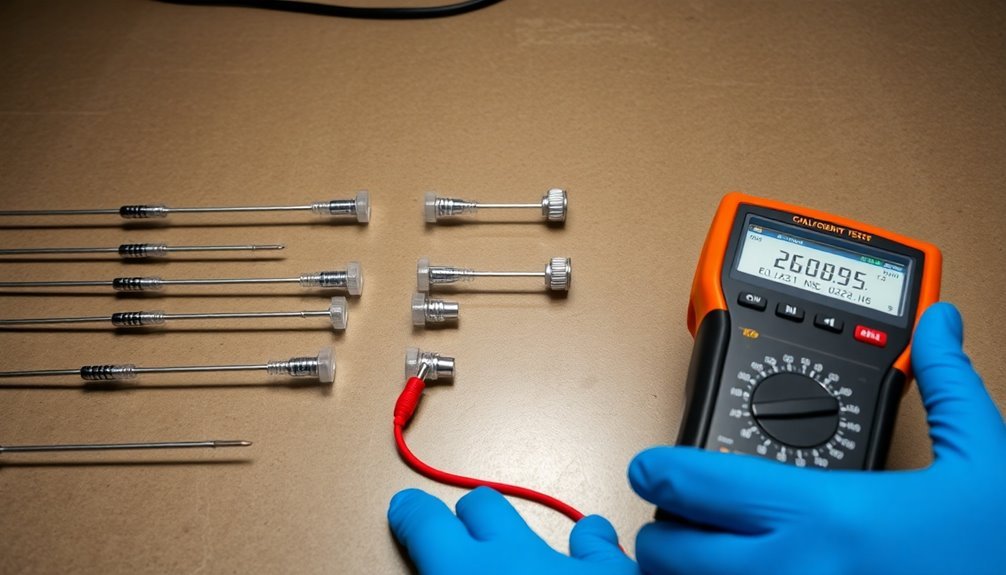
Maintaining accurate equipment calibration records forms the cornerstone of reliable electrical floor testing. You'll need to document every calibration event for your testing equipment, including the date, methodology used, and specific results obtained.
Make sure your records demonstrate clear traceability to national standards and include detailed calibration certificates for each verification process.
Before you begin calibration, conduct pre-calibration checks on your equipment and document the findings. You must evaluate measurement uncertainty and compare your device against certified calibration standards.
Calculate and record all measurement errors, ensuring they fall within acceptable tolerances for electrical floor testing equipment.
Keep detailed maintenance logs showing scheduled upkeep, repairs, and any adjustments made to your testing equipment. After repairs or adjustments, you'll need to recalibrate the equipment and document the results.
Set up a system to track calibration intervals, adjusting them based on your equipment's performance history.
Store all calibration records in an organized, easily accessible manner that facilitates quick retrieval during audits. Your documentation must comply with industry regulations and maintain a clear chain of traceability to certified standards.
Resistance Range Standards
Every ESD floor installation must meet specific resistance range standards to confirm both safety and effectiveness. You'll need to ascertain your floors maintain resistance between 1 million and 100 million ohms, as specified by industry standards. This range guarantees proper static dissipation while preventing dangerous conductivity levels.
When testing your ESD floors, you'll want to follow these critical parameters:
- Verify charge dissipation capability – floors must reduce a 5000V charge to under 50 volts within 2 seconds.
- Test resistance using ANSI/ESD STM 7.1 or ASTM F150 standards with appropriate measurement tools.
- Place two 5-lb probes 36 inches apart and apply 10 volts for accurate readings.
- Connect one probe to electrical ground using a copper strip for secondary verification.
Different industries have specific requirements you'll need to evaluate. Electronics manufacturing follows ANSI/ESD S20.20 with resistance under 1.0 x 10E9 ohms, while telecommunications adheres to Motorola R56 standards between 10^6 and 10^10 ohms.
Analyzing Test Results
Once you've gathered your resistance test data, understanding how to interpret the results becomes critical for ensuring proper ESD protection. The ideal resistance range falls between 1 x 10E5 and 1 x 10E8 ohms, with readings below 1.0 x 10E5 posing potential electrical hazards and those above 1.0 x 10E8 indicating insufficient conductivity.
You'll need to account for several variables that can affect your readings. Environmental conditions, particularly relative humidity (RH), can greatly impact your floor's electrical resistance. Additionally, dirt accumulation and the use of certain adhesives or topical treatments can alter conductivity over time.
When analyzing your results, make sure you're examining both point-to-point (RTT) and point-to-ground (RTG) measurements. You'll want to verify that your floor meets ANSI/ESD S20.20 standards, which require resistance below 1.0 x 10E7.
Don't forget to test the entire system, including flooring material, footwear, and adhesives together.
To maintain reliable protection, you'll need to implement regular testing schedules and keep detailed records of your measurements. This helps you track changes in performance and identify potential issues before they compromise your ESD protection system.
Frequently Asked Questions
How Often Should Electrical Floor Testing Be Performed After Initial Installation?
You'll need to test every 3 months for construction sites, 6 months for factories, 5 years for commercial properties, and 3 years for industrial settings. Adjust frequency based on environmental conditions and usage intensity.
Can Electrical Floor Testing Be Conducted During Active Facility Operations?
Yes, you can conduct testing during active operations, but you'll need to carefully plan around patient care schedules, coordinate with staff, and use non-disruptive testing methods to minimize impact on facility activities.
What Causes Sudden Changes in Floor Resistance Measurements Over Time?
You'll notice sudden changes in floor resistance due to material degradation, moisture exposure, chemical spills, surface treatments, improper maintenance, and environmental factors like temperature. Regular testing helps you identify these unexpected variations.
Do Different Shoe Materials Affect the Accuracy of Floor Resistance Readings?
Yes, your shoe materials considerably impact floor resistance readings. You'll get different measurements depending on your footwear's conductivity, as the contact between shoes and floor directly affects the overall resistance level measurement.
How Do Repairs or Patches to Conductive Flooring Affect Overall Resistance Values?
You'll find that repairs can create inconsistent resistance values if patching materials don't match original conductivity. To maintain uniform readings, guarantee you're using compatible materials and proper application techniques during floor repairs.
In Summary
You've learned the essential steps for conducting accurate electrical floor resistance testing, from proper surface preparation to results analysis. By following standardized testing procedures and safety protocols, you'll guarantee reliable measurements that meet industry standards. Remember to thoroughly document your findings and maintain consistent environmental conditions throughout the process. When in doubt, always consult applicable standards and manufacturer specifications for your specific flooring type.


Leave a Reply